Sony Alpha a7S is one of the most popular digital cameras with a full-frame feature and 12.2 megapixels. It's integrated with a BIONZ X image processor and CMOS sensor, which promises exceptional still image and video quality. In addition, the camera offers an expansive range and extended sensitivity. There is the on-chip gapless lens, which improves image quality and light-gathering efficiency.
In simpler words, it offers an incredible combination of resolution, sensitivity, speed, and dynamic range to optimize multimedia. Many people store the images and videos on the camera, which is why we are talking about UFUSoft Sony a7S video photo recovery and a much-better recovery software alternative!
Part 1: UFUSoft Data Recovery Review
UFUSoft Data Recovery software is a secure and effective option that helps retrieve lost photos, videos, emails, documents, and music files from external hard drives, digital cameras, USB drives, mobile phones, and media players. It supports over 550 file formats.
Features:
- The best thing about this software is that you pause and resume the data recovery process according to your schedule.
- UFUSoft allows the users to save and improve the scanning results, so you don't have to scan the digital camera multiple times.
- It's a secure platform.
Part 2: How to Recover Sony a7S Videos/Photos with UFUSoft Data Recovery
UFUSoft Sony a7S video photo recovery is a reliable choice for people who have lost videos and photos on the Sony digital camera. To recover the videos and photos, you can follow the below-mentioned steps;
Step 1: Download & Run
To start the process, download UFUSoft Data Recovery software on the computer and connect the camera to the computer with the help of a cable. When the camera appears in "My Computer," run the software and tap on the start button.
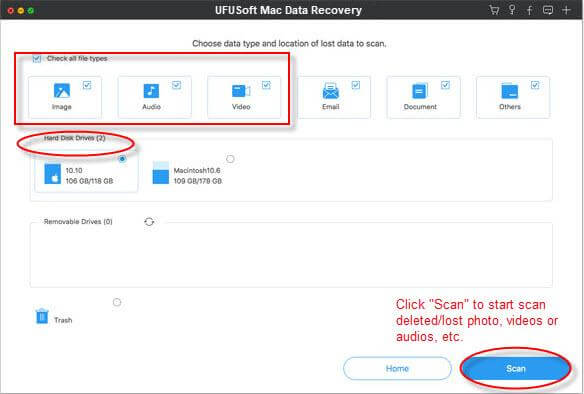
Step 2: Select Sony Camera
The second step is to choose the Sony camera in the software and tap the scan button to initiate the scanning process.
Step 3: Recover
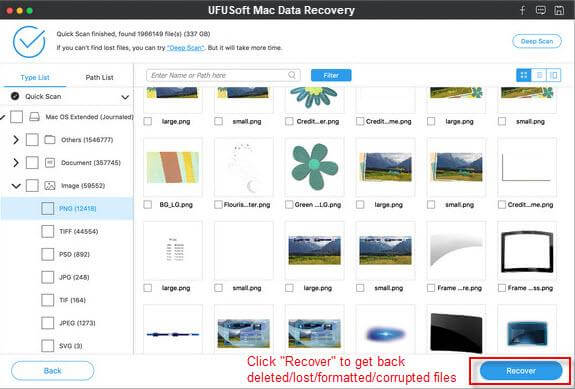
When all the recoverable files appear on the screen, you can select the desired files and press the recover button to retrieve them.
Part 3: Better Alternative for UFUSoft - iMyFone D-Back
3.1. Recover Sony a7S Files with iMyFone D-Back
UFUSoft is not a very reliable option and can be an issue for beginners, given the challenging interface. For this reason, we recommend that you opt for the iMyFone D-Back: it's a promising choice for Windows, Mac, and Linux users. It's paid software but is available for free as well. Some of its features include;
- Supports more than 1000 formats.
- Retrieves data from USB drives, external hard drives, digital cameras, and more.
- File filter for easier file identification.
- Previews the filesbefore final recovery.
- Intuitive and beginner-friendly.
- Strong encryption standards.
Now that you know the features and the user-friendly interface iMyFone D-Back has, let's see which steps you've to follow to recover the files from the Sony camera;
Step 1: Download
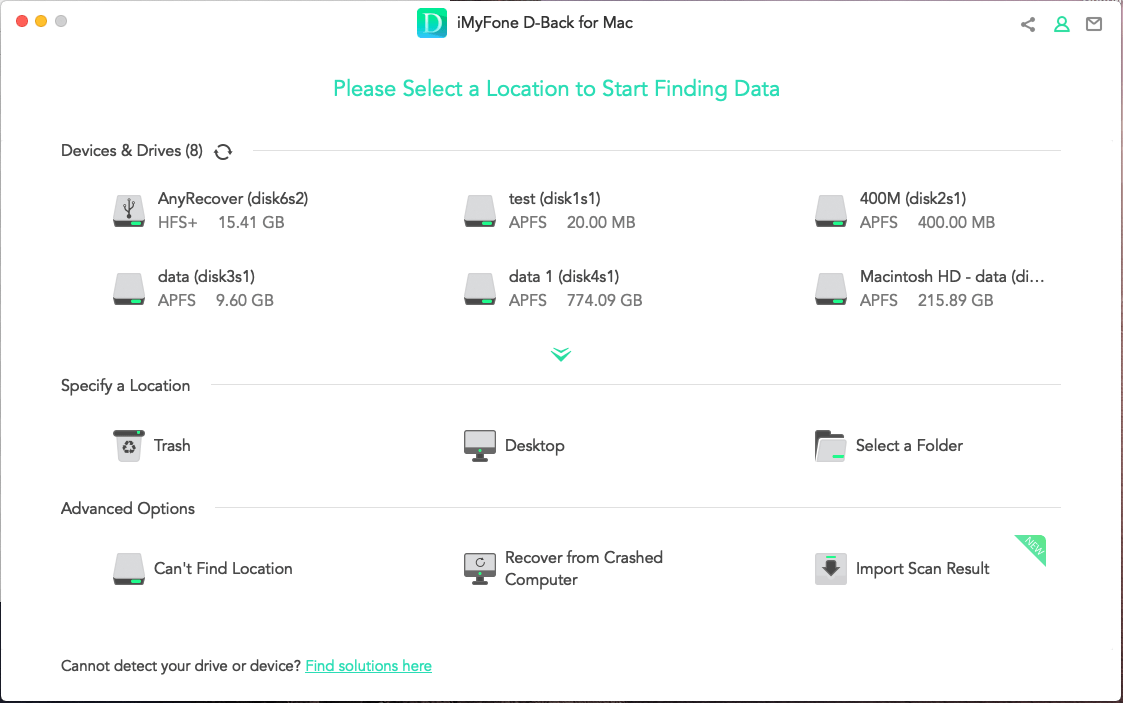
First, you have to download, install and open this profession tool. Now, connect the Sony camera to the computer with a cable and open the software. When it opens, you've to select Sony cameras as the recovery location.
Step 2: Scanning
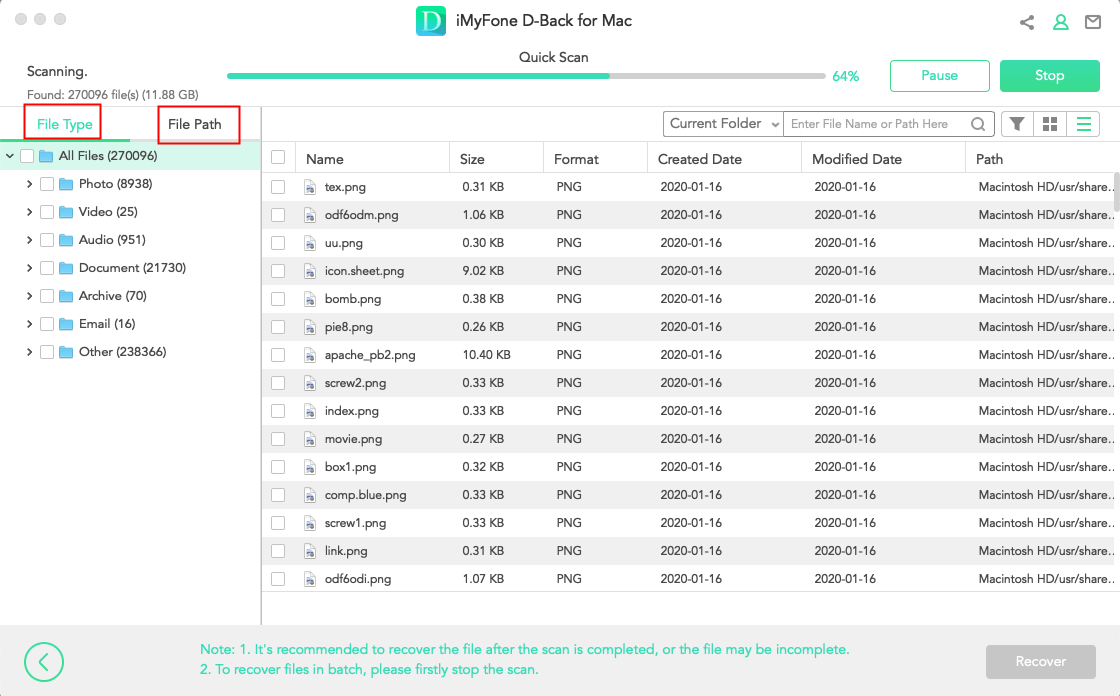
When the location is selected, the software will begin its in-depth scanning process, and within a few seconds, the recoverable files will be shown on the screen.
Step 3: Recover
Then, select the desired files from the available list of files and press the recover button from the bottom of the screen!
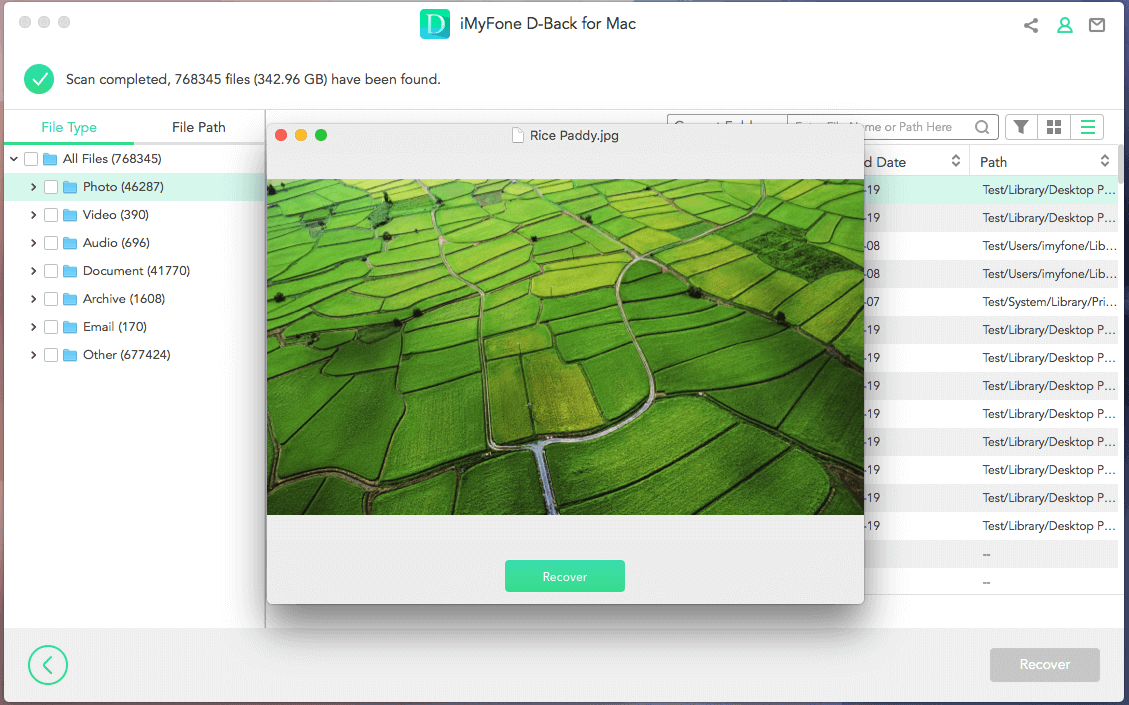
3.2. Comparison Between iMyFone D-Back Hard Drive Recovery & UFUSoft Data Recovery
Both these data recovery software solutions are amazing. Still, there are significant differences that can change your decision. So, let's check out the brief comparison table to see which is better!
| iMyFone D-Back | UFUSoft Data Recovery | |
|---|---|---|
| CPU/Processor | 1GHz for Windows and Mac | 1GHz |
| RAM | 256MB for Windows and 512MB for Mac | 1028MB |
| Supported formats | More than 1000 | Over 550 |
| Hard disk space | 200MB | 50MB |
| Operating systems supported | Windows, Mac, and Linux | Mac and Windows |
Part4. FAQs
1. How to import video from Sony a7?
If you want to know to import videos from the Sony a7 to the computer, we are sharing the steps that you've to follow;
Step 1:First of all, you've to turn on the computer and connect the USB cable to the USB input jack of the computer and the camera. Then, turn on the camera.
Step 2:The next step is to select "import pictures and videos using Windows" from the notification box. When the new window appears, open the import settings and follow the on-screen prompts to import the picture and videos.
2. How to recover permanently deleted files from Sony a7?
To recover the permanently deleted files from Sony a7 digital camera, we recommend using iMyFone D-Back as it's free and works on Windows, Mac, and Linux. Also, it's a beginner-friendly option!
Conclusion
People capture memories in the form of pictures and videos. There is nothing worse than losing all the important memories. For this reason, we shared two recovery software solutions, but iMyFone D-Back takes the lead because it supports more file formats and has easier processing. So, which of these software solutions will you choose and use?


 March 29, 2023