How to Easily Recover Voice Memos on Mac?
Category: PC Data Recovery

1 min read
Losing important voice memos on your Mac can be frustrating, but the good news is that there are various ways to recover them. Whether you’ve accidentally deleted them or they’ve gone missing due to a system glitch, you can recover voice memos on Mac Easily.
In this guide, we’ll explore both methods: recovering voice memos without a backup and using a backup, and we’ll also provide some additional tips and frequently asked questions.

In this article:
Part 1: The Best Way to Recover Voice Memos on Mac (Without Backup)
If you don't have a backup for your voice memos, don't worry. There’s still hope to recover them using third-party software like iMyFone D-Back for Mac.
This professional tool is specifically designed to help Mac users recover lost data, including voice memos from their device, without the need for a previous backup. D-Back for Mac is committed to providing the best Mac data recovery service.
Why D-Back for Mac Stands Out in Mac Data Recovery?

Key Features:
- Offers advanced technology for secure voice memo recovery on Mac;
- Supports to recover a wide variety of file types, including voice memos, images and more;
- Features user-friendly interface for effortless recovery;
- Offers a free trial before you purchase the full version;
How Does D-Back Help to Recover Voice Memos on Mac?
D-Back provides an easy way to recover voice memos on your Mac. It will scan your Mac for deleted or lost voice memos, even if you are not backed up.
- Step 1: Click “Free Download” button to download and install D-Back on your Mac for a free trial.
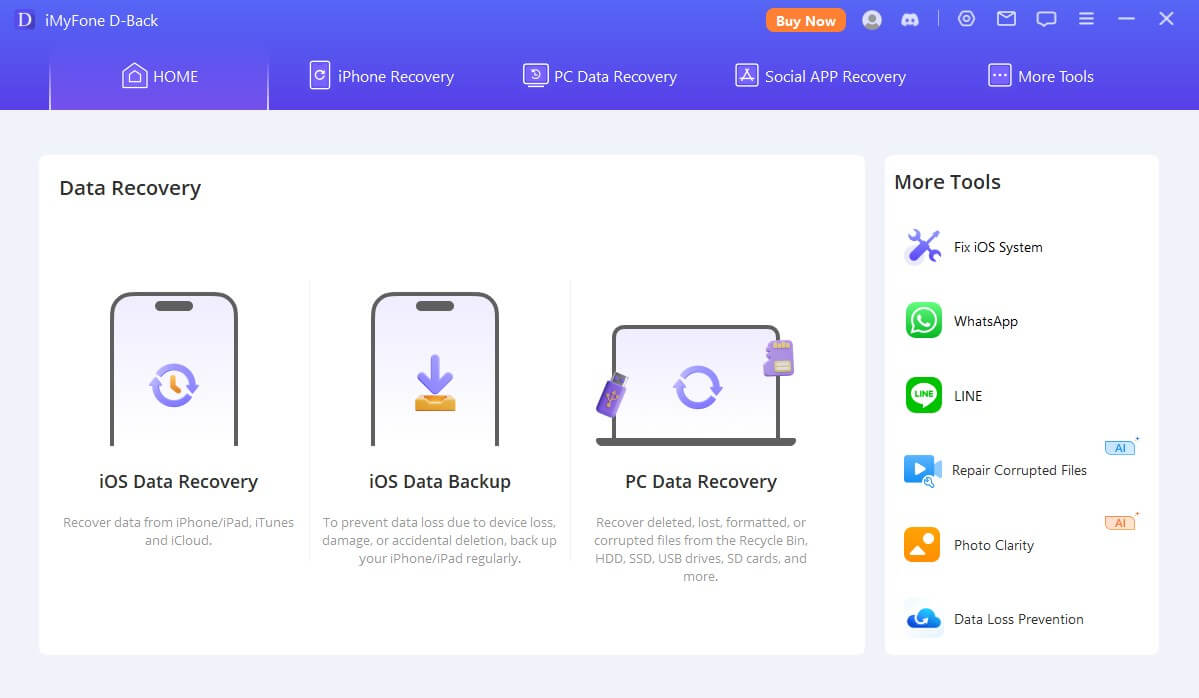
- Step 2: Launch D-Back, connect you phone to your computer, and select “PC Data Recovery” on the main page.
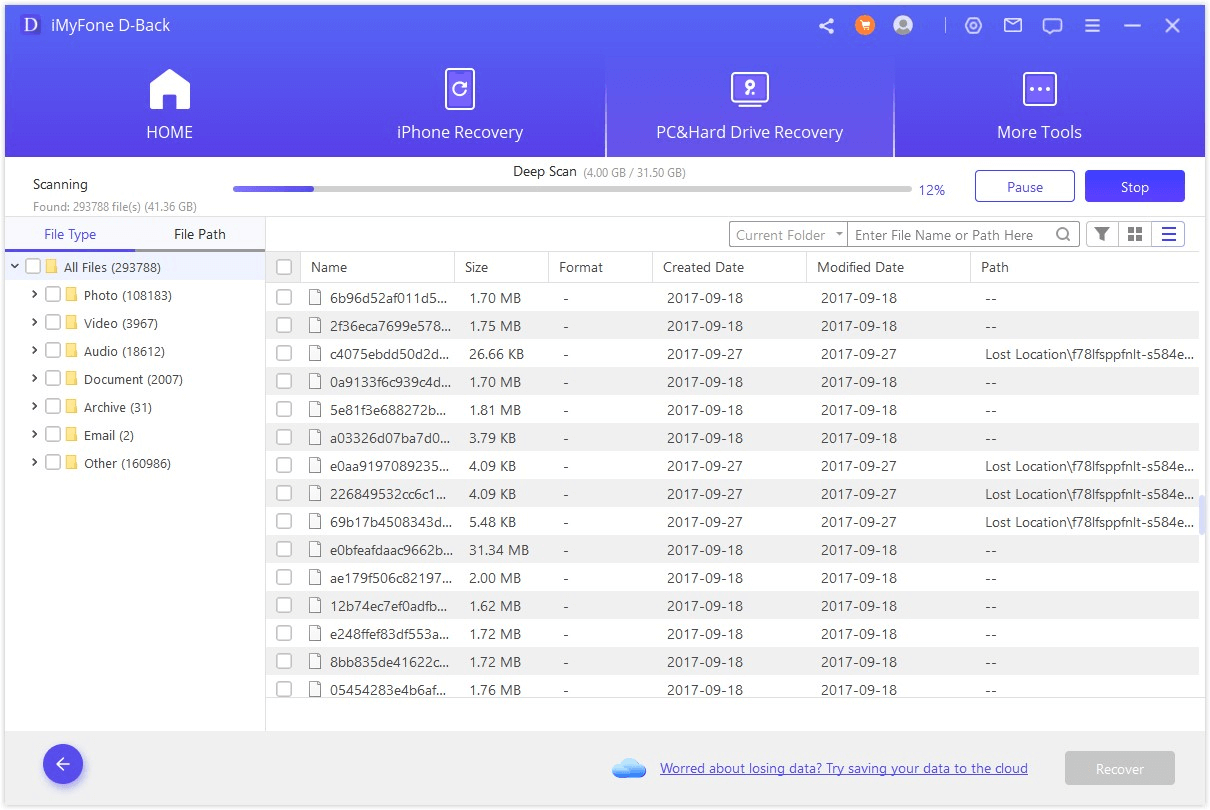
- Step 3: Select your device and wait for D-Back to scan the data.
- Step 4: Choose voice memos you want to recover and then click “Recover”. Once the recovery is complete, you can save them on your Mac.


The Best Part:
D-Back for Mac offers a free trial version that lets you scan and preview the recoverable voice memos. If you’re satisfied with the results, you can then purchase the full version to recover them.
By using D-Back, you’re leveraging the most advanced technology to recover voice memos on Mac quickly and effectively. With its user-friendly interface, it’s a solid choice for anyone looking to retrieve lost recordings without having a backup in place.
Part 2: Ways to Show Voice Memos from a Backup
If you’ve been using Time Machine, iCloud, or any other backup solution, recovering your voice memos becomes much easier. Here's how to do it:
1 Recovering voice memos from Time Machine:
1. Open Time Machine: Connect your Time Machine drive to your Mac, and open Time Machine from the Applications folder.
2. Browse for Voice Memos: Use the timeline or arrow keys to browse through different backup versions until you locate the voice memos you need.
3. Restore: Select the voice memos you want to restore and click the “Restore” button. They’ll be back in their original location.
2 Recovering voice memos from iCloud Backup:
1. Check iCloud Settings: Go to “System Preferences” and click “Apple ID” to ensure that iCloud Drive is enabled for Voice Memos.
2. Restore from iCloud: Open the Voice Memos app, and if your voice memos were synced to iCloud, they should automatically reappear once the app syncs with the cloud.
While backups make it easier to recover lost data, it’s essential to ensure that you have a backup system in place for the future. Time Machine and iCloud are both reliable solutions for safeguarding your voice memos from future data loss.
Part 3: Additional Information on Recovering Deleted Voice Memos on Mac
Sometimes, your voice memos may not be permanently deleted and can still be recovered from the Mac's internal system.
It’s crucial to understand that when you delete a voice memo, it doesn’t immediately disappear from the hard drive. Instead, the system marks the space as available for new data.
Here are some additional tips:
- Check the Recently Deleted Folder: The Voice Memos app has a “Recently Deleted” section where deleted files are stored for 30 days before being permanently erased. If you accidentally deleted a memo, check this folder first.
- Stop Using the Mac Immediately: If you’ve lost voice memos due to accidental deletion, minimize usage of the device to avoid overwriting the deleted data. This gives recovery software like Dback a better chance of finding the lost files.
- Use Disk Utility for Recovery: If you’re unable to find your voice memos in the Recently Deleted folder or through a backup, you can use Mac's built-in Disk Utility tool. It may help repair corrupted files and allow access to previously inaccessible files.
Understanding these nuances can greatly improve your chances of recovering deleted voice memos on Mac, especially when combined with powerful tools like D-Back.
Part 4: FAQs About Voice Memo Recovery
1 What is the best method to recover deleted voice memos?
The best approach depends on whether you have a backup. If no backup is available, using a recovery tool like iMyFone D-Back is highly recommended.
2 How long does it take to recover lost voice memos on Mac?
The recovery time can vary based on factors such as the size of the scan, the number of files, and the type of recovery method used. Generally, using D-Back for scanning and recovery can take anywhere from 30 seconds to an hour.
3 Can I recover voice memos on my Mac from my iPhone or iPad?
Yes, if your voice memos were synced with iCloud, you can recover them across multiple devices. Otherwise, you can use D-Back to restore them.
Conclusion
Recovering voice memos on your Mac doesn’t have to be a daunting task. Whether you’re restoring from a backup or using a tool like D-Back to recover them without a backup, there are options for you.
For a seamless and reliable experience, iMyFone D-Back for Mac is the ultimate solution to recover lost or deleted voice memos on your Mac.
Download it for the free trial today and see how easy it is to get your valuable voice memos back!
Recover deleted or lost voice memos on Mac with One Click.


