It's common for people to use the same file names for two different files, especially when they are working on two similar projects at a time. However, imagine the horror of losing one file (it means losing your data for the whole project).
Honestly, it's frustrating, but you are in luck because there are some recovery methods. So, if you were wondering, "accidentally replaced file; how to recover," we share the in-depth guide with multiple solutions!
Part 1. Can You Recover a File that You Replaced?
In case you are wondering, "can you recover a file that you replaced?" it's an absolute yes. This is because when the file is replaced, it is not deleted from the drive instantly. Instead, the file information that the OS uses to locate the file is removed, and the previous file location becomes available to save a new file.
Part 2. How to Recover Accidentally Replaced File on Windows 10/8/7 Mac
It doesn't matter if you are using a Windows computer or a Mac. There are different possibilities if you are wondering how to recover replaced files Mac or Windows. However, the recovery methods are different for every computer that you use. So, let's get in!
2.1. Recover Accidentally Replaced File on Windows 10/8/7 Mac without Backup
In most cases, the users turn on automatic backup on their devices to ensure the data can be quickly restored, even if the files are deleted from the system.
On the other hand, if you haven't created the backup and wondering how to recover replaced files Windows 10 or other computers, you can depend on the iMyFone D-Back. It's one of the most popular and dependable recovery software that you can try since it has the following features;
- Recovers deleted files from SD cards, hard drives, USB drives, cameras, and SSDs.
- Supports more than 1000 formats of files.
- Previews the recoverable data before conducting the final recovery.
- Selective recover.
- File filter for quick location of the files.
- Encrypted servers.
These are some of the features this recovery software has, and now, let's see which steps you've to follow to recover the files;
Step 1: Installation
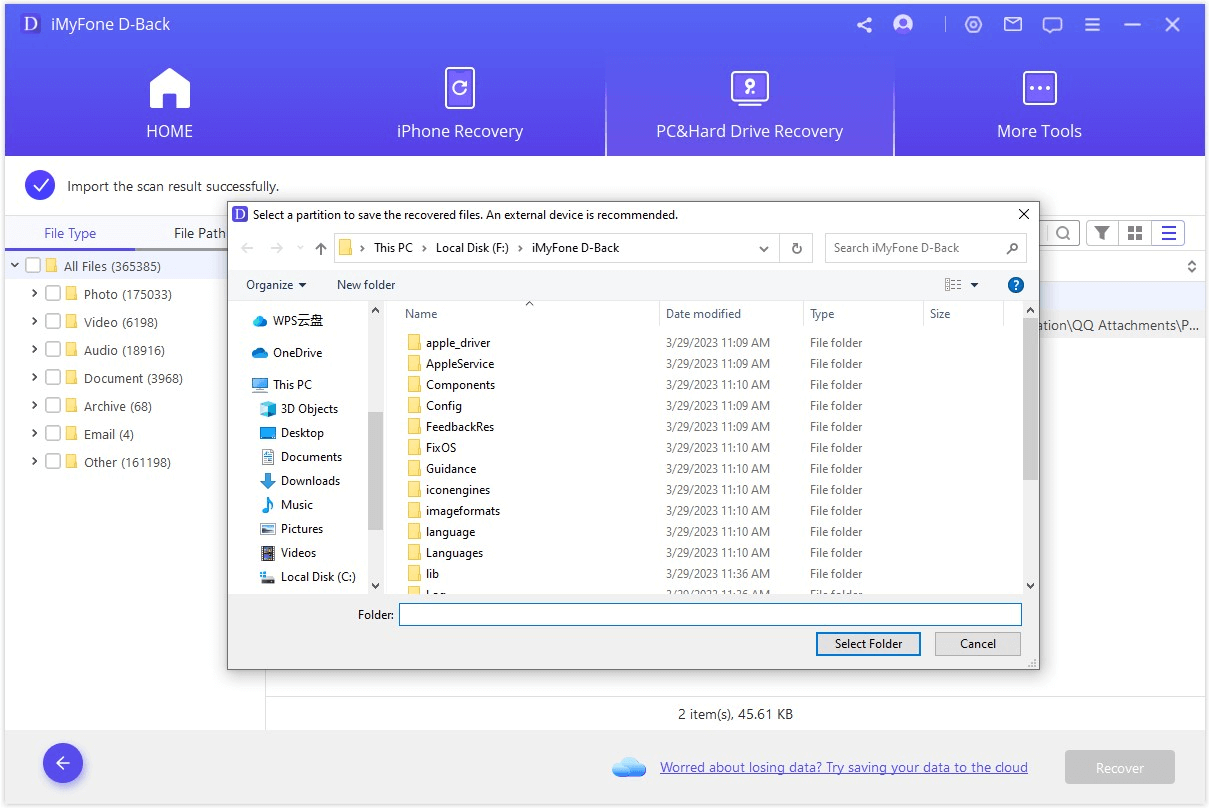
First, you must install iMyFone D-Back on the computer and select the location where you want to recover the lost files.

Step 2: Scanning
The second step is automated as the software will start a quick yet in-depth scanning process to identify the lost files.
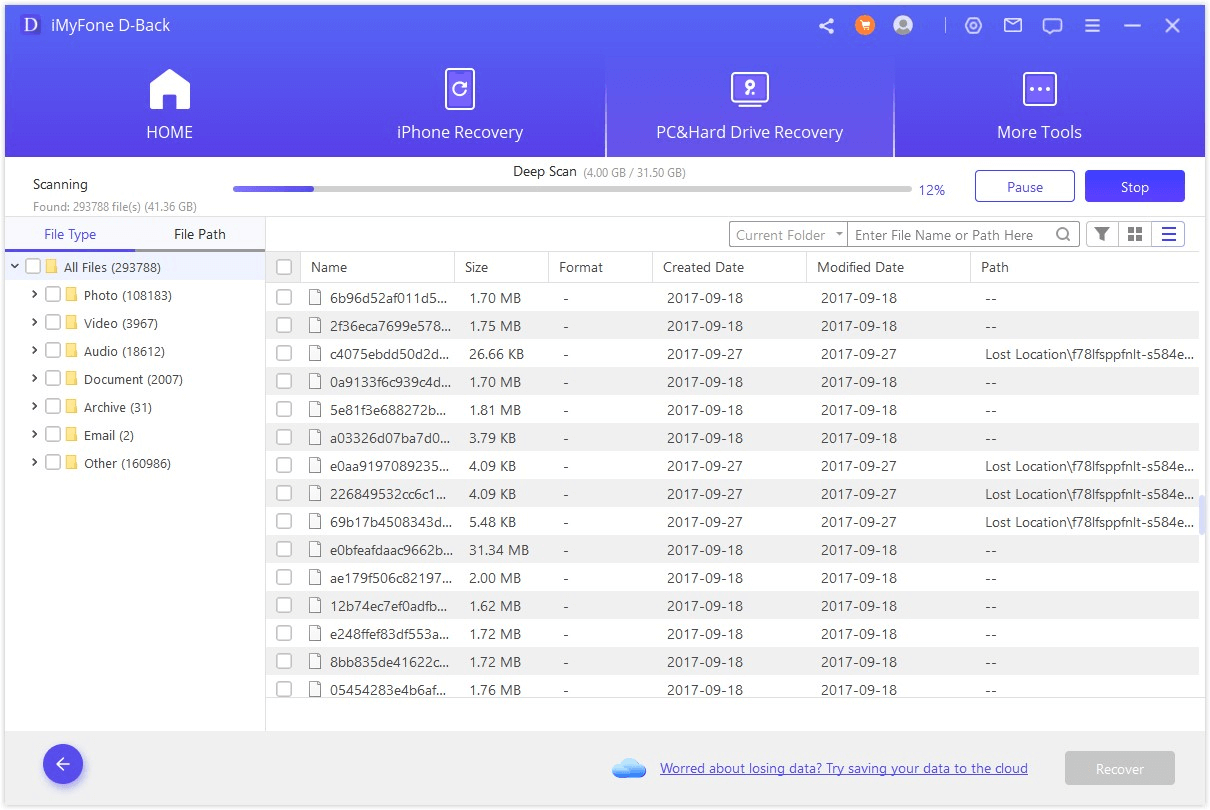
Step 3: Recovering
The last step is to go through the files that are present on the screen, and when you find the desired file, double-click it and press the recover button to make sure the file is saved on the selected location.
So, are you clear on how to recover replaced files Windows 10?
2.2. Recover Accidentally Replaced File on Windows 10/8/7 Mac with Backup
Now that we have mentioned the full guide to using recovery software, we are sharing two more methods that can help you retrieve the files if you had turned on the backup feature. So, if you are wondering, "accidentally replaced file; how to recover" and enabled the backup, we have the methods that will help;
Method One: Using Previous Version
If you have turned on the file history, you create the system that keeps the file intact, making it easier to restore the file to the previous version. This method is perfect for Windows users who are wondering accidentally replaced file how to recover, so let's check out the step-by-step instructions;
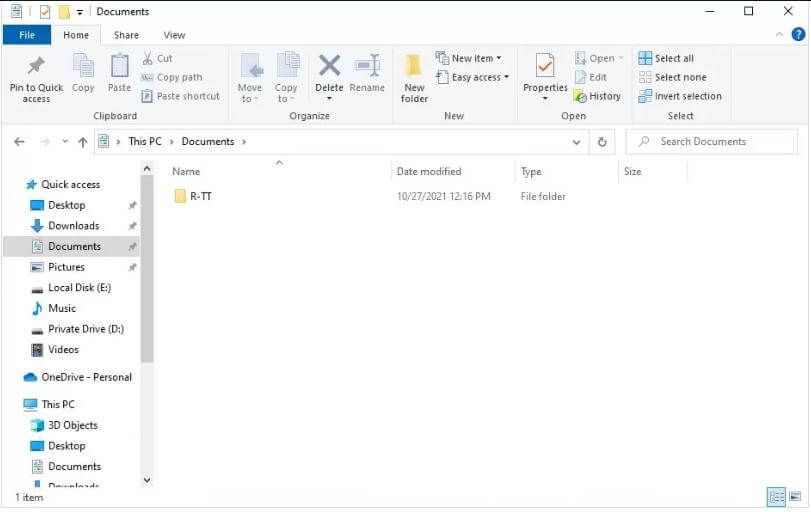
Step 1: Navigating to the Folder
First of all, you've to open Windows Explorer on the computer and go to the folder where the file was saved.
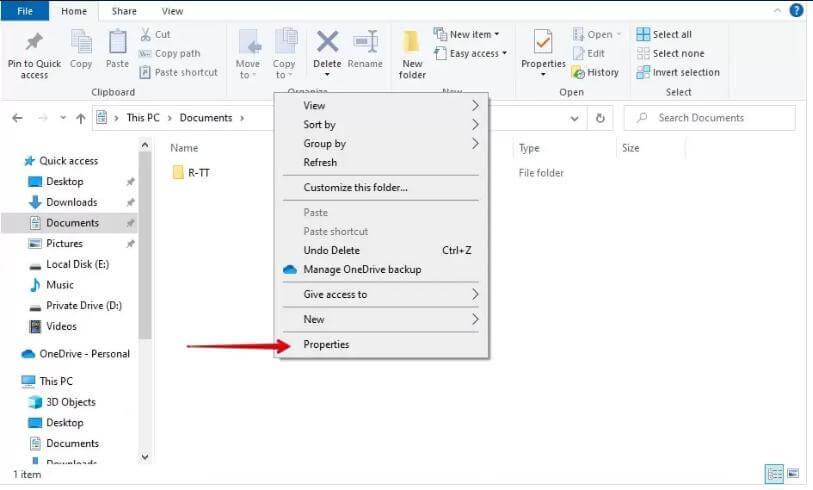
Step 2: Open Properties
You can right-click in this folder anywhere you want, and when the menu appears, tap on the properties to open a new window.
Step 3: Choose Previous Versions
Then, you have to choose the previous version tab and look for the previous version of the replaced file.
When you find the version, just tap on the restore button and the file will be saved.
Method Two: Using Time Machine
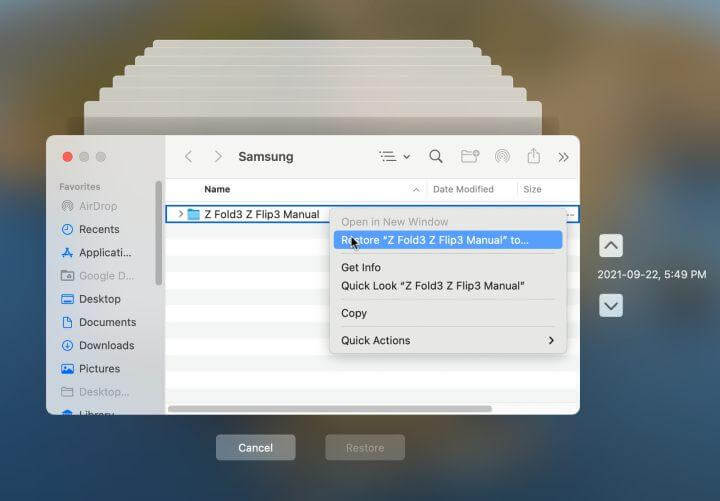
If you are a Mac user, you can use the Time Machine feature to recover the files. To begin with, you have to open Time Machine and open the recent finder window on the center screen. Once you find the center screen, follow the below-mentioned steps;
Step 1: Locating the File
From the recent finder window, locate the file you want to recover and right-click on it to choose the "restore to" option.
Step 2: Saving Location
Then, the file browsing window will show up, asking where the folder or file should be saved. If the file name already exists, you can choose between different options, including keeping the original, replacing it, or keeping both.
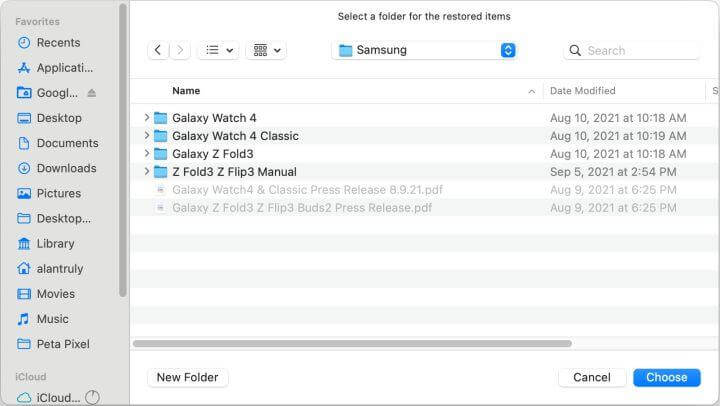
Once the file is restored, it will appear in the destination folder. So, these are the steps you have to follow if you had an "accidentally replaced file; how to recover Mac without Time Machine" issue.
Part 3. FAQs
1. How to recover a replaced PDF file?
You can use the backup folder to retrieve the file or use iMyFone D-Back if you are trying to understand how to recover a replaced PDF file.
2. How to recover replaced video files?
The replaced video files can be retrieved with the help of iMyFone D-Back, as they support more than 1000 file formats, including videos. This would be a perfect option if you were wondering how to recover replaced video files.
3. How to avoid replacing files?
To avoid the replaced file, save the files with different names. However, if you have to keep the same name, add a symbol with one of them to differentiate.
4. Where does the replaced file go?
The replaced files are kept on the operating system as only the file data is removed.
Conclusion
Recovering the replaced files is relatively easy if you have a backup on your device. However, suppose you don't have the backup option. In that case, you can always depend on the iMyFone D-Back to help you recover the files, irrespective of the file format or efficiency!


 March 29, 2023
