[Solved] How to Recover Deleted Videos from Dashcam
Category: PC Data Recovery

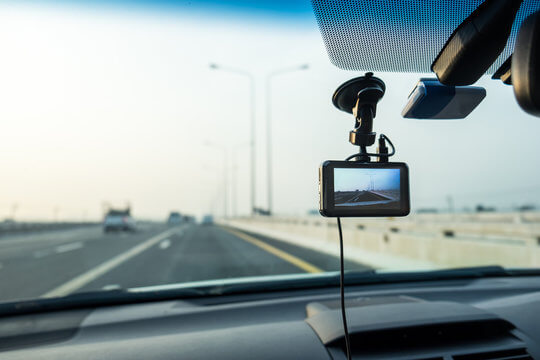
Dashcams, also known as car cameras or DVRs, have become essential car accessories. Their popularity has surged, with some automakers, like Tesla, including features like "Sentry Mode." While dashcams serve as crucial digital witnesses, they can suffer from user errors, malfunctions, and technical glitches leading to lost recordings. Issues like accidental deletion, video overwriting, formatting, or storage device damage can occur. If you face such problems, don’t worry! This guide will introduce you all the ways to recover or view lost or deleted videos from your dashcam, including Tesla and other compatible cars.
In this article:
Part 1. It is Possible to Recover Deleted Videos from a Dash Cam?
Losing dashcam footage can be stressful, but fear not! Recovery is often possible for various storage types:
- Tesla USB Drive: Even overwritten footage can be recovered using data recovery software. These tools work on formatted, corrupted, or even manually deleted drives.
- SD Card Dashcam: Accidental deletion, corrupted files, or formatting issues can be resolved with data recovery software. Common causes include improper ejection or card failure.
- Internal Memory Dashcam: While harder, consider professional data recovery services if software fails.
- Cloud Storage Dashcam: Contact the cloud service provider directly. Many offer file restoration or access to previous data versions.
Remember, losing footage doesn't have to be permanent! This guide offers solutions for most dashcam storage methods.
Watch this Video to Know how to recover deleted video from SD Card
Part 2. The Quickest Way to Recover Deleted Video from Dashboard Camera
When it comes to retrieving deleted dashcam videos, data recovery software stands as the most efficient and reliable solution. Among the leading contenders is iMyFone D-Back, a renowned video recovery expert.
D-Back boasts comprehensive scanning capabilities, encompassing all storage devices commonly used by dashcams. It adeptly recognizes and recovers a vast array of video file formats, including MP4, MOV, and AVI, ensuring no precious footage goes missing. It can retrieve videos from corrupted, inaccessible, formatted, or even virus-infected SD cards, often used in dashcams.
1,000,000+ Downloads
Key Features:
- Recover missing videos in various formats, including MOV, M4V, 3GP, MPG, MKV, and AVI.
- Recover data from all your storage devices, including SD cards (common for dashcams), external hard drives, USB drives, laptops, and even SSDs.
- No technical expertise needed! The software is designed to be user-friendly, so anyone can recover their lost files.
- It can even repair your blurry dashcam videos.
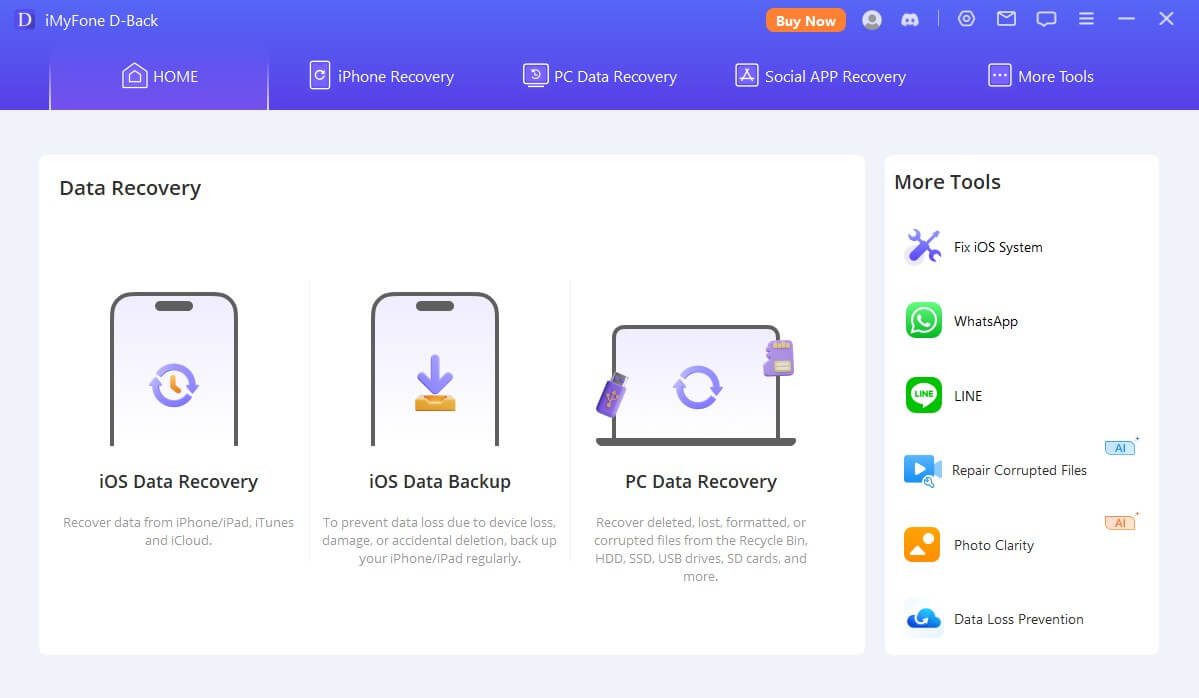
1. Launch D-Back and Choose "Data Recovery":
Open the D-Back application. On the main screen, select the "Data Recovery" module to begin the recovery process.
2. Select Your SD Card:
Use a card reader to connect the SD card from your dashcam to your computer. D-Back should automatically detect it. Locate and choose the SD card connected from your computer in the "External Devices" section.

3. Start the Scan:
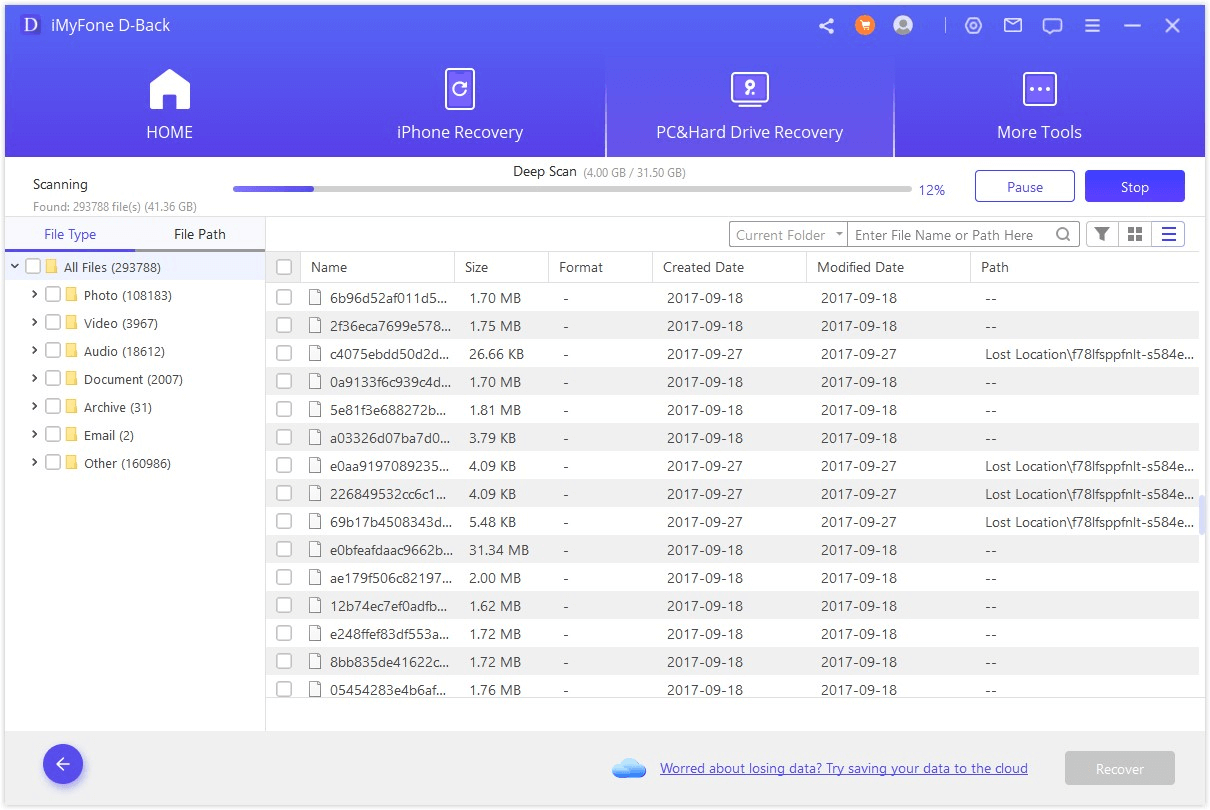
Click the "Start" button to initiate the scan. The scan time will vary depending on the amount of data stored on your SD card. Be patient, as a thorough scan ensures better recovery chances.
4. Find and Recover Your Videos:
Once the scan completes, D-Back will display a list of recoverable files. You can filter the list by video formats to easily find your lost dashcam footage. Select the specific videos you want to recover and click the "Recover" button.

5. Repair Corrupted Files (Optional):
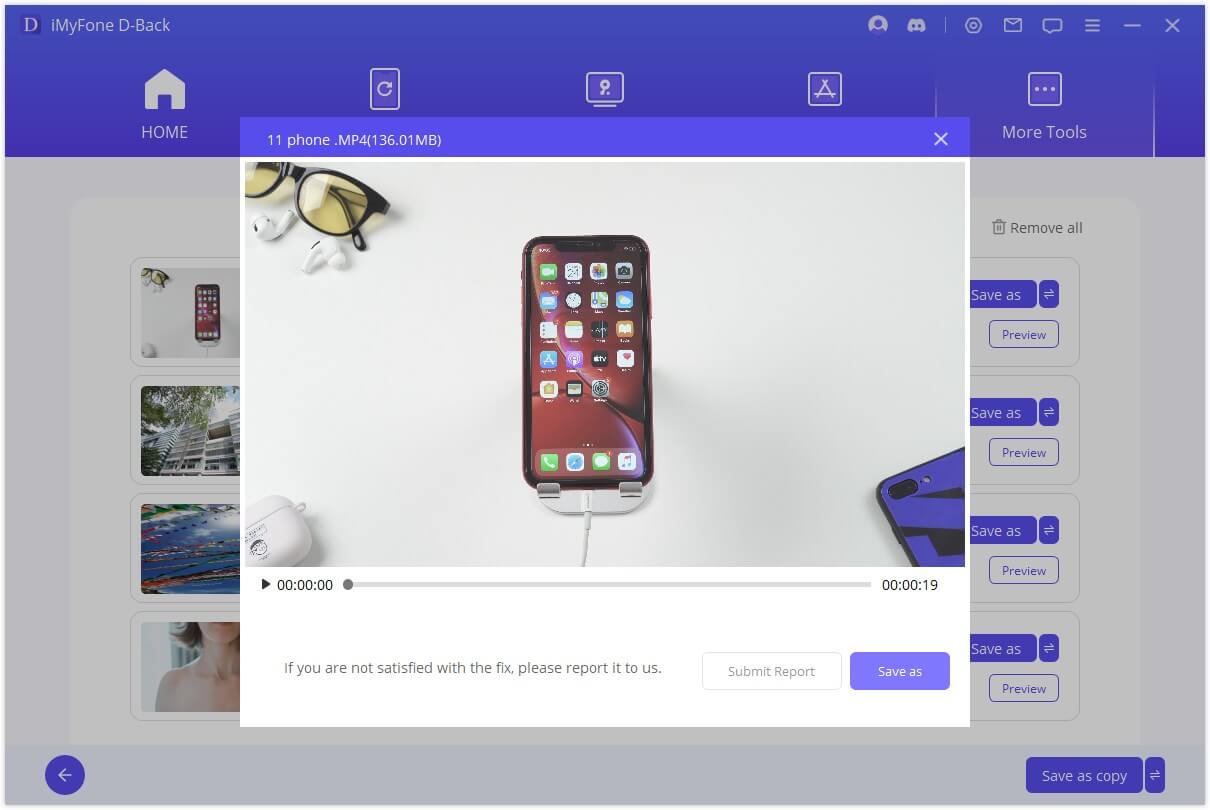
If some recovered videos are damaged and won't play, D-Back offers an optional AI repair function. Access the "Video Repair" module from the main menu and add your corrupted dashcam videos. D-Back will attempt to repair them within minutes, giving your valuable footage a second chance.
Part 3. Other Methods to Recover Dashboard Camera Video
1. Recover Dashcam Footage with CHKDSK (Windows Only)
CHKDSK (Check Disk) is a built-in Windows tool that scans your storage device for errors and attempts to fix them, making your data accessible again. This can be helpful when your dashcam footage becomes corrupt or inaccessible due to file system issues.
CHKDSK can be a powerful tool, but it's important to use it cautiously. While it can fix errors, it may not recover permanently deleted files.
- Back up any critical data from the storage device you'll be scanning if possible.
- Identify the drive letter assigned to your dashcam's storage device (SD card reader, USB drive). You can find this by opening File Explorer and navigating to "This PC."
Here's how to use CHKDSK:
Step 1: Connect your dashcam's storage device to your computer.
Step 2: Open Command Prompt: Press the Windows key + R key simultaneously. Type "cmd" and press Enter.
Step 3: In the Command Prompt window, type the following command and press Enter: chkdsk X: /F /X /R
Replace "X" with the actual drive letter of your storage device (e.g., chkdsk E: /F /X /R).
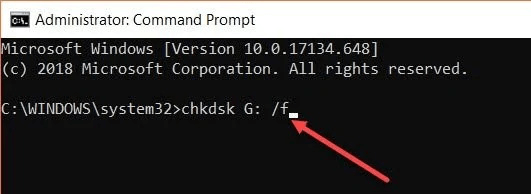
Step 4: Wait for the scan to complete. CHKDSK will scan your storage device, identifying and attempting to fix errors. This process may take some time depending on the size of the drive. Once completed, CHKDSK will display a report summarizing the errors found and fixed.
2. Reassign a Drive Letter for Your Dashcam Footage
If your dashcam footage seems inaccessible due to a drive letter conflict, reassigning a new letter in Windows might help. Here's how:
Step 1: Connect Your Dashcam's Storage Device:
Connect the SD card reader or USB drive containing your footage to your computer.
Step 2: Open Disk Management:
- Press the Windows key + R key simultaneously.
- Type "diskmgmt.msc" and press Enter.
Step 3: Locate Your Dashcam Storage:
In the Disk Management window, locate the drive representing your dashcam's storage device (SD card or USB drive). You can usually identify it by its size or any assigned label.
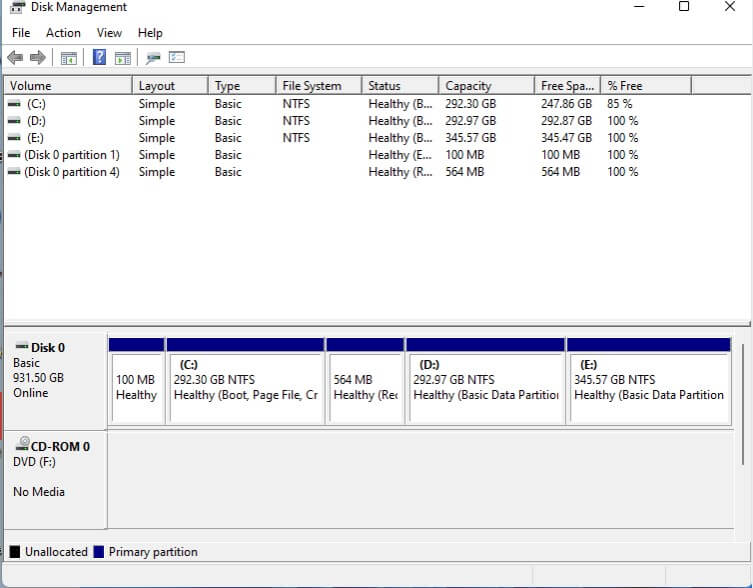
Step 4: Reassign the Drive Letter:
Right-click on the identified drive and select "Change Drive Letter and Paths..."
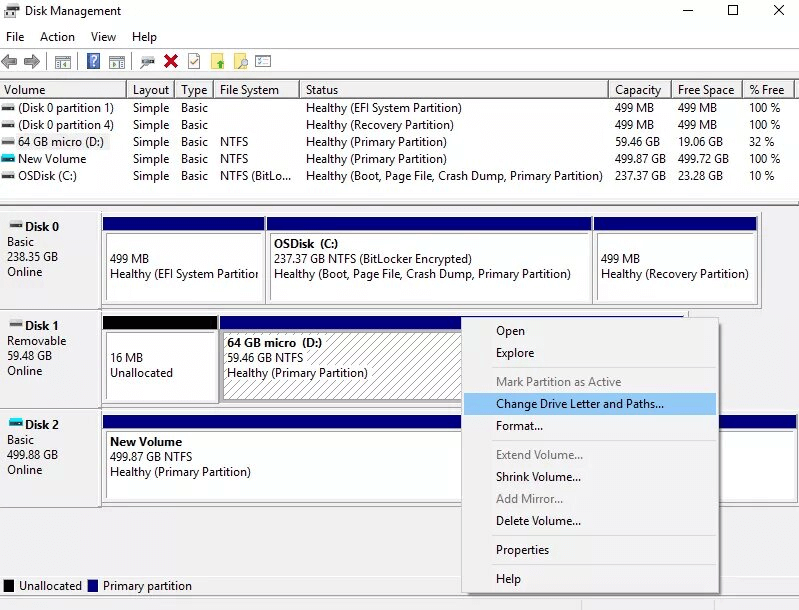
Step 5: Choose a New Drive Letter:
- Click the "Change..." button in the new window.
- Select a new available drive letter from the list.
Step 6: Apply the Changes:
Click "OK" on both windows to confirm the change.
Restart your computer for the new drive letter assignment to take effect.
Part 4. Safeguarding Dashcam Footage After a Car Accident
A car accident is stressful, but dashcam footage can be invaluable evidence. Here's how to ensure your recording survives:
- Manual Save: Most dashcams allow for manual footage saving. This prevents it from being overwritten by new recordings. Consult your dashcam manual or manufacturer's website for specific instructions. (For Tesla users, visit this support page: [link Tesla dashcam save footage])
- Safely Eject: If possible, turn off your dashcam before physically removing the storage device (SD card, USB stick, etc.). This ensures proper data transfer completion.
- Secure Location: Store the storage device in a cool, dry, and stable environment. Avoid extreme temperatures, humidity, or magnetic fields, as these can damage the data.
- Leverage Cloud Backup (if available): Advanced dashcams from Tesla or brands like BlackVue offer cloud backup via Wi-Fi or mobile data. If your device has this feature, prioritize completing the upload. Cloud storage provides an extra layer of security for your footage.
By following these steps, you can ensure your dashcam footage remains secure and readily available if needed.
Part 5. FAQs
1 How can I get files off a dashcam?
A1: To get files off a dashcam, remove the microSD card from the dashcam and insert it into a card reader connected to your computer. Alternatively, you can connect the dashcam directly to your computer via USB. Once connected, access the files through your computer’s file explorer.
2 Can I request a copy of dashcam footage?
A2: Yes, you can request a copy of dashcam footage, but it depends on the owner’s consent. If the dashcam belongs to someone else, you will need to ask the owner to provide the footage. In some cases, such as insurance claims or legal matters, you may need to obtain a subpoena to access the footage.
3 How can I fix a dashcam video that is blurry?
A3: To fix a blurry dashcam video, first ensure that the camera lens is clean. If the lens is clean and the video is still blurry, check the video resolution settings on the dashcam and set it to the highest resolution. Additionally, you can use iMyFone D-Back to fix blurry video.
4 Do dashcams delete old footage?
A4: Yes, most dashcams delete old footage automatically. They typically use a loop recording feature, which overwrites the oldest files when the storage is full. To prevent important footage from being deleted, you can manually save or lock those files.
5 How long do dashcams keep footage?
The length of time a dashcam keeps footage depends on the storage capacity of the microSD card and the video resolution settings. Higher resolution videos take up more space, so they will overwrite older footage more quickly. Generally, a 32GB card can store several hours of footage, while larger capacity cards can store more footage. To extend the storage time, you can use a higher capacity microSD card or lower the video resolution settings.
Conclusion
Losing dashcam footage can feel like losing a crucial witness. But fear not! By following the tips in this guide, you've empowered yourself to recover deleted or lost videos from your Tesla or any other dashcam. Whether you utilize data recovery software or leverage cloud backups, remember – preserving your footage is a valuable step towards protecting yourself on the road.
Best Data Recovery Expert
168,282 people have downloaded it.
- Supports a wide range of data types such as messages, photos, videos
- 100% Work with a variety of data loss scenarios.
- Retrieve lost data from different types of devices
- AI repair broken/corrupted files, photos and videos.


