Recover More Data with Only 4 Steps
-
Step 1. Restart your Mac and boot into macOS Recovery Mode Step
-
Step 2. In the macOS Recovery Mode, enable system extensions and save the new startup settings
-
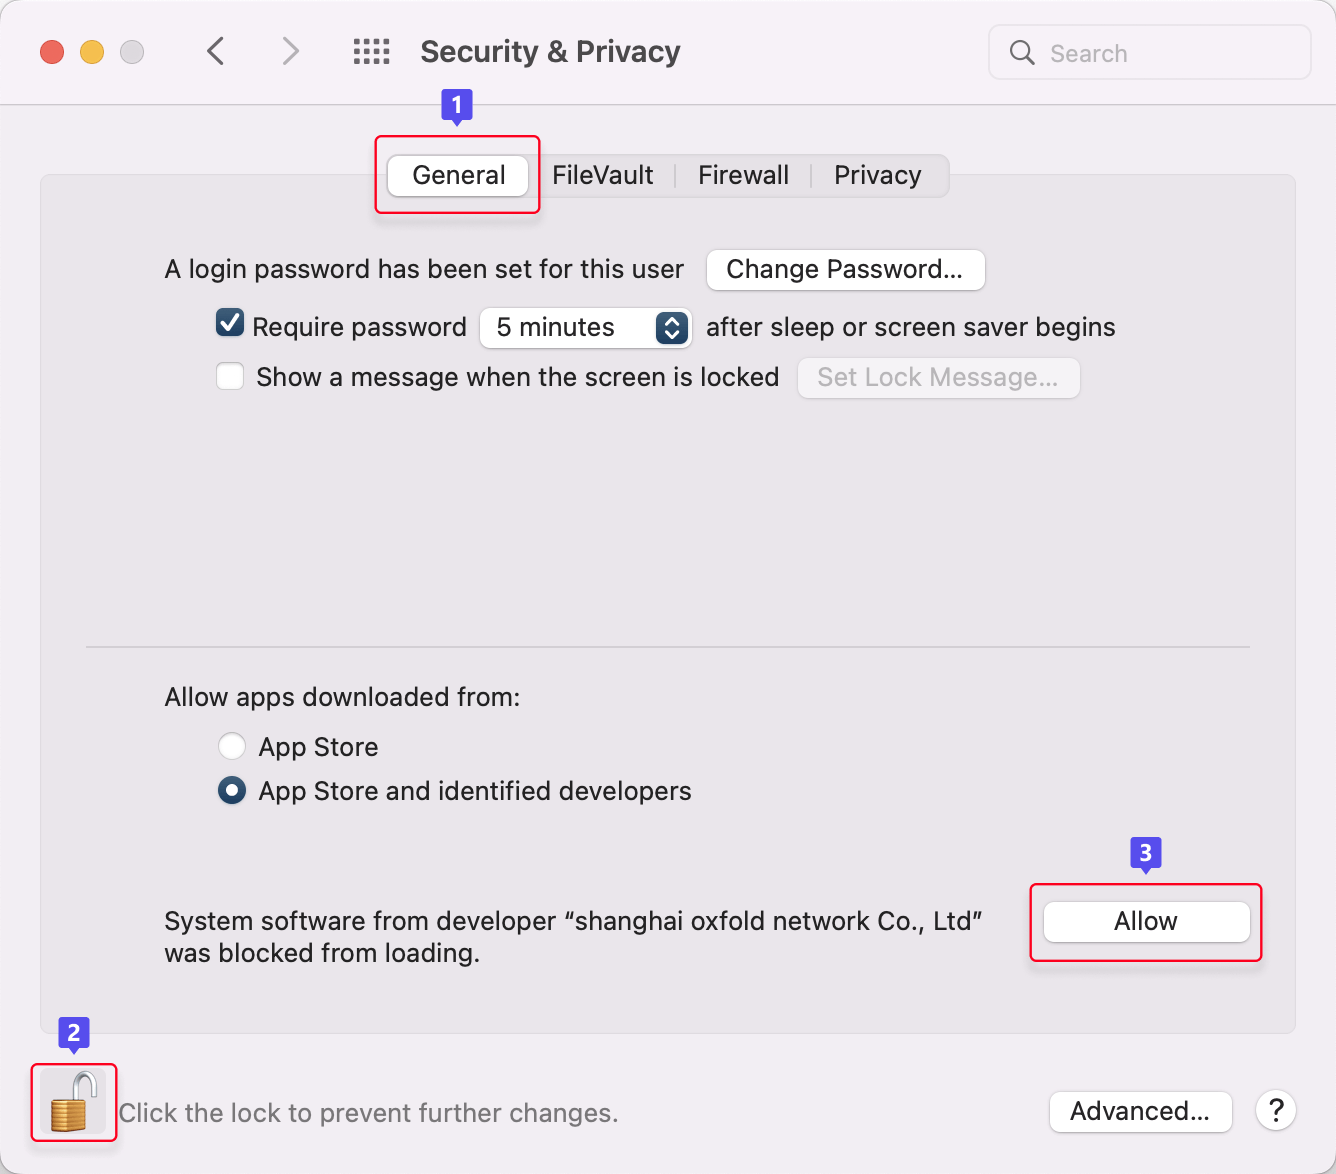
Step 3. Give D-Back permission in System Preferences
-
Step 4. Restart your Mac again, open D-Back and start scanning

*Scan QRcode and open this page on other devices.
Step 1 Restart your Mac and boot into macOS Recovery Mode
1. Save all the work and turn off your Mac.
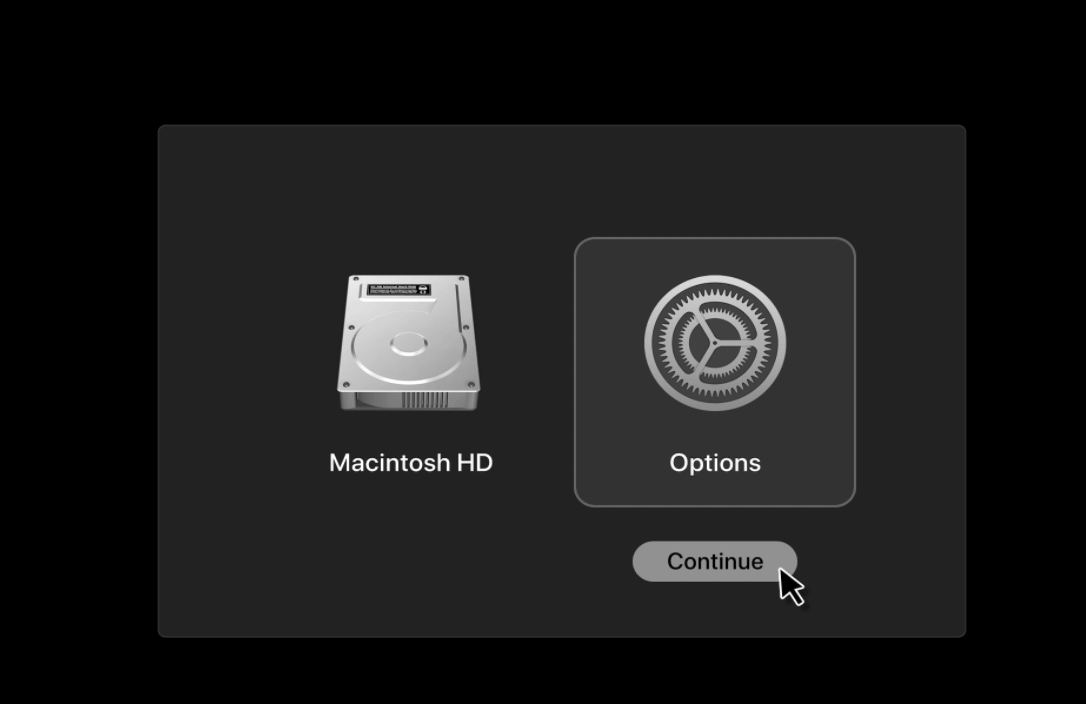
2. Press and hold the Touch ID or Power button until you see the Option icon appears on the screen.
3. Select Options and click Continue.
Step 2 In macOS Recovery Mode, set Startup Security Utilities
1. Mac is now in macOS Recovery Mode.
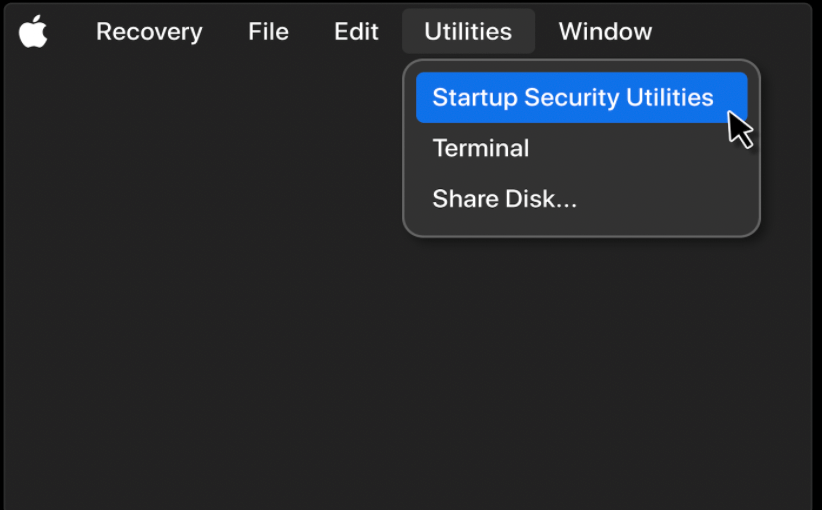
2. Click on Utilities from the menu bar. Next, select Startup Security Utilities.
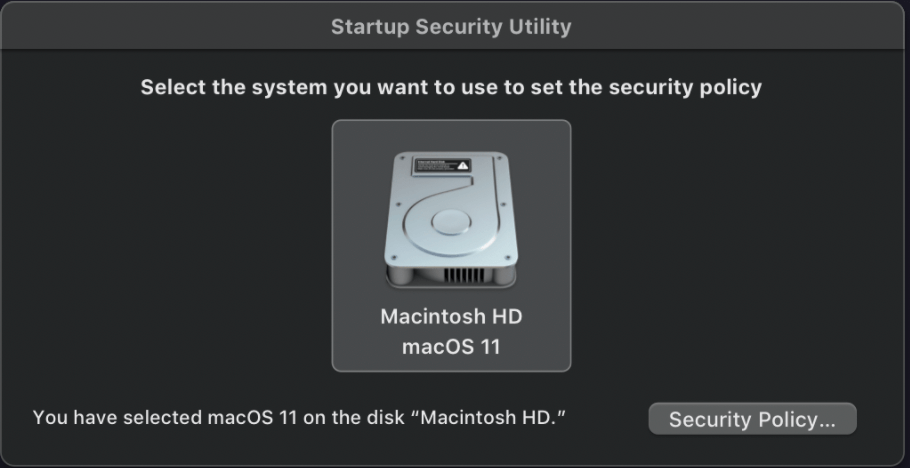
3. Select the drive where D-Back is installed, generally it should be the Macintosh HD.
4. Click the Security Policy button.
5. Select Reduced Security in the pop-up window.
6. Must tick Allow user management of kernel extensions from identified developers. Then click OK.
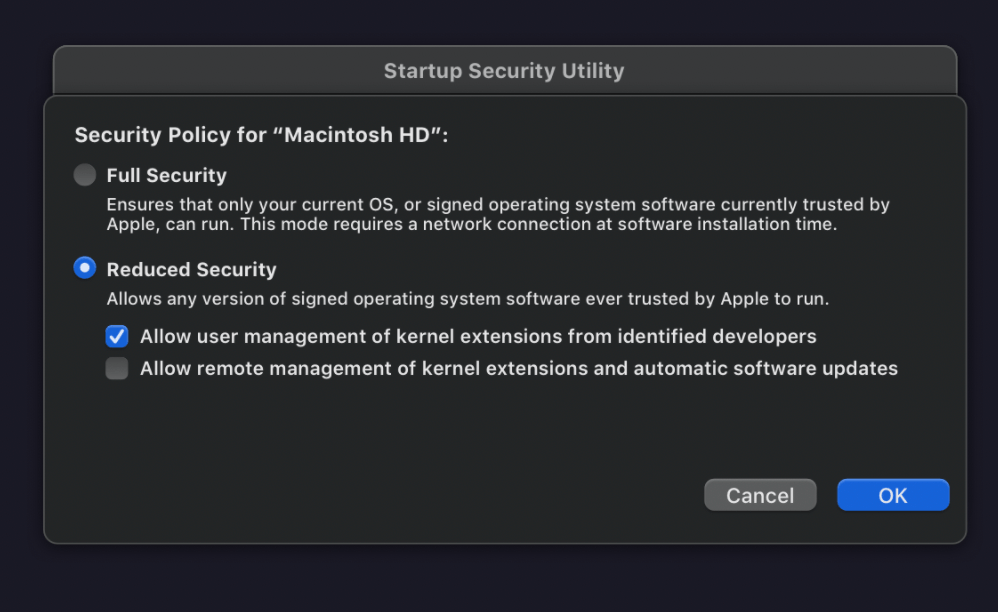
7. Restart your computer, then open D-Back again.
Step 3 Give D-Back permission to run
This step varies by macOS versions. If you are using macOS 13, the details are as follows.
1. Go to System Preferences > Privacy & Security.
2. Click the Allow button to give D-Back permission to run (the device may reboot).
3. Enter your administrator password to allow this.
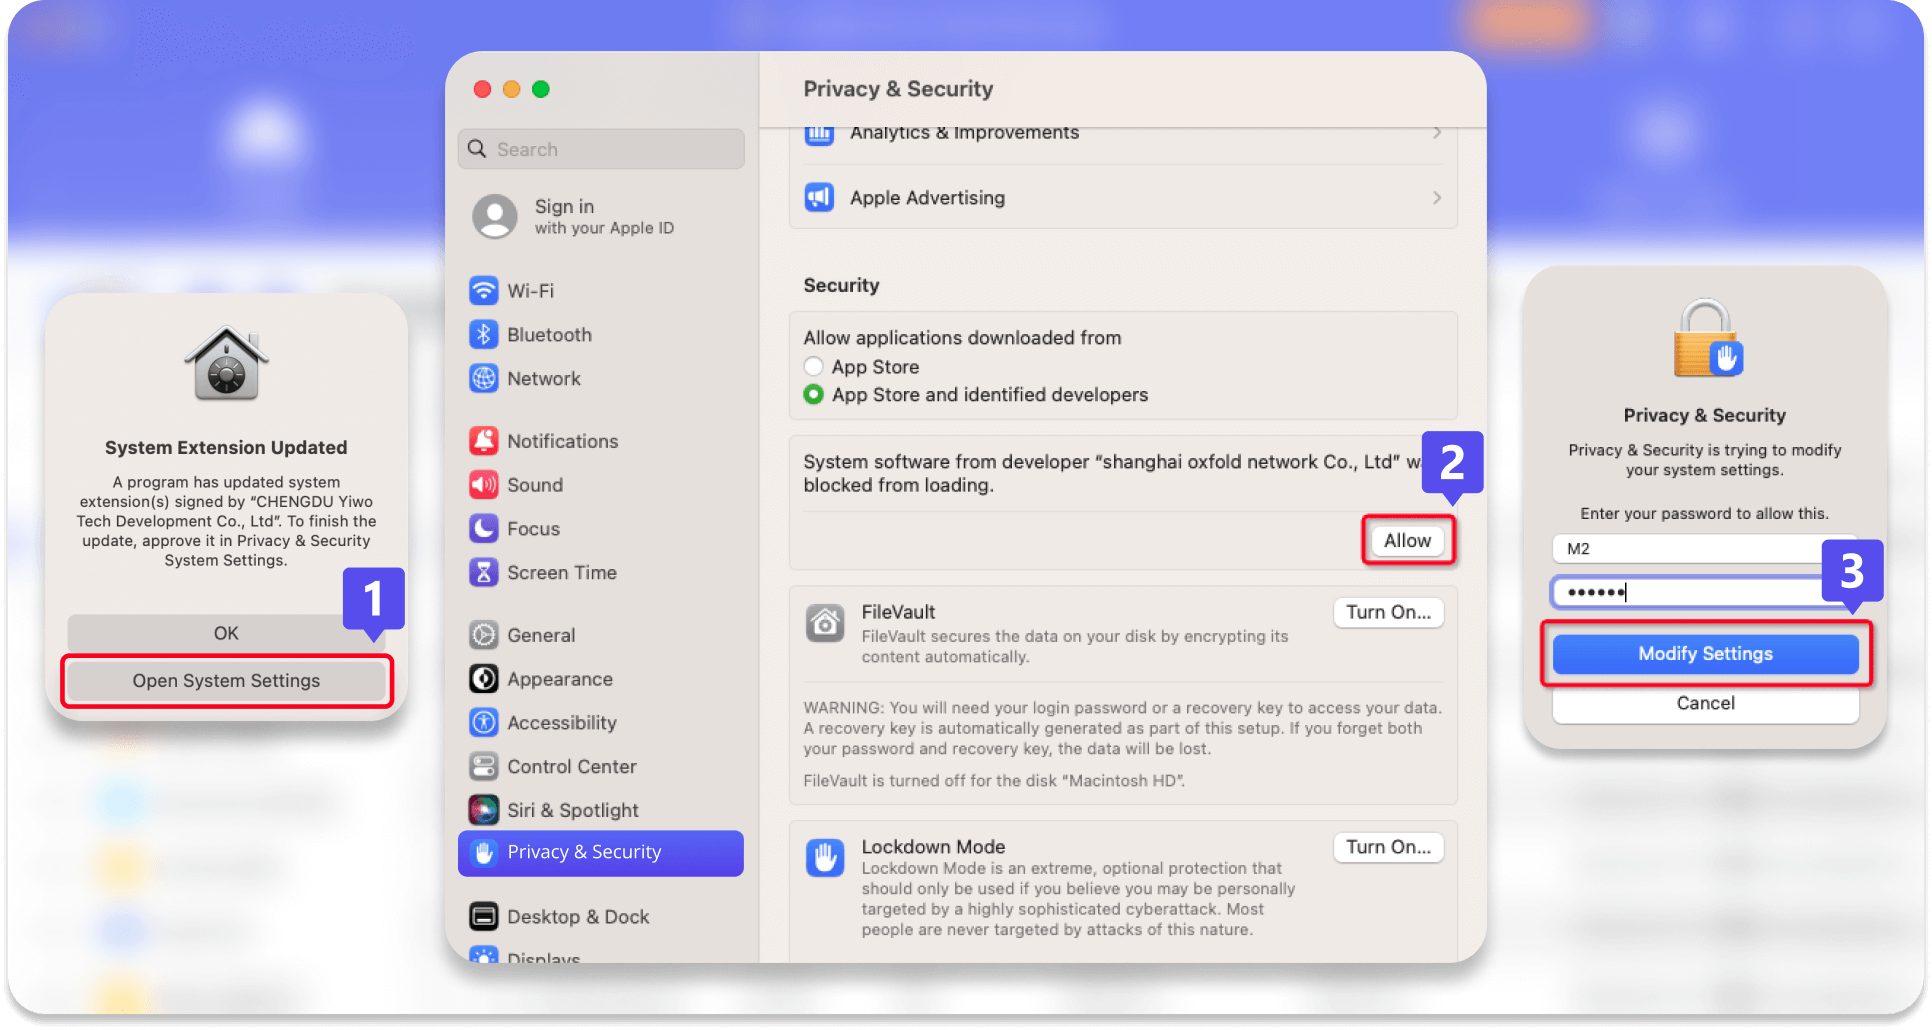
If you didn't perform Step 2, you would see this on the Security & Privacy page:
Click Enable system extensions, and a pop-up window will pop up.
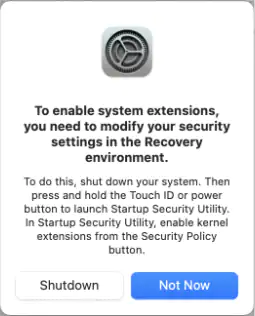
Click Shut Down, then perform Step 2.
Step 4 Restart your Mac again, open D-Back and start scanning
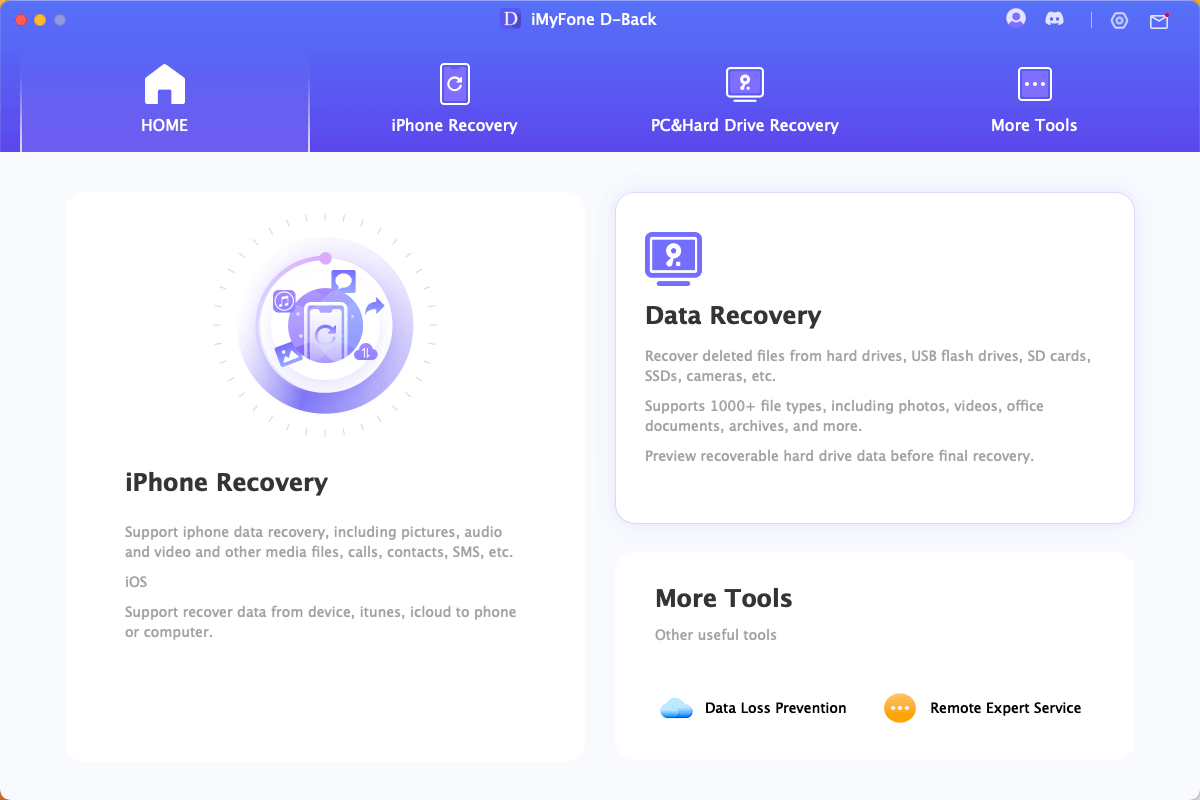
OK, all set! Back to D-Back and start scanning.
If you have any further questions, feel free to contact our Support Team.


