Error 8012 iTunes is a common error because many iTunes users complain of this issue with every iTunes update. Therefore, we’ll introduce the best solution for fixing this error first before giving you other options and solutions to troubleshoot each possible cause and take appropriate action. However, we believe you won’t need the other solutions after dealing with the issue from the root using the best solution.
#1. Best Solution for Error 8012 iTunes – Use iMyFone TunesFix
There is no specific or clear-cut cause for error 8012, hence, you may have no idea where the issue is coming from and the way to fix it. If this is the case, then you don’t have to bear with it anymore because there is an easy tool that can fix the error without hassle.
iMyFone TunesFix is a powerful, ultimate, and primary iTunes error solution that can help you fix every iTunes issues, errors, and problems. This ultimate iTunes error fixer can deal with the root cause of iTunes Error 8012, in order to ensure that it doesn’t surface again or disturb the smooth running of iTunes. TunesFix can fix 100+ iTunes error, repair any iTunes issues, and clear up iTunes junk files to boost your computer.
Steps to fix error 8012 iTunes using TunesFix:
Step 1. Download, install and launch iMyFone TunesFix on your PC or Mac. TunesFix will auto-detect the issue with your iTunes, but if there is no issue, you’ll be directed to the home interface.
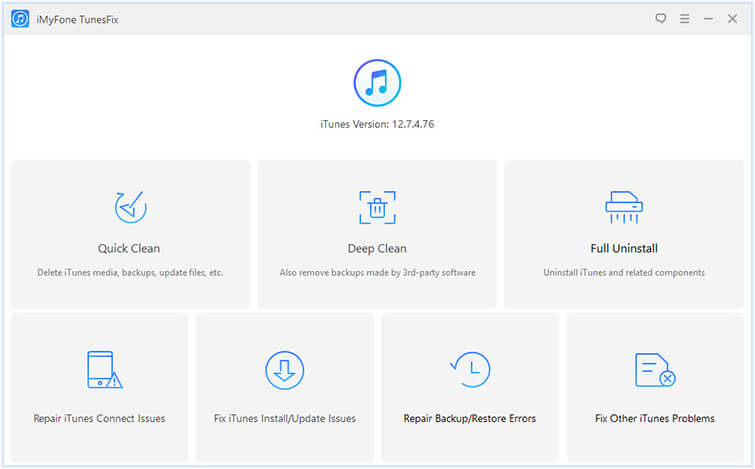
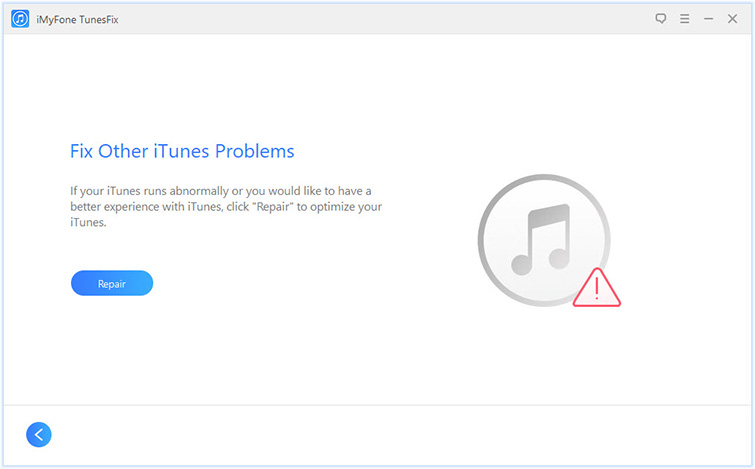
Step 2. Choose “Fix Other iTunes Problems” and click “Repair” to start repairing your iTunes. Please, keep your internet connection stable during the repair process.
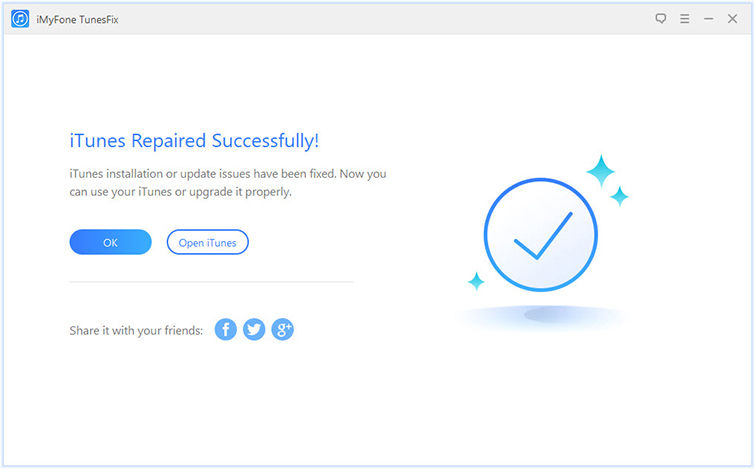
Step 3. When the repair is complete, click “Open iTunes” to launch iTunes and see if the error has been fixed.
#2. Fix Error 8012 iTunes via Manually Change Windows Firewall Settings
Before you proceed with changing your Windows Firewall settings, you have to be logged into the system as the administrator. Then, follow the steps below:
Step 1. Go to the search bar and type in “Run”. Then, click on the first option and when the run box is open, type in “firewall.cpl” and click OK.
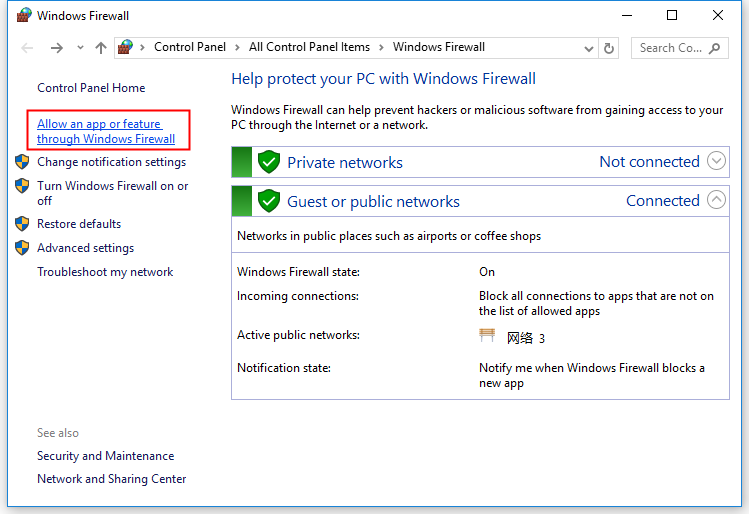
Step 2. On the Windows Firewall, click “Allow an app or feature through Windows Firewall.”
Step 3. Click the “Change Settings” tab and check if “iTunes” is selected under the public and private network categories. Check if “Bonjour” is selected only for the private network.
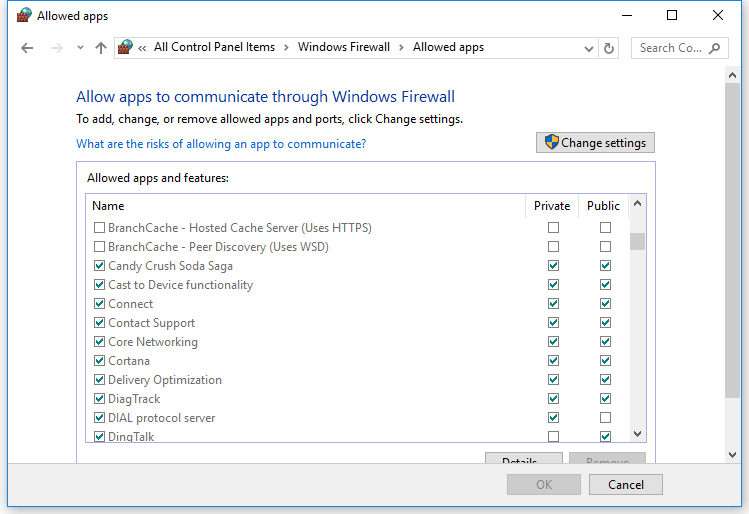
Step 4. If the software mentioned above is not selected, click “Allow another App” and search for iTunes and Bonjour to add them to the list.
Step 5. Then, close Firewall.
#3. Other Common Troubleshooting Solutions for Error 8012 iTunes
1. Scan your PC for Malware:
There is a chance that error 8012 iTunes is caused by virus attack or malware infection of your PC. You can use Windows Defender to scan for all badware in your PC and remove them.
Step 1. Go to Windows Search bar and type in “Windows Defender Security Center”, click enter and select it when it appears on the search result.
Step 2. In the Windows Defender Security Center, select “Virus & threat protection”.
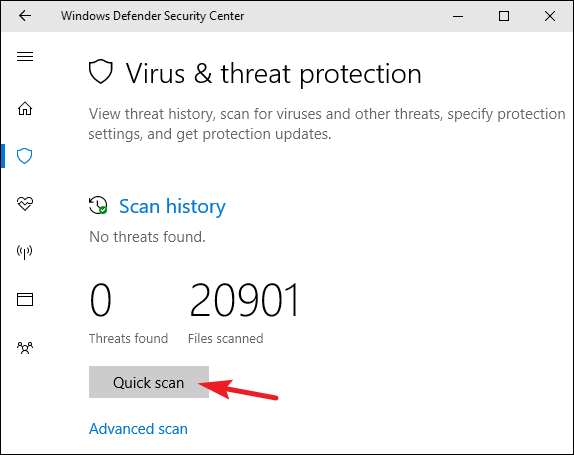
Step 3. Either choose “Quick scan” or “Advanced scan”. After the scanning, Windows will display any malware or virus in your PC and you can remove them at once.
2. Clean your PC Junk with Disk Clean:
The Disk Clean is a good Windows built-in utility for cleaning up junk and temporary files from your PC. Although, it may not be able to able to clean up programs like Firefox, Microsoft Office, Chrome. Live Messenger, etc.
Step 1. Take your cursor to the search bar and click on it. Then, type "command" in the search box, and while holding CTRL-Shift on your keyboard, hit ENTER.
Step 2. You will be prompted with a permission dialog box, click Yes, and a black box will open with a blinking cursor.
Step 3. Type "cleanmgr" and hit ENTER.
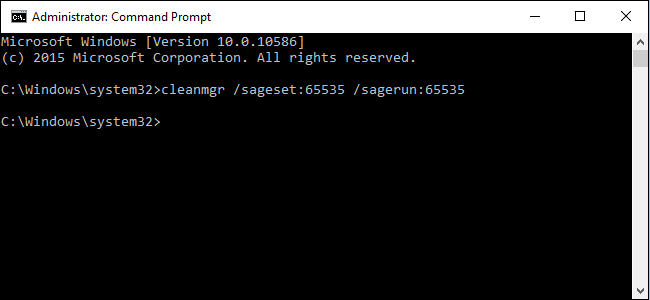
Step 4. Disk Cleanup will calculate the amount of storage space you can reclaim. After which, the Disk Cleanup dialog box will appear with a series of cleanable temporary and junk files, select all or some to clean and click OK to erase them.
Conclusion
We’ve discussed the possible solutions to iTunes error 8012, you can use any of the solutions above to solve the issue depending on the root cause of the error. However, iMyFone TunesFix is the ultimate solution to error 8012 and can help you fix your iTunes no matter where the error is stemming from.


 June 21, 2021
