You can also read this guide in Français.
Whenever you browse on any Apple device either via Safari or other browsing applications, your session history is stored. Although the intent is to improve your user experience, this poses a lot of dangers and risks to your privacy in the long term. Most people have sites they visit that they’ll rather not want anyone to know.
This is also inclusive of passwords and bank account details. Although you can browse in private these days, what about the times you forgot to switch over, or those times you didn’t deem your privacy important? This article will show how you can clear history on iPad to protect yourself from possible privacy breach.
Part 1. Two Free Ways to Check Safari History on iPad
Want to check Safari History on iPad to know if it contains private/important histories? Here are 2 free mehtods.
Option 1 Via Safari App
--Check open tab's recent history
-
Step 1: In Safari browser, locate the tab you want to access its history.
Step 2: Find the page forward and page back button at the bottom right corner and tap it.
Step 3: The current tab's history will appear. You can tap one to check.
--Check full histories
-
Step 1: Launch Safari app.
Step 2: Tap Bookmark button at the bottom right corner.
Step 3: Choose History. All the browsing history will be shown there.
Option 2 Using iPad Data Eraser (Also Support iOS 14)
iMyFone iPad Eraser is an application that you can use to erase all kinds of files from iOS devices including the iPad. Checking the things you have in your Safari history is absolutely Free. You can use it in two ways for checking Safari history:
iMyFone is highly spoken of by hundreds of users and well-known media.
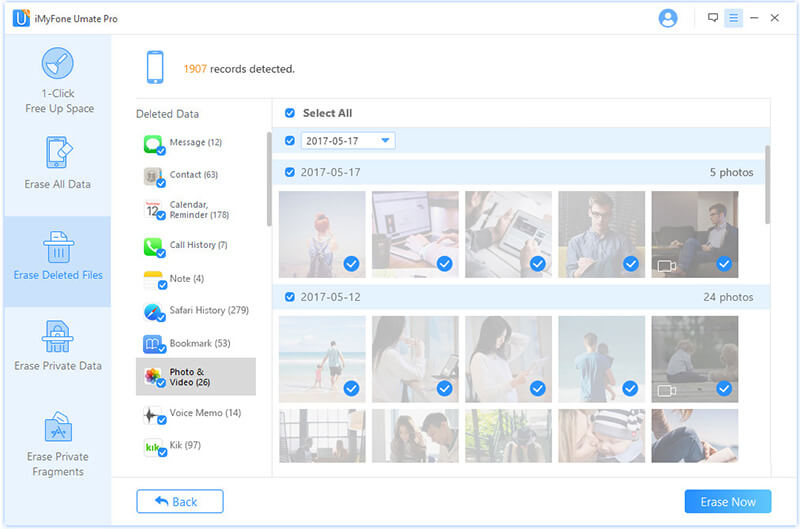
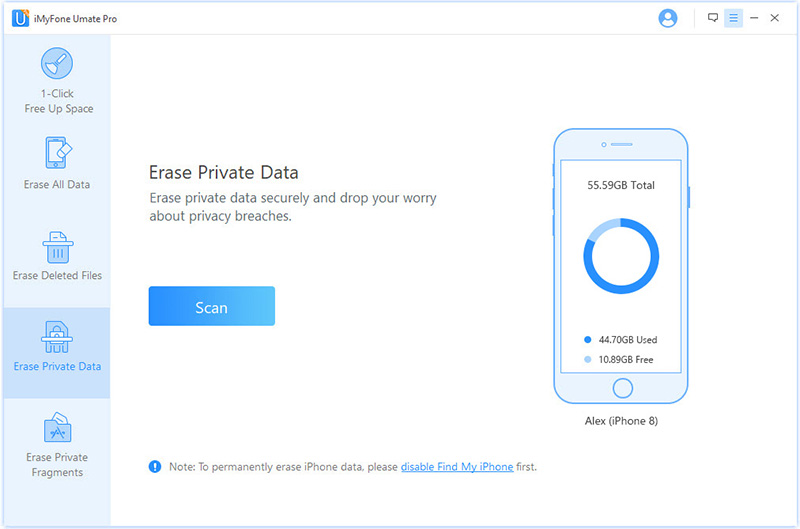
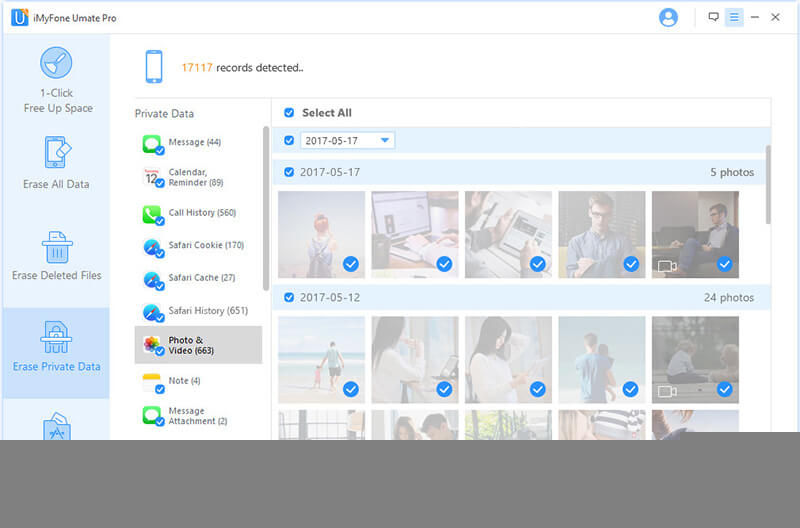
- Check Existing Safari History: Current history refers to history that hasn’t been deleted manually before. Use Erase Private Data mode to check it. Once in this mode, click the Scan button to view all private files on your iPad including Safari history, Cookies and Cache.
- Check Previously Deleted History: The history you deleted before is still left in device drive. To view such deleted history, select Erase Deleted Files mode and click the Scan button to check.
Part 2. Free Ways to Clear Safari/Chrome History on iPad (Recoverable)
Option 1 Clear up Safari History on iPad
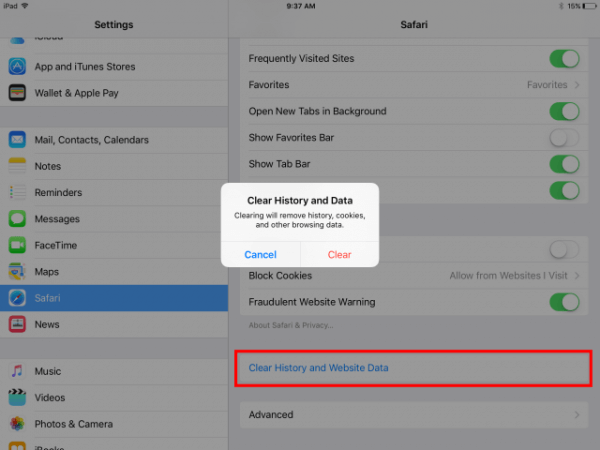
Step 2: After this, scroll down and click Clear History and Website Data from there.
In addition, apart from clearing history, you can also go to Safari app and set up the Private Browsing Mode, so that no history will be saved.
Tips: A guide to clear history on iPad for a new user:
(1) Go to "Settings > Safari > Block Cookies".
(2) Go to "Settings > Safari > enable Do Not Track".
Option 2 Clear Google Chrome History on iPad
Step 2: Tap the 3 bars button at the top right.
Step 3: Choose History.
Step 4: Scroll down and tap Clear Browsing Data.
step 5: Browsing history is checked by default. You can uncheck others you don't want to delete.
Step 6: Tap Clear Browsing Data and confirm.
Step 7: Tap Done button at the top right to finish it.
In addition, to do this, you can also clear your saved bookmarks, passwords and the auto field data from this page.
Part 3. Permanent Way to Clear History on iPad (100% Unrecoverable)
iMyFone iPad Eraser - Permanently clear Safari history on iPad, left NO chance of recovery!
As we mentioned before, you can use iMyFone iPad Eraser to view current or deleted history. In addition, it helps to permanently delete them without no trace of recovery left. It is the all-in-one solution to save iOS space and also protect privacy, which not only makes sure your iPad clear but also permanently erase private data.
Umate Pro is fully compatible with all iOS versions, including iOS 14. You can follow these steps to permanently clear Safari history on your iPad:
Step 1: Download and install iMyFone iPhone Eraser program. Link your iPad to computer.
Step 2: Choose "Erase Private Data" and then click "Scan" button.
Note: If you want to permanently erase previously deleted history, go to "Erase Deleted Files".
Step 3: You can preview and select "Safari History" to clean. Then type "delete" into the pop-up window.
Note
- You can also go to "1-Click Free Up Space" mode and clean all app cache and corrupted files via running "Junk Files". Safari cache is inclusive. "Junk Files" is the free trial of iMyFone Umate Pro.
- You can go to "Erase Private Fragments" to permanently delete private fragments left by third-party apps, like WhatsApp, WeChat,

Tips
Erasing Previously Deleted Files Other Than Safari History
It is not only Safari history that poses a threat to your privacy. All other files you’ve deleted from different applications are also potential threats. From your text messages to your voicemails, notes to calendar, all pose a risk to your privacy.
It is therefore imperative to scan for and permanently erase these files using iMyFone iPhone Eraser. It will scan the nook and cranny of your device and lists all these files. You can preview them before erasing them.


