Apple has made the process of transferring from an older iPhone to a newer one very smooth. While the overall experience is pretty streamlined, there could be issues like missing emails. If your older emails are also important and you want them to be on your new iPhone, here we will tell you how to transfer emails to your new iPhone.
Table of Content [Hide]
Part 1. Why Are My Emails Not Transferring to New iPhone?
You get several backup options when switching from your old iPhone to the newer one. In those backup options, you must manually select the data you want to transfer to your new device. However, for some people, their emails do not successfully transfer from the older iPhone to the newer one and here are some possible causes.
- If you are using different accounts on different devices, the newer iPhone may not get the older emails on it.
- Not checking the email transfer option can be why your emails are not transferring to the newer iPhone.
- Your backup method not supporting transferring emails could also be why you are facing this issue.
Part 2. How to Transfer Emails to New iPhone with iCloud Syncing
When switching from an older iPhone to a newer one, you have many different options to bring your old data to the newer device. One of the best methods for iPhone users is the iCloud sync feature. Using this feature, you can get all the old and new emails in one place. The process here is pretty simple, and you only have to follow these steps below to get this method working for you:
Steps to Set iCloud Syncing Emails
- Go to the iCloud website and go to Accounts settings.
- Go to the Custom Email Domain option in account settings and select manage.
- Now select the old email address from which you want to import all your older emails.
- After selecting the email, you will need to check the import mail button.
- After following these steps, you must go along with the onscreen instructions to go through the sign-in process.
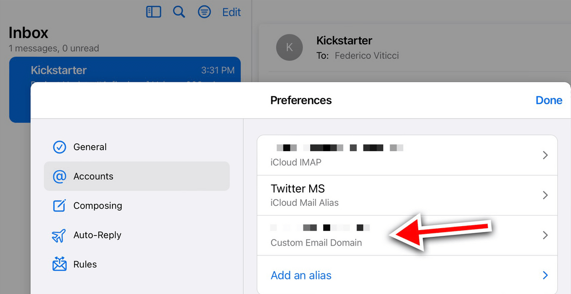
After completing the sign-in process, your previous email account messages will be imported to your new device. You can easily manage old and new email accounts because iCloud Mail will have folders for easier management.
Additionally, if you used to manage mails with folders in your previous email, you will still get all those folders inside the one new folder with the name of the previous email address you were using. Before you begin the email import process, you will need to manage iCloud storage because the process may not work for you if you do not have enough storage space available.
Part 3. Move Emails to New iPhone with Another IMAP Email Account
When switching between different devices, you may also need to switch your email account. However, losing all old important emails is not the right decision just because you are changing your old account with a new one.
So, using the IMAP email account is the right solution for you. It can help you easily transfer your emails from the old account to the new one. IMAP email account helps you transfer emails from one server to another and from one account to another while staying within the same email client on your device.
Steps to Move Emails to Another IMAP Email Account
- Open the Mail application on your old iPhone and go to Inbox.
- Click the Edit button on the top right, and then you can check the messages you want to transfer to the new account. And then click on Move.
- Now you will need to select the IMAP email, and it is better to select a folder inside that email where you want the emails to go.
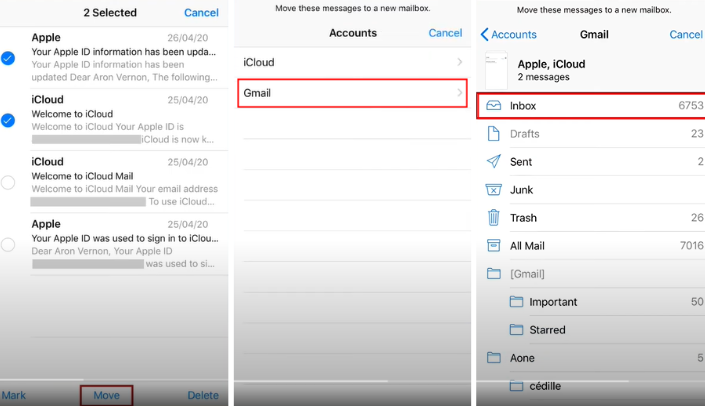
Now you can check the IMAP email, and your selected emails will be present there. After checking the presence of your old emails in your new account, you will be done with the process. Now you can remove the older email address from the old iPhone without worrying about losing any of your important emails. Just make sure you follow the steps correctly and verify the emails in the new account before deleting the old account.
Bonus: An Easy Tool For You to Backup and Restore Emails in iPhone
The best method to refrain from issues like emails didn't transfer to the new iPhone is by creating your iPhone's backup using a reliable method. For your iPhone Backup needs, iMyFone's iTransor is the most reliable option where you can easily create the backup and restore it to your new iPhone.
Main Features about iTransor
- iTransor helps you backup contacts and SMS along with emails and restore them as it is.
- There is a guarantee that you will never face any data loss when creating a backup or restoring it.
- iTransor works for more than 18 types of data as compared to a simple iTunes backup.
- iTransor is compatible with all iOS versions, including devices on older and latest iOS versions. So, you can also use it on the latest 13 series.
Steps to Get All the Emails on Your New iPhone Using iTransor
Step 1.Connect your old iPhone to your PC with iTransor running on it using a USB data cable.
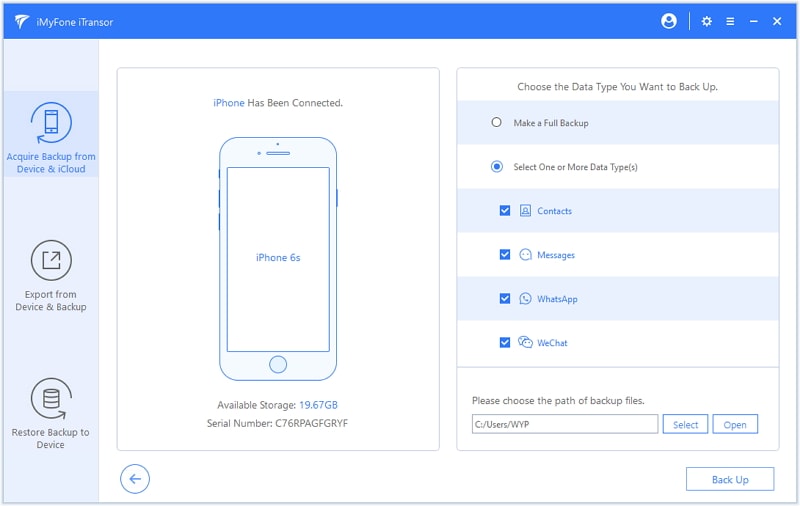
Step 2.Go for Acquire Backup from Device and then Back Up device.
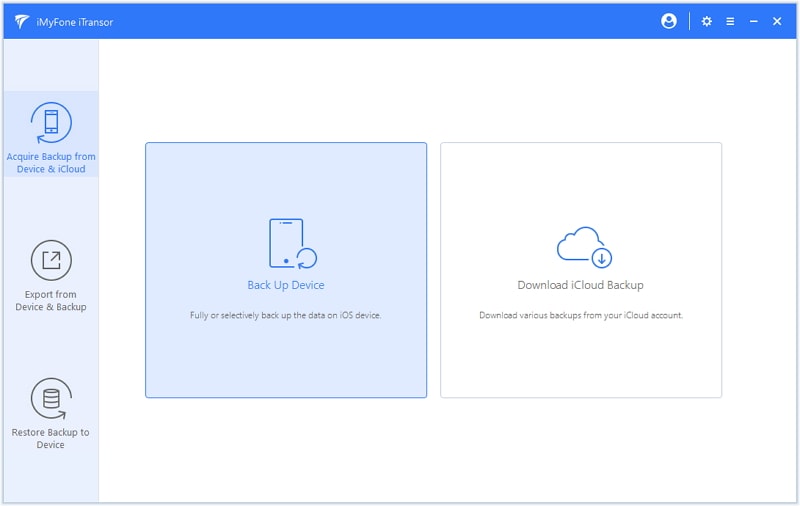
Step 3.Now you will need to select everything that you want to backup, and click on the Back Up button to begin the backup process with iTransor.
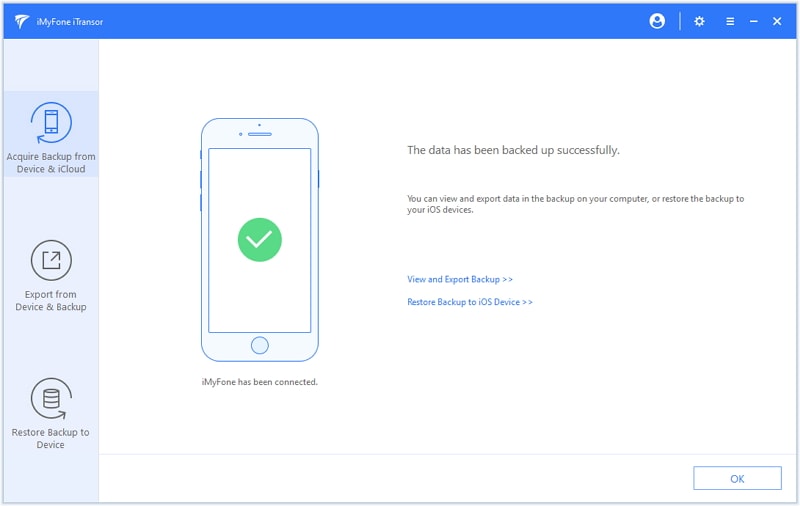
Step 4.Wait for the backup is complete, once it is complete you can disconnect the old device.
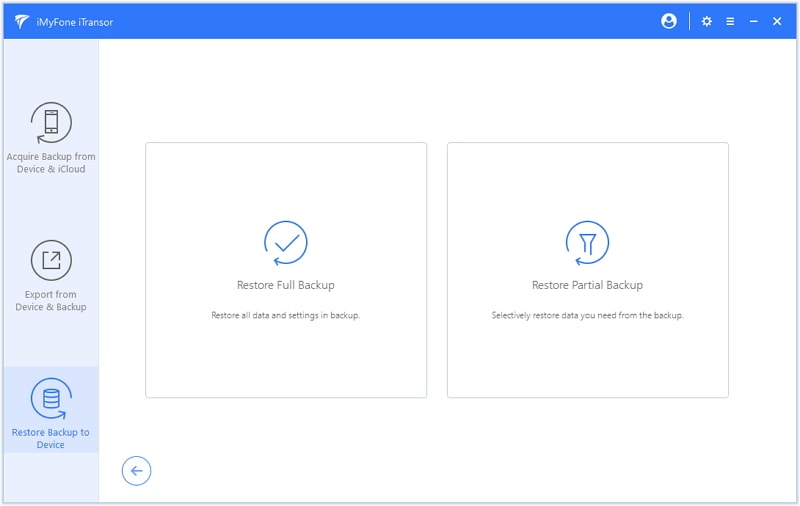
Step 5.Whenever you want to restore the backup to new iphone or any other iOS devices, you can go to Restore Backup to Device and to choose Restore Full Backup or Restore Partial Backup.
Step 6.Follow onscreen instructions to go through the restore process, and you will be done.
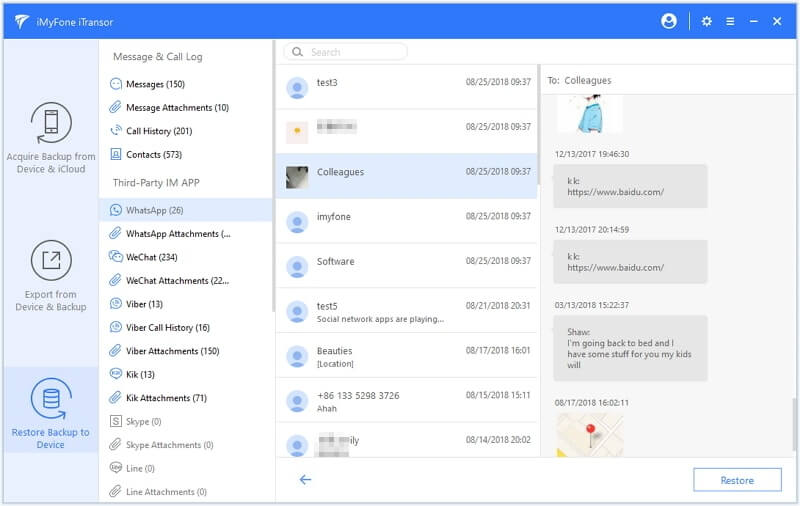
After the process, you can also check the availability of all the selected items on your new iPhone.
Final Words
You must not compromise on losing your emails if they are not automatically transferring to your new iPhone. You can easily transfer the email to a new iPhone by following the methods we discussed above, or we also recommend you to try the effective iPhone data backup and restore tool to avoid any data loss.


 July 5, 2022


