Odin is used to flashing Samsung devices, with either their stock firmware or a custom one. Essentially, flashing is when you are either changing the ROM on your device or restoring it to the default firmware that comes with your device. If you are stuck on "file analysis" on the log in Odin, it could be due to many reasons so this article will show you how to repair this issue.

Tip 1. Try to Flash An Older Version
Although it may sound ridiculous, if you have an older device, you should remove the latest version of Odin from your PC and download an older version (such as Odin 3.09). Try to flash your device using this version. A lot of older devices lose support as newer Samsung devices are released every year so try to use a version of Odin that was the latest version a few months after your device was released. For example, if your device is from 2016, try to use a version of Odin from 2017 rather than the latest version.
Tip 2. Check for Physical Issues
If there is a slight disturbance of connection with Odin from your mobile device, there will most likely be an error in Odin. This can be caused by two main factors. Where possible, make sure that you are using the original USB cable that came with your device. If this is not possible, then make sure that the USB cable is of high quality because cheaper quality cables and thinner ones can easily lose connection when being used. Usually, thicker cables can transfer data better. Also, try different USB ports on your PC/laptop because it is possible that a port may be damaged or not work properly.
Tip 3. Make Sure the Order of Process
You may be aware that Odin is quite a sensitive program that requires everything to be working so that the flash can take place. Therefore, you should make sure that Odin is running before you connect your phone to the PC. Also, make sure that all the other prerequisites are completed before you connect your mobile device to the PC. Follow the instructions for flashing your Android using Odin in the same way as specified. Changing the order could result in an error, such as Odin being stuck on file analysis.
Tip 4. Enable USB Debugging
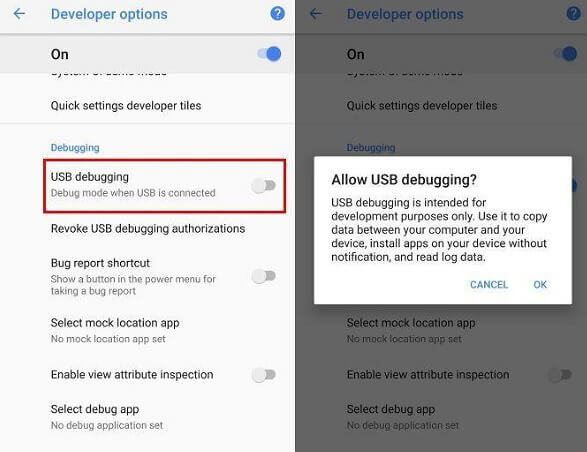
If you can still boot up your device normally, you should enable USB debugging in developers' options if you haven't done so already. The exact method varies for each device however, the general outline on how to do this is given below. USB Debugging gives you access over your device's content when using a PC. This is important when you are using Odin to change the ROM on your device so ensure that you have enabled USB Debugging if possible.
- Go into your device's settings.
- Locate "build number" under device information and tap on it several times quickly until you get a message saying that you are now a developer.
- Find developer options in settings (usually located under System) and then find USB Debugging.
- Enable this option and then power off your device.
Tip 5. Put Your Device into Download Mode
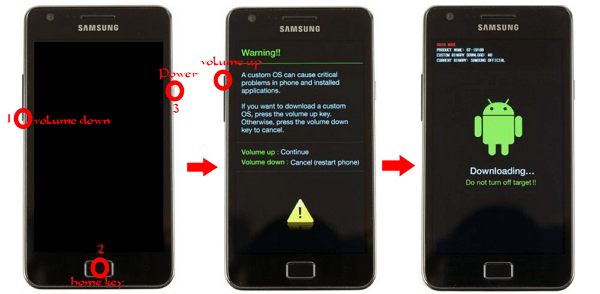
To make changes to the device's firmware, your Samsung will need to be in Download (Odin) Mode. If it is not in this mode, you will not be able to flash your device.
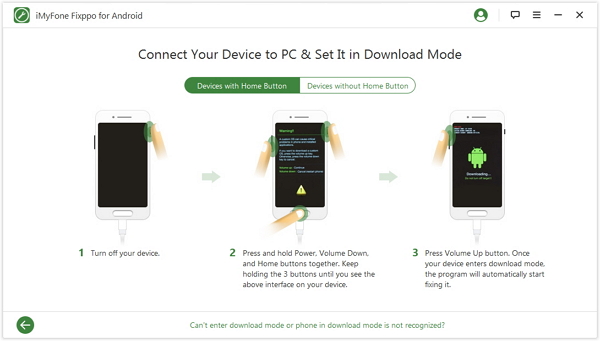
- If your device has a physical home button: Power off your device. Hold down the volume down and home button keys simultaneously. When you get a screen with a warning, press the volume up key to put your device in download mode.
- For devices without a physical home button: Power off your device. I will be using the S8 as an example. Press and hold the Bixby and volume up buttons. Then press the power button until the power turns off. Release the buttons once a blue screen appears. Press the volume up key to boot into download mode.
Tip 6. Try A Fixppo Repair Tool for Android
Having tried all the fixes listed above, if Odin is still stuck on "File Analysis" when you are trying to flash your Samsung device, we encourage you to use the iMyFone Fixppo for Android by iMyFone.
There are a few reasons as to why we recommend you use this tool. Fixppo for Android only requires you to input the basic details regarding your device. It will then automatically download the correct firmware, unless you would like to use a custom ROM, and then complete the flashing process for you. If you would like to use a custom ROM, you can choose to select it after it has been downloaded however this is not recommended if are only trying to repair your device. Once you have downloaded the tool from the iMyFone Android website and have installed it on your PC, complete the instructions given below.
Step. 1 Open the Fixppo on your PC and fill in the details for your device. Press the "next" button and wait for your device to download the stock firmware for your device. As mentioned above, you can alternatively use your downloaded file.
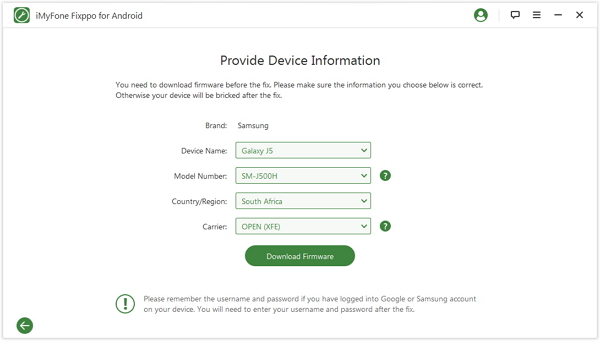
Step. 2 Once the firmware has downloaded, check that all the information presented on your screen matches your device's details. Choose the "start" option and put your device in download mode by following the on-screen instructions. The method varies if your device has a home button (such as the S7 Edge) or not.
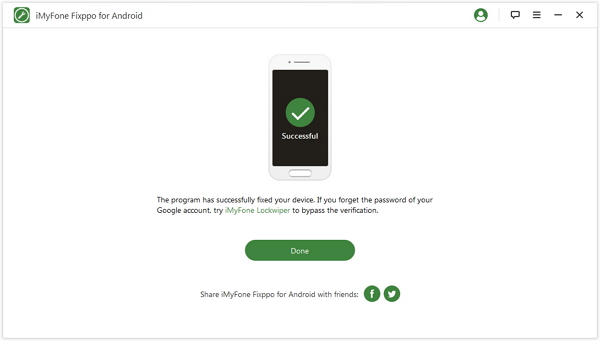
Step. 3 Wait until the process has been completed. Your device will automatically be repaired. Once it is complete, you can disconnect your phone from your PC and close the software.
Conclusion
Flashing a Samsung device is considered easier than flashing other Androids because you do not have to go through the hassle of unlocking the bootloader however even then, it can still be a daunting process. Therefore, it is recommended by us that you use the Fixppo Tool for Android because it is much easier and quicker for you when flashing the stock ROM back onto your device.


 October 9, 2022

