Android smartphone owners commonly use the photo Vault App to encrypt important images or data on their phones. However, you may lose your important photos due to various reasons.
You start feeling awful after losing your important data, but you may recover vaulty pictures with the appropriate information. In this article, we will look at how the iMyFone D-Back can help you recover your vital data and some additional methods to recover and preserve it.

- Part 1: Free Download the Data Recovery Software to Recover Deleted Vaulty Files

- Part 2: Possible Solutions to Get My Pictures Back from Vaulty
- 2.1: Recover Pictures from the Vault App
- 2.2: Recover Pictures from the App Lock/Gallery Vault
- 2.3: Recover pictures with Es File Explorer File Manager
- Part 3: Pro Tip about Scenarios of Vaulty Files / Pictures
- Part 4: Faqs about Vaulty App Pictures/Files
Part 1. Free Download the Data Recovery Software to Recover Deleted Vaulty Files
iMyFone D-Back(Android) is one of the simplest and most effective ways to recover data that has been lost or deleted. You might lose your data for various causes, but no matter what the circumstance is, this sophisticated Android data recovery program can efficiently recover any data from Android phones and tablets.
The program offers a range of top-notch features that make it one of the best data recovery solutions. Its primary features include:
- It quickly scans your Android device and recovers whatever you have misplaced in a couple of minutes.
- The software allows you to recover any file from your internal memory and SD card.
- The program can selectively recover various data types, including contacts, text messages, photographs, WhatsApp messages and attachments, audios, videos, call history, documents, etc.
- It offers three modes for recovering data from Android devices: retrieving data directly from the device, recovering from a Google backup, and recovering from a damaged device.
- This software allows you to preview files before restoring them, ensuring that you get exactly what you need.
- It works on both rooted and non-rooted Android devices to restore lost data.
- With this software, you can recover, and export deleted data to your PC in CSV, HTML, and VCF formats.
Now that you know how effective the iMyFone D-Back is, you are ready to use it to recover deleted vaulty pictures. All you have to do is follow the easy steps outlined below:
Step 1: Download and Launch the Program
The first step to recovering vaulty files is downloading and launching iMyFone D-Back on your system.
Step 2: Choose the Recovery Mode
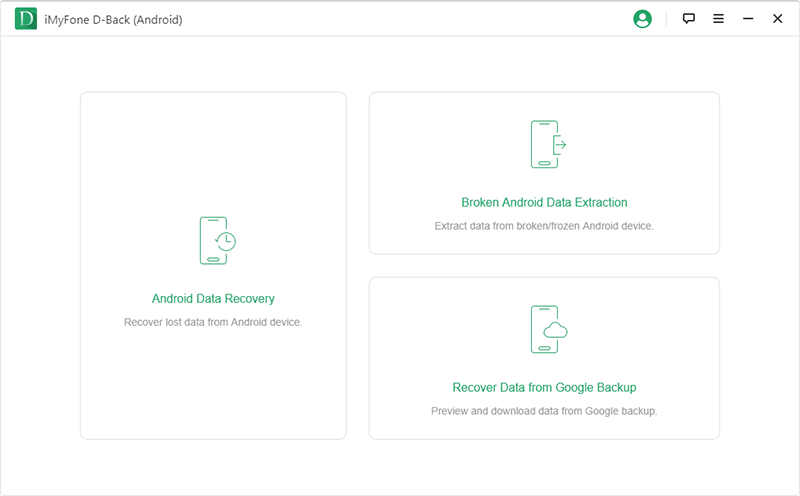
When the software is launched, the software will present you with the following interface, which will allow you to select your chosen data recovery option. You will need to click on Android Data Recovery to recover deleted vaulty pictures.

Step 3: Connect the Device
The next step is to connect your device to the computer through the USB port, whether an Android phone or a tablet.

Step 4: Recover the Files
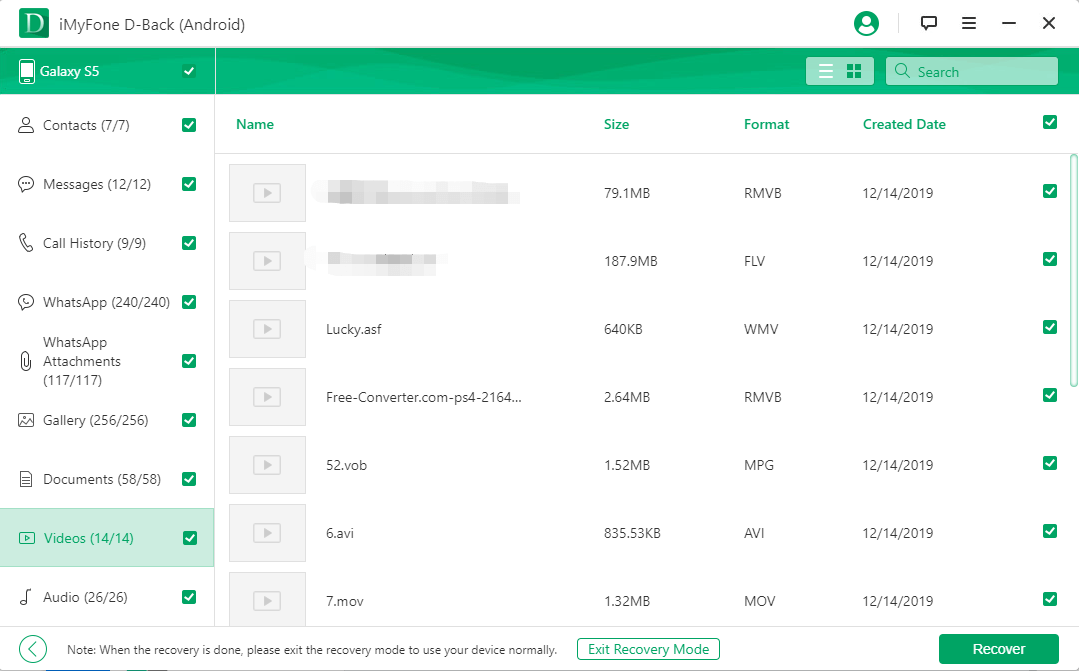
You will be able to select the location from which the vaulty files will be retrieved after the device is connected. Now, follow the software's on-screen directions to recover all of your lost files from your device; you’ve to simply select the files and click on recover.

Part 2. Possible Solutions to Get My Pictures Back from Vaulty
If you are thinking, ‘how do I get my pictures back from vaulty’, there are options other than utilizing data recovery software. The following are some of the alternative solutions available for recovering vaulted images:
Method 1: Recover Pictures from the Vault App
If you accidentally erase data or photographs, you may utilize the vault app to recover them. Follow the steps below:
Step 1: The first step is to download and launch the Vault app on your phone.
Step 2: Select Photos or Videos from the main interface.
Step 3: Now, select the photos or videos you wish to recover and click the export option.
Step 4: Finally, press the OK button to save the files from your Android phone.
Method 2: Recover Pictures from the App Lock/Gallery Vault
Step 1: The first step is to log in to the app using your password.
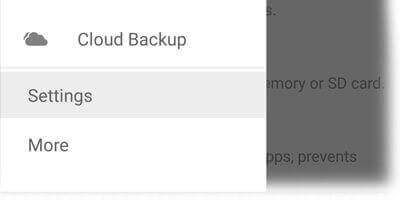
Step 2: Once logged in, click on the app lock and go to the setting.
Step 3: Then you will see the option of data recovery from where you can find all the deleted files.
If you have any lock application on your phone that hides files in dot folders (.folder name), you may rely on explorers like ES File Explorer File Manager to effortlessly recover the pictures and files from dot folders.
To recover vaulty data with Es File Explorer File Manager, follow the simple steps given below:
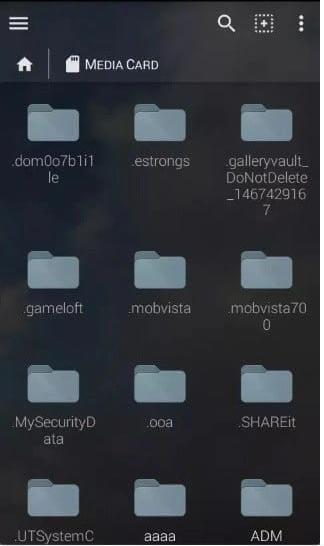
Step 1: First of all, install Es File Explorer File Manager and launch it. Enable "Show hidden files" in the settings.
Step 2: Return to your home directory and search for the ".My security" folder. When you open the folder, you will notice a lot of files with random alphabets and digits in their names.
Step 3: Select the search option and then "Advanced options." You must provide a size between 10KB and 10MB, which may vary. Now, Select "all files" and then "search" from the drop-down menu.
Step 4: You will see several file extensions here, all of which must be opened as images. Finally, use the multi-rename tool to alter the file extensions to jpg/mp4.
You are ready to transfer the photos and files to a new place.
The loss of pictures and files from the vaulty app might be caused by various factors. Some of the scenarios that might result in files and photos being lost from the vault app may include:
To avoid any of these scenarios that might result in the loss of vaulty data, here are some tips that can help you keep your vaulty data safe:
Vaulty provides an automatic online backup service for your crucial data. Your data is automatically backed up to your Google Drive account.
Subscribe to Vaulty's automatic backup and permit Vaulty to utilize one of your Google accounts for automatic backup to backup your data. If you are subscribed to automatic backup, you may choose to back up your vaulted data on the SD card under Vaulty settings.
The vaulty files are only stored on your device, not on the vault’s server or anywhere else.
Yes, you can use the iMyFone D-back Hard Drive Recovery Expert to recover and then open the files on your PC. We’ve mentioned the method in the Part 1.
You may also use your PC to open the vault app by following these simple steps:
Vaulty apps are a great solution for keeping your important data and photos secure, but you may lose your data for various reasons. You do not need to be concerned in this situation since the iMyFone D-Back is on your side. It can rapidly and efficiently retrieve your lost data.
We also explored various alternative approaches for recovering data that had been lost. Ultimately, you must have learned how to recover deleted vaulty photos and files from this article and how to prevent this situation in the first place.


Method 3: Recover Pictures with Es File Explorer File Manager

Part 3: Pro Tip about Scenarios of Vaulty Files / Pictures
Part 4. Faqs about Vaulty App Pictures/Files
1
How to make a vaulty backup?
2
Where are the vaulty files stored?
3
Can I open vaulty files on PC?
Conclusion


 October 9, 2022