15 Powerful Microsoft Word Tips and Tricks in 2024
Category: AI Assistant

7 mins read
Whether you're a professional writer, a student, or someone handling documentation, harnessing the full potential of Word can significantly boost your productivity. In this journey of discovery, we unveil 15 powerful Microsoft Word tips and tricks.
Let's embark on this exploration and uncover the arsenal of tools that will elevate your Word experience to new heights of productivity.
In this article:
Part 1: 15 Powerful Microsoft Word Tips and Tricks for Productivity
1 Styles and Headings for Document Structure:
Use styles and headings to organize and format your document consistently.
Situation: Creating a report with sections and sub-sections.
Practice Steps:
1. Write your document content.2. Select a heading and go to the "Home" tab.
3. Choose a heading style from the "Styles" gallery (e.g., Heading 1, Heading 2).
4. Repeat for different headings and sub-headings.
5. Use the "Navigation Pane" to easily navigate between sections.
2 Table of Contents (TOC) for Easy Navigation:
Generate a Table of Contents to help readers quickly access different sections.
Situation: Adding a Table of Contents to a lengthy document.
Practice Steps:
1. Insert headings using styles (as in the previous tip).2. Place your cursor where you want the Table of Contents.
3. Go to the "References" tab and click on "Table of Contents."
4. Choose a style for your TOC (e.g., Automatic Table 1).
5. The TOC will be generated with clickable links to headings.
3 Navigation Shortcuts:
Use navigation shortcuts to quickly move within your document.
Situation: Reviewing and editing content in a long document.
Practice Steps:
1. Use "Ctrl + Home" to go to the beginning of the document.2. Use "Ctrl + End" to go to the end of the document.
3. Use "Ctrl + Up Arrow" or "Ctrl + Down Arrow" to move a paragraph up or down.
4. Use "Ctrl + Left Arrow" or "Ctrl + Right Arrow" to move the cursor to the beginning or end of a word.
4 Quick Parts for Reusable Content:
Save frequently used content as Quick Parts for easy insertion.
Situation: Reusing a standard disclaimer or frequently typed text.
Practice Steps:
1. Highlight the text you want to save as a Quick Part.2. Go to the "Insert" tab and click on "Quick Parts."
3. Select "Save Selection to Quick Part Gallery."
4. Give it a name and assign it to a category.
5. To insert it, go to "Quick Parts" and select the saved entry.
5 Track Changes and Comments for Collaboration
Use Track Changes and comments to collaborate and review documents.
Situation: Editing and reviewing a document with feedback from others.
Practice Steps:
1. Go to the "Review" tab and click on "Track Changes" to enable editing tracking.2. Make changes in the document; they'll be highlighted and linked to your name.
3. To add a comment, select the text, and go to "Review" > "New Comment."
4. Share the document with collaborators, and they can review, accept, or reject changes and reply to comments.
Practicing these Microsoft Word tips and tricks in specific situations will greatly enhance your productivity and help you create well-structured and efficient documents.
6 AutoCorrect and AutoText for Efficiency:
Use AutoCorrect to replace commonly mistyped words with the correct ones, and AutoText to save and insert frequently used text.
Situation: Quickly inserting your email signature or company name.
Practice Steps:
1. Go to the "File" tab and select "Options."2. In the "Proofing" section, click on "AutoCorrect Options."
3. Enter the text you want to replace and the replacement text.
4. To use AutoText, select the text, go to "Insert" > "Quick Parts" > "AutoText," and choose the entry.
7 Page Breaks and Section Breaks for Layout Control:
Use page breaks and section breaks to control where new pages and sections begin.
Situation: Creating a multi-column layout for a newsletter.
Practice Steps:
1. Place your cursor where you want a new page or section.2. Go to the "Insert" tab and choose "Page Break" or "Section Break."
3. For section breaks, you can choose "Next Page," "Continuous," or "Even/Odd" depending on your layout needs.
8 Headers and Footers for Document Consistencyl:
Add headers and footers for consistent page numbering, dates, and other document elements.
Situation: Adding a page number and document title to every page.
Practice Steps:
1. Go to the "Insert" tab and click on "Header" or "Footer."2. Choose a predefined style or select "Edit Header" / "Edit Footer" for customization.
3. Add the desired content, such as page numbers or document title, using the options in the "Header & Footer Tools" tab.
9 SmartArt for Visual Communication:
Use SmartArt to create visually appealing diagrams and flowcharts within your document.
Situation: Illustrating a process or hierarchy.
Practice Steps:
1. Place your cursor where you want to insert the SmartArt.2. Go to the "Insert" tab and click on "SmartArt."
3. Choose a SmartArt graphic type (e.g., Process, Hierarchy, Cycle).
4. Enter your content into the SmartArt graphic's text boxes.
10 Read Aloud for Proofreading:
Use the Read Aloud feature to have your document read aloud, helping you catch errors and improve clarity.
Situation: Proofreading a lengthy document for errors.
Practice Steps:
1. Go to the "Review" tab and click on "Read Aloud."2. Word will start reading your document from the cursor's position.
3. Follow along and use your mouse or keyboard to control the reading.
Practicing these additional Microsoft Word tips and tricks will help you become even more proficient in creating, formatting, and enhancing your documents.
11 Mail Merge for Bulk Document Creation:
Use the Mail Merge feature to personalize and send bulk letters, emails, or labels.
Situation: Creating personalized letters for a mass mailing.
Practice Steps:
1. Go to the "Mailings" tab and select "Start Mail Merge."2. Choose the type of document you want to create (e.g., Letters, Emails, Envelopes).
3. Follow the Mail Merge Wizard to select recipients, insert merge fields, and preview your documents.
4. Complete the merge and generate individualized documents.
12 Quick Access Toolbar Customization:
Customize the Quick Access Toolbar to have easy access to frequently used commands.
Situation: Adding specific formatting or editing options to the toolbar.
Practice Steps:
1. Click on the dropdown arrow at the end of the Quick Access Toolbar.2. Select the commands you want to add from the list, or choose "More Commands" for additional options.
3. Click "OK" to add the selected commands to the toolbar.
13 Split View for Simultaneous Editing
Use the Split View feature to work on two different parts of a document simultaneously.
Situation: Comparing or editing two sections of a long document.
Practice Steps:
1. Go to the "View" tab and click on "Split."2. Drag the split bar to position the split where you want.
3. Scroll and edit both sections independently.
14 Recover Unsaved Documents:
Use the AutoRecover feature to recover unsaved or accidentally closed documents.
Situation: Recovering a document after a sudden computer crash.
Practice Steps:
1. Go to "File" > "Open."2. Click on "Recover Unsaved Workbooks" at the bottom of the Open window.
3. Locate the unsaved document, select it, and click "Open."
15 Save As PDF for Easy Sharing:
Convert your Word document to PDF for easy sharing while retaining formatting.
Situation: Sharing a document with colleagues or clients.
Practice Steps:
1. Go to "File" and choose "Save As."2. Select a location to save the file.
3. Choose "PDF (*.pdf)" from the "Save as type" dropdown.
4. Click "Save" to create the PDF version of your document.
By practicing these additional Microsoft Word tips and tricks, you'll be well-equipped to handle a variety of tasks efficiently and creatively.
Part 2: Personal Chabot Assistant –Know Every Thing about Microsoft Word Tips and Tricks
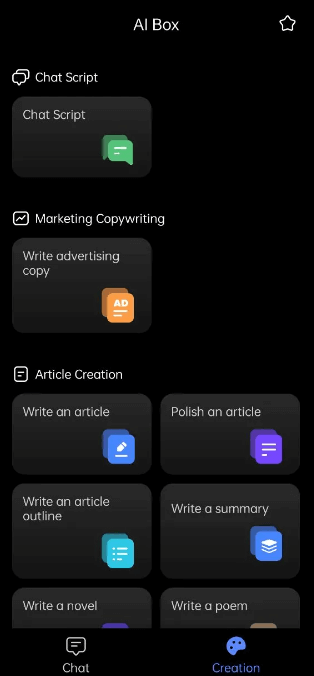
ChatArt, powered by OpenAI o1, GPT-4o and more advanced AI models, is a well-designed Word Tips and tricks provider. If you have any problem in using Word, you can ask it, as long as you give it a question, it will give you the answer immediately, if you are not satisfied with the answer, you can also ask it to polish its answer.

It is important to note that ChatArt is now available on Google Store and App Store, so whether you are an Android user or an iOS user, you can all enjoy the convenience that this app brings.

ChatArt Key Features:
- Supported models: OpenAI o1-preview, o1-mini, GPT-4o, Claude 3.5, Gemini 1.5, etc.
- Engage in real-time Q&A with AI and obtain quick and accurate answers.
- Select different text creation modules according to scenario needs.
- Generate chat scripts, ad copy, novel, poetry, blogs, essay, dream analysis, etc.
- Save valuable content via bookmarking for easy future access and use.
FAQs: Hot Questions about Microsoft Word Tips and Tricks
Q1. What are some useful Word tips and tricks for improved productivity?
Explore a variety of Word tips and tricks to enhance your efficiency, from formatting shortcuts to advanced document navigation techniques.
Q2. How can I find Microsoft Word tips and tricks specific to my version of Word?
To find Microsoft Word tips and tricks tailored to your version, you can explore official Microsoft resources, online tutorials, and community forums related to your specific Word edition. Besides, you can also turn to professional excel assistant like ChatArt.
Q3. Where can I learn about Microsoft Word tips and tricks that can save me time?
You can learn about time-saving Microsoft Word tips and tricks through online courses, video tutorials, official Microsoft Office support, and specialized productivity blogs. Or, you can turn a personal Word assistant like ChatArt.


