User Guide of iMyFone DreamVid
iMyFone DreamVid is an AI-powered image to video app. Simply upload your photos, and the AI will generate the video you need. Animate your photos effortlessly with actions like hugging, kissing, outfits changes, and more—all in just one click.
Part 1: Sign Up & Log In
Step 1: Download and Launch DreamVid
Click the button below to install DreamVid on your iOS or Android device. Once installed, open the app.
Step 2: Log In or Sign up
Your next step depends on your purchase and account status.
Scenario 1: If you're a new iMyFone user and have purchased the product online: Your email will be automatically registered upon purchase. Simply enter your purchase email and password, then click Log In.
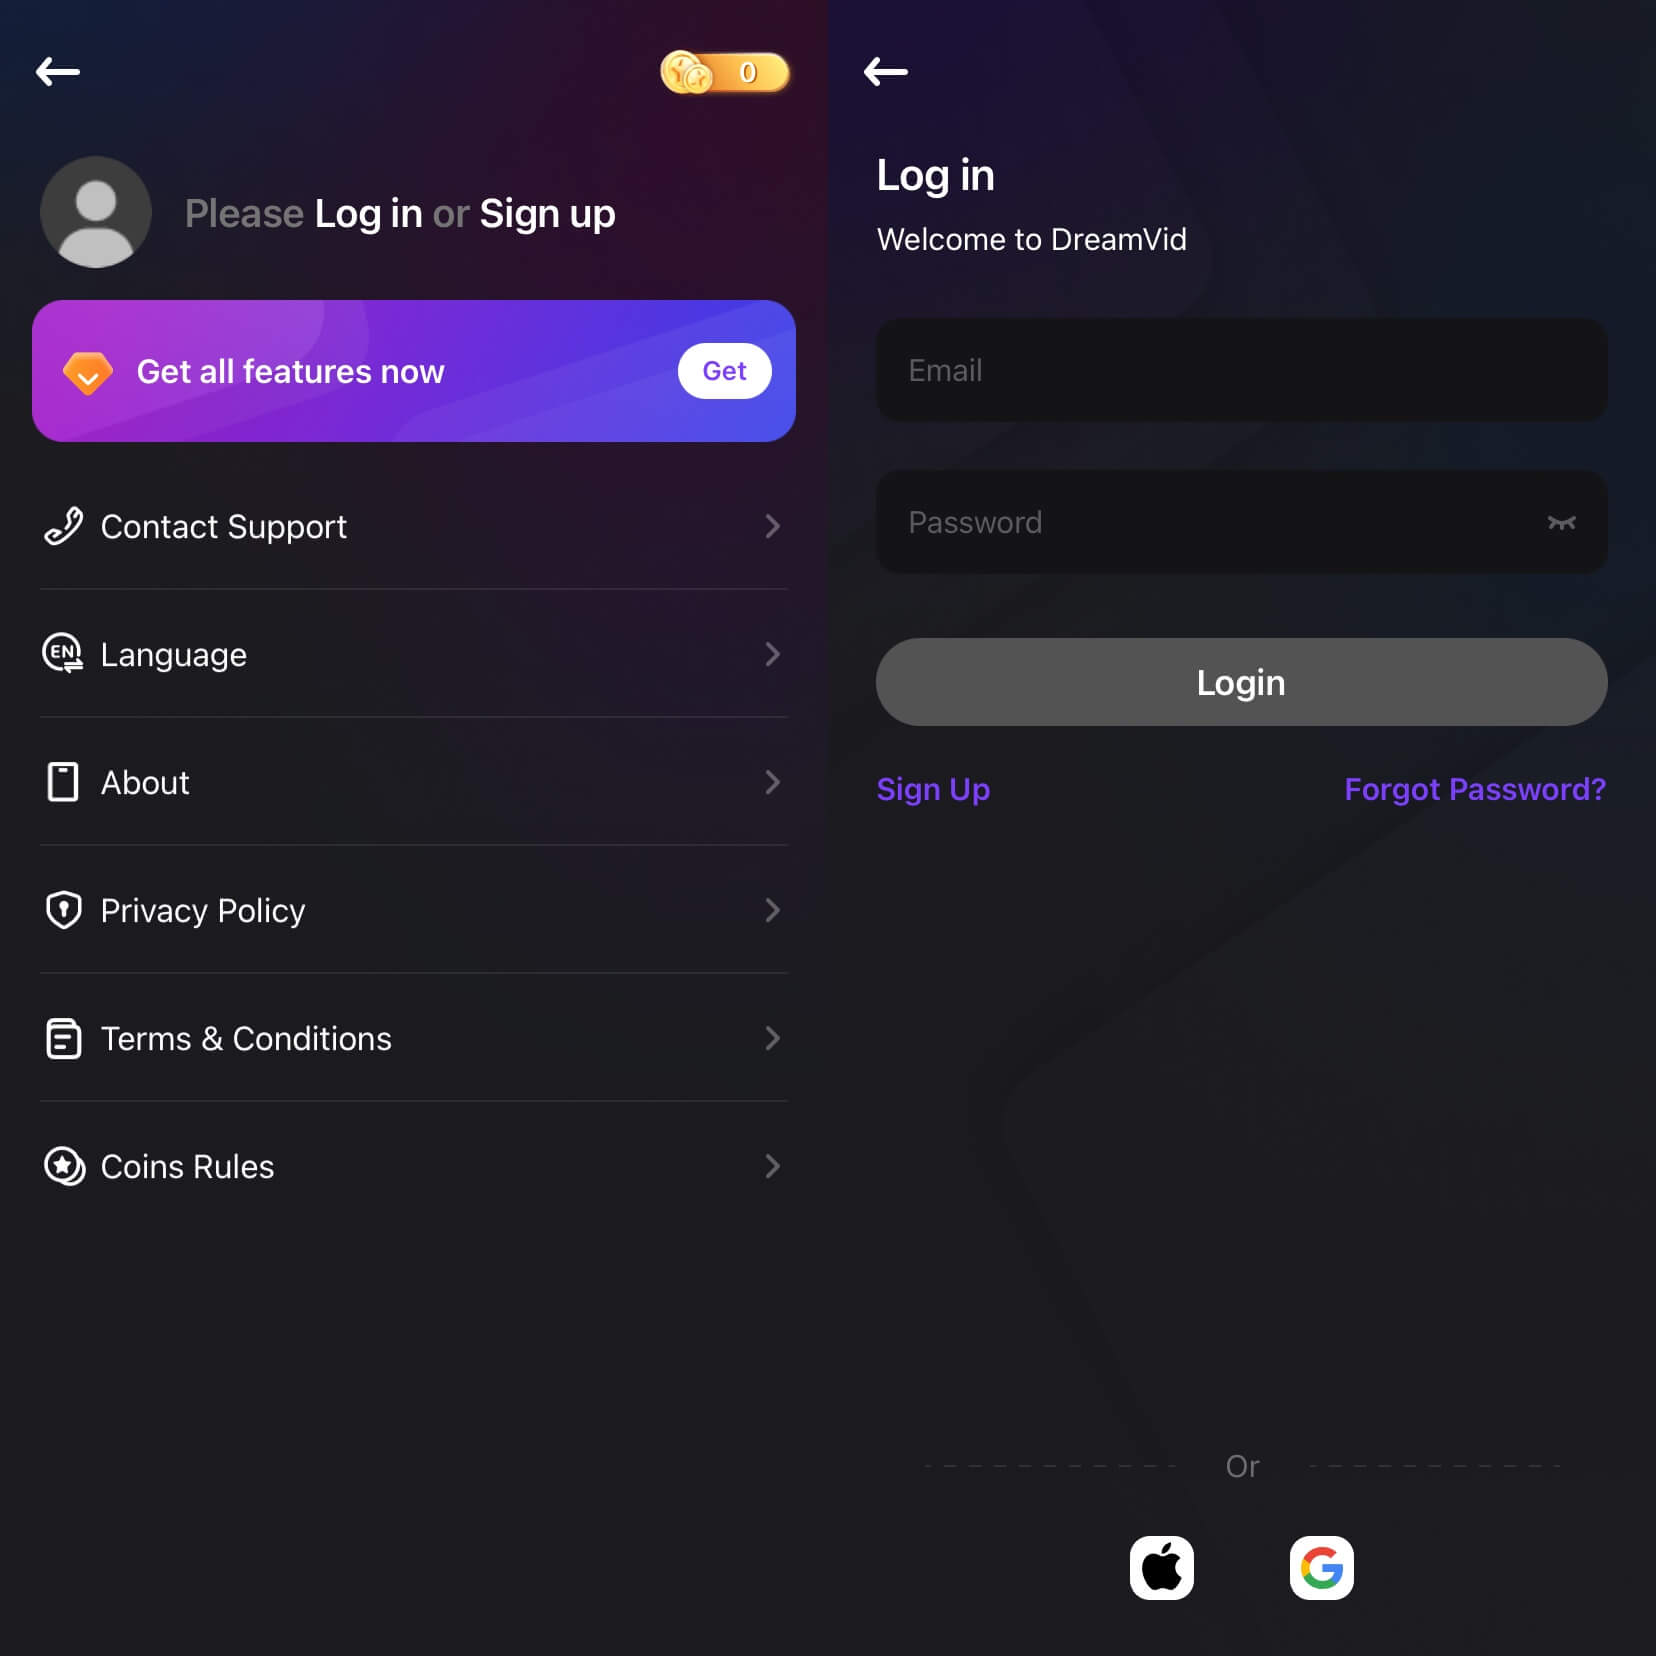
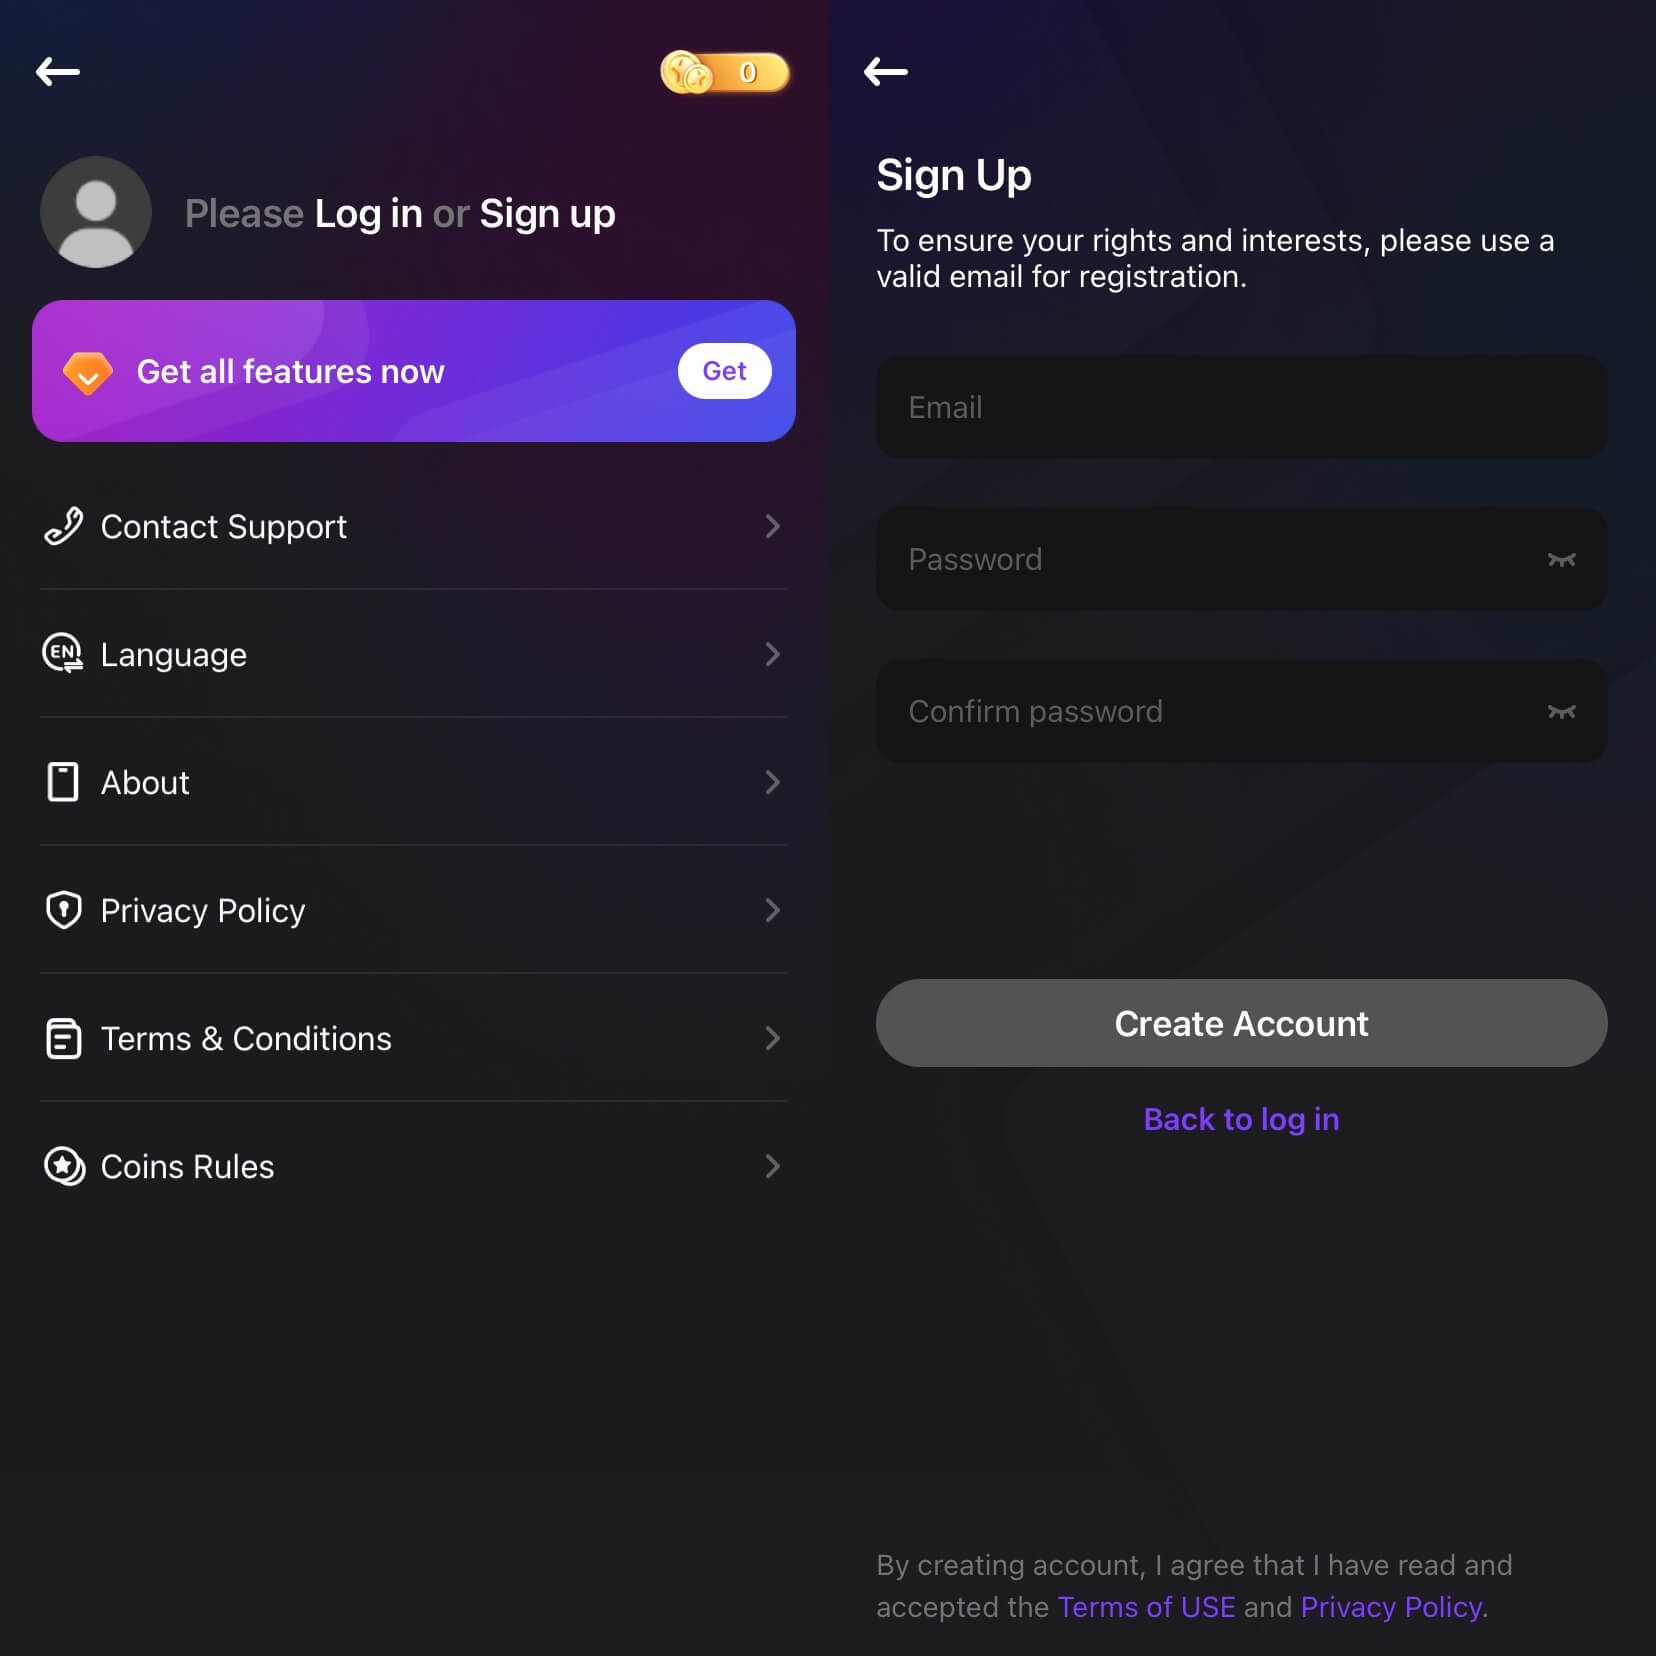
Scenario 2: If you haven't registered yet and need to subscribe to a plan: Tap the Profile icon in the top-right corner of the app homepage, select Sign Up, enter your email and password, and then complete your purchase.
Step 3: Review Account Details
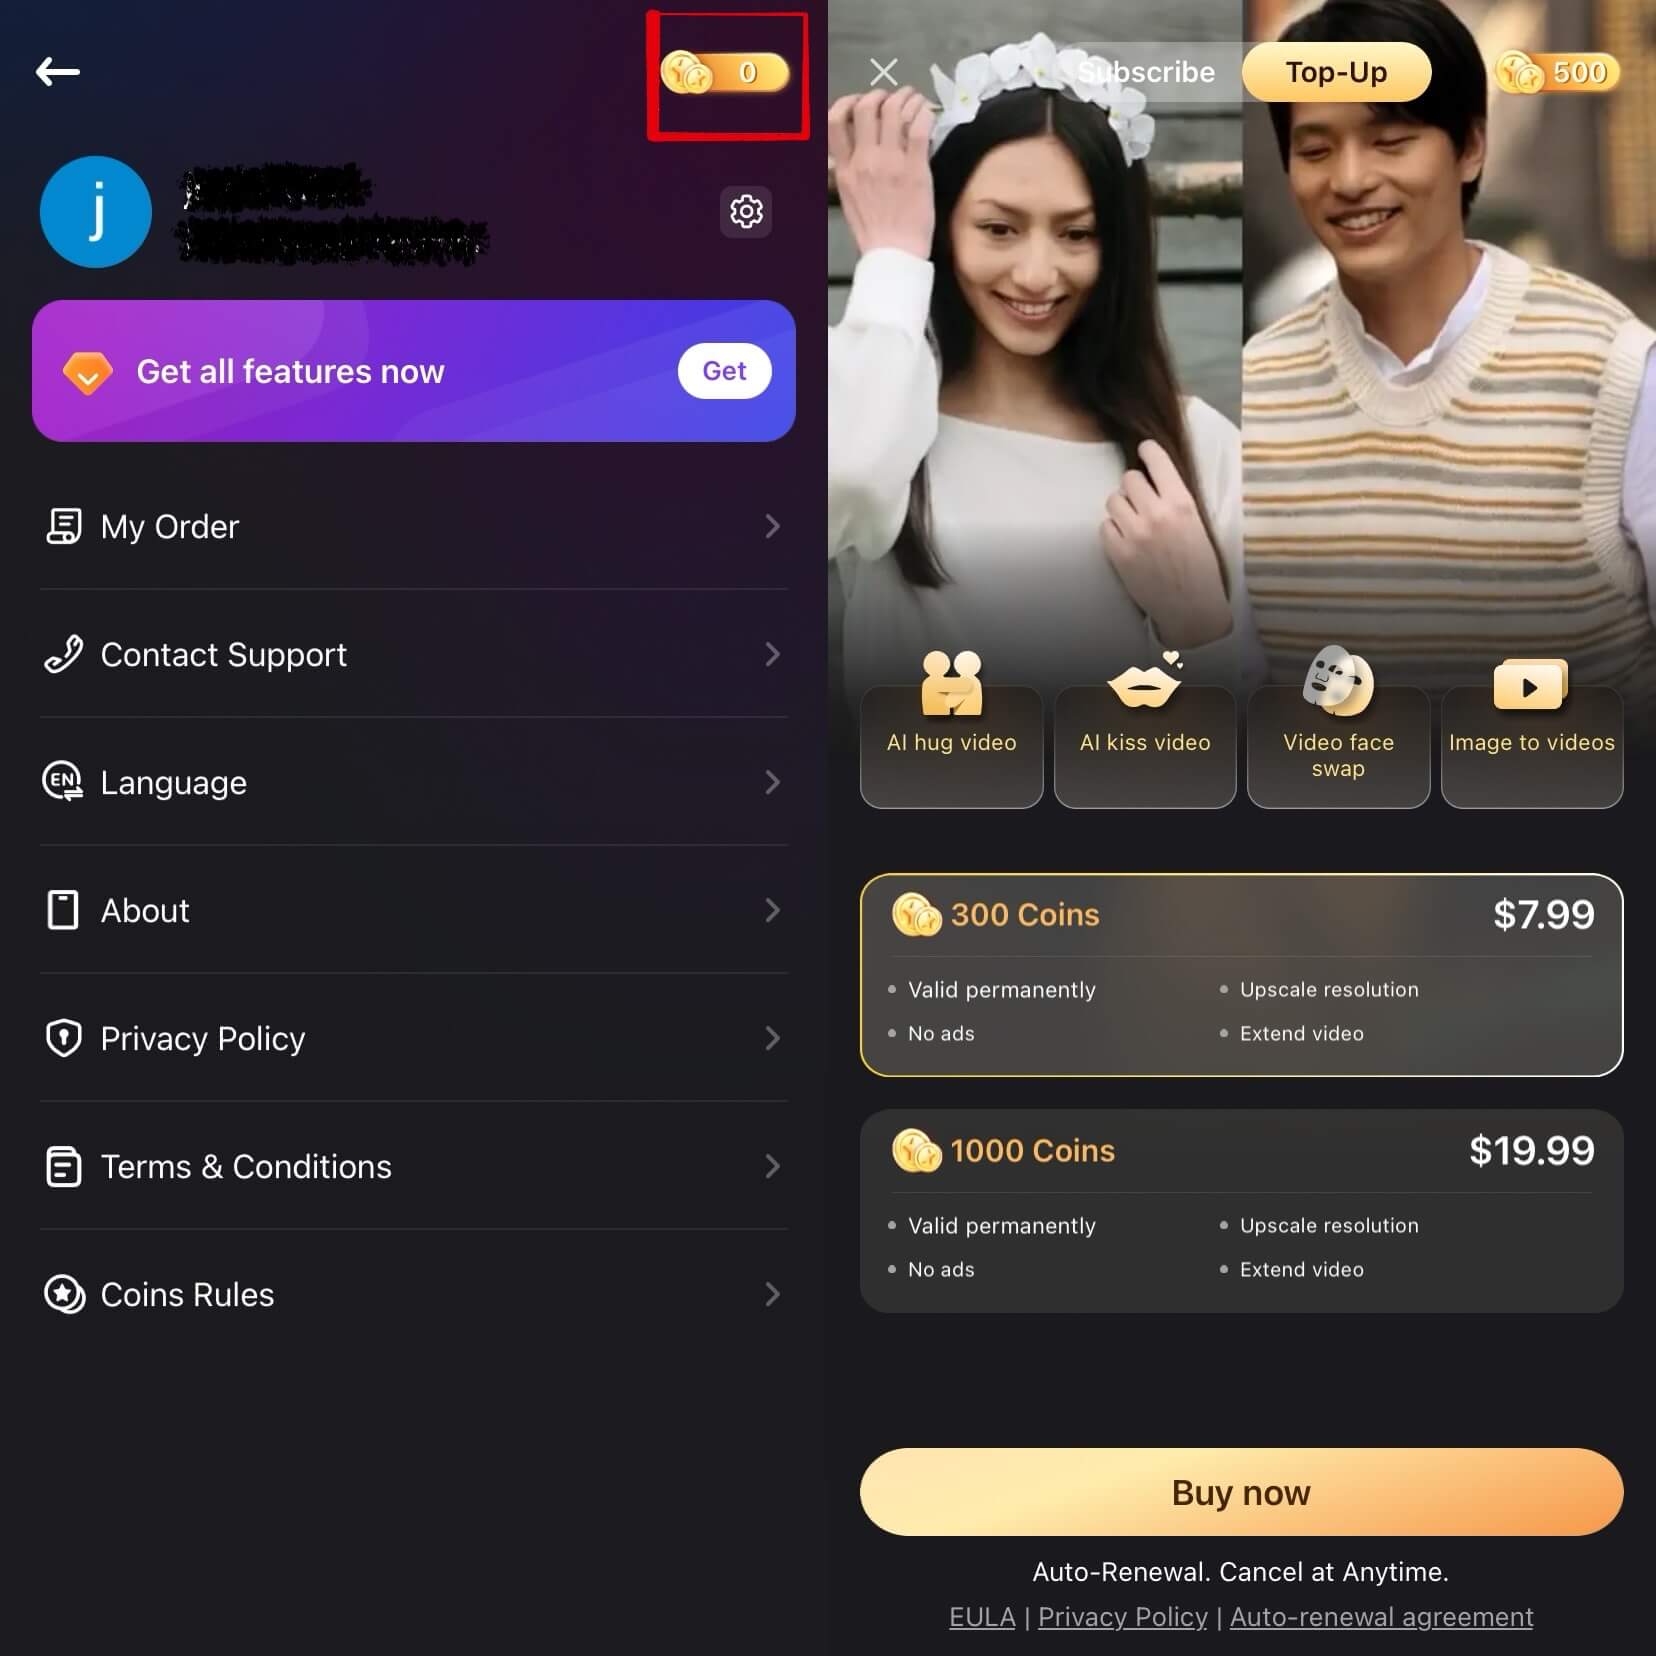
Once logged into your iMyFone account, you can view your coin balance, benefit status, and more. Click the Coins icon to manage your coins.
Part 2: AI Image to Video
You can upload any image, including old photos, and use templates or prompts to transform them into videos with DreamVid image to video AI.
Step 1: Go to Image to Video and Upload Your Photos
On the DreamVid homepage, scroll down to locate the Image to Video options and click on it.
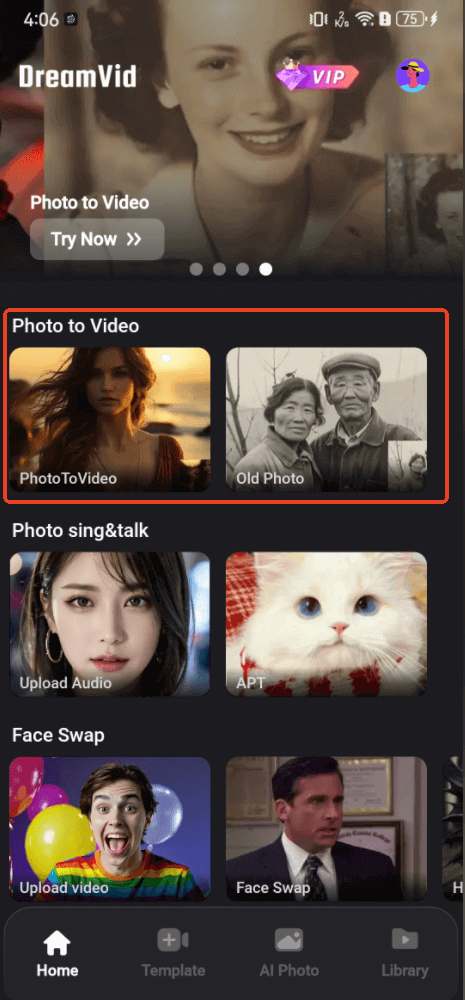
Once this feature is enabled, click the + button in the center to upload images.
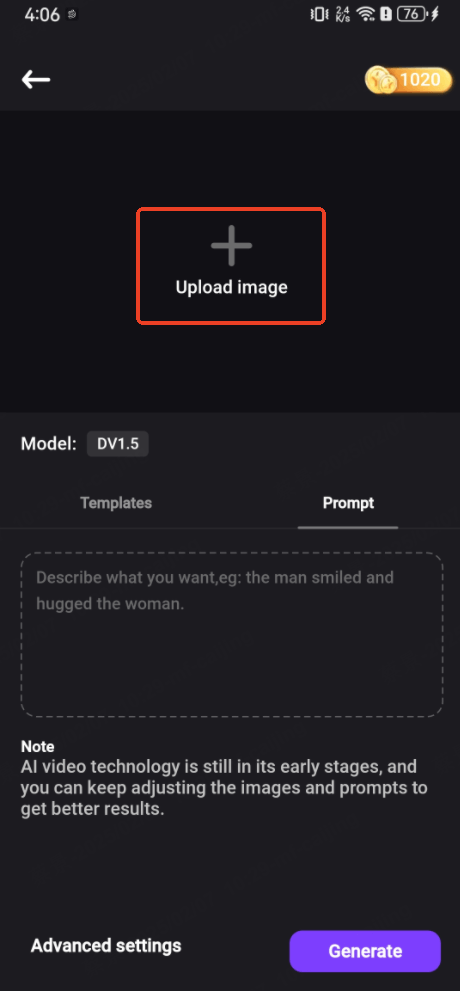
Step 2: Choose a Template or Enter a Prompt
Select a template or describe the content you want to turn into a video, then click Generate.
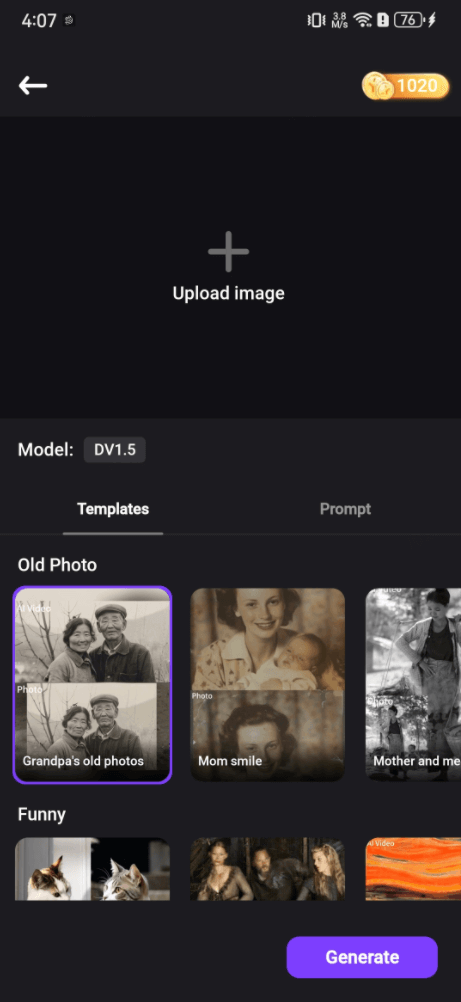
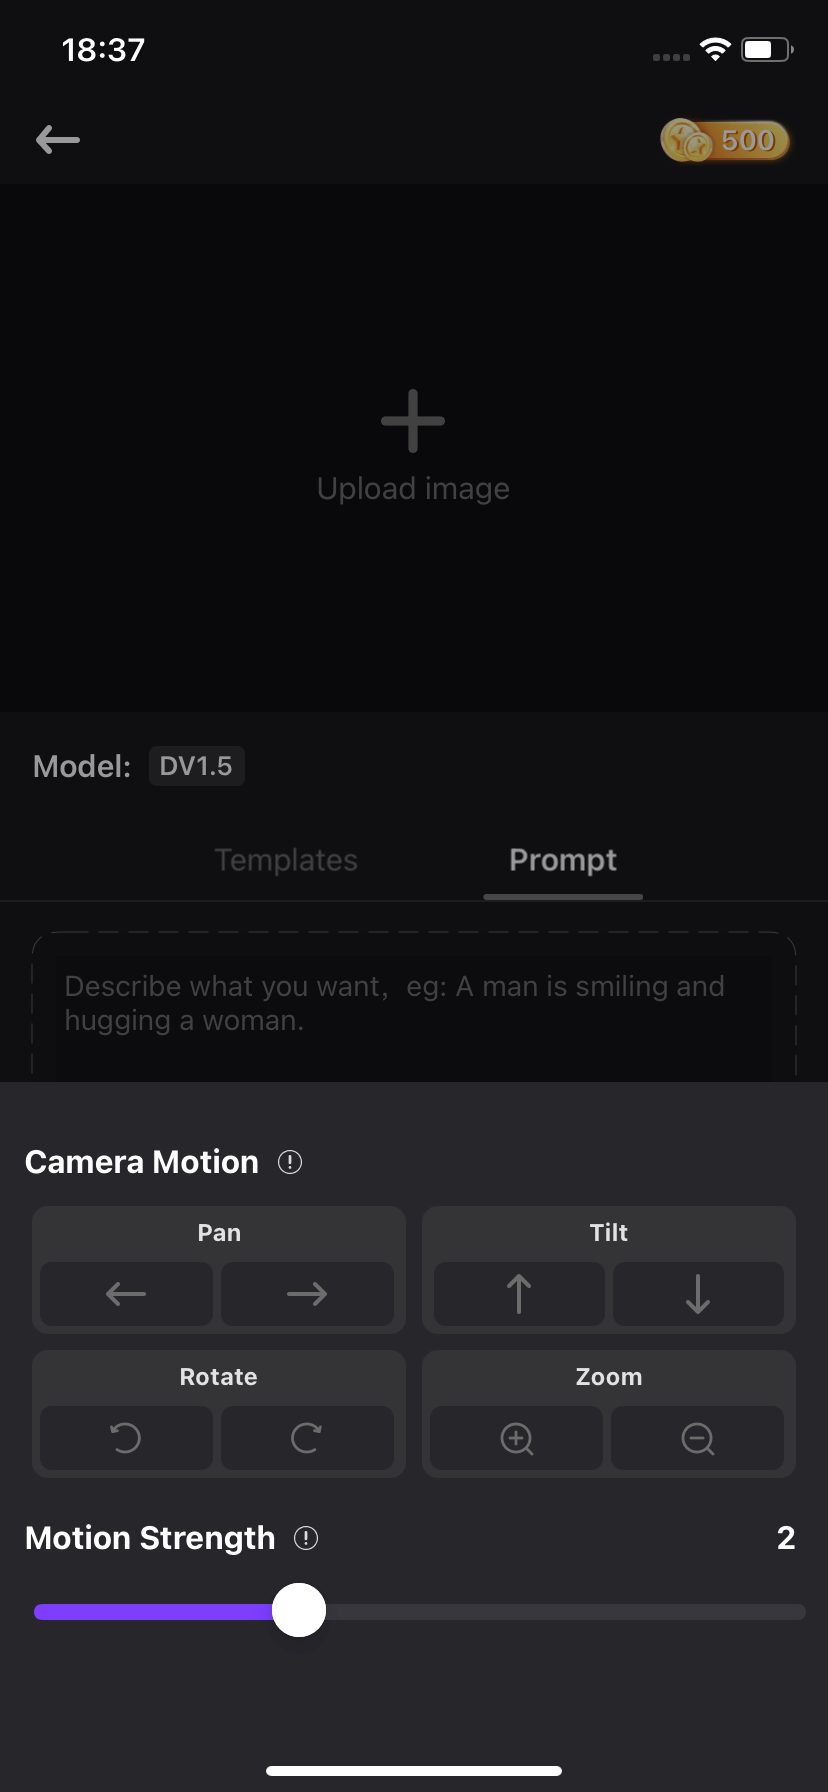
Step 3: Adjust Advanced Video Settings
For more control, you can also click Advanced Settings to adjust the camera movement, motion intensity, and other options to enhance the video's realism.
Step 4: Save Your Video
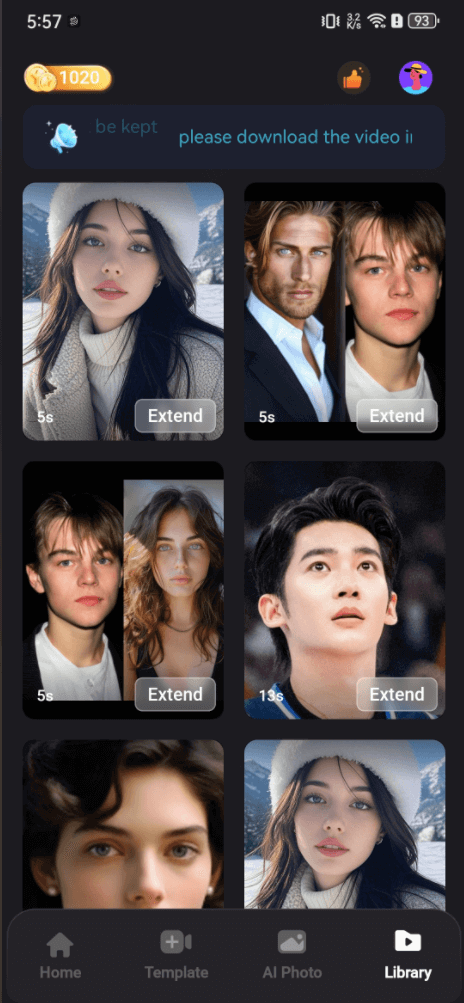
DreamVid will automatically save the generated video to your Library, where you can monitor its progress.
Once the image-to-video conversion is finished, you can download the video as an .mp4 or .gif file to your phone. Feel free to share, edit, or extend it as needed.
Part 3: AI-Powered Hugging, Kissing, and Fighting Videos
Simply upload photos of two characters, and DreamVid will generate AI hugging, kissing, and fighting videos.
Step 1: Select AI Video Type and Scene
Visit the DreamVid homepage, click on AI Video and choose a scene type: hugging, kissing, or fighting.
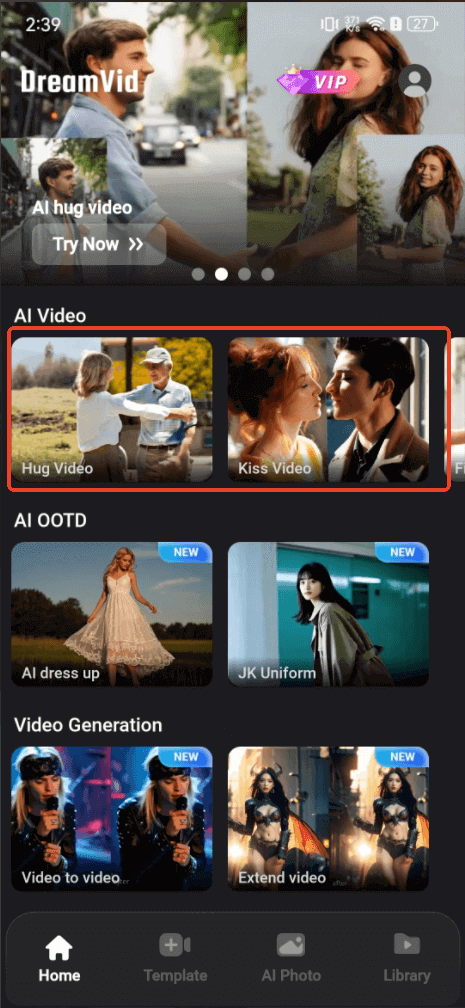
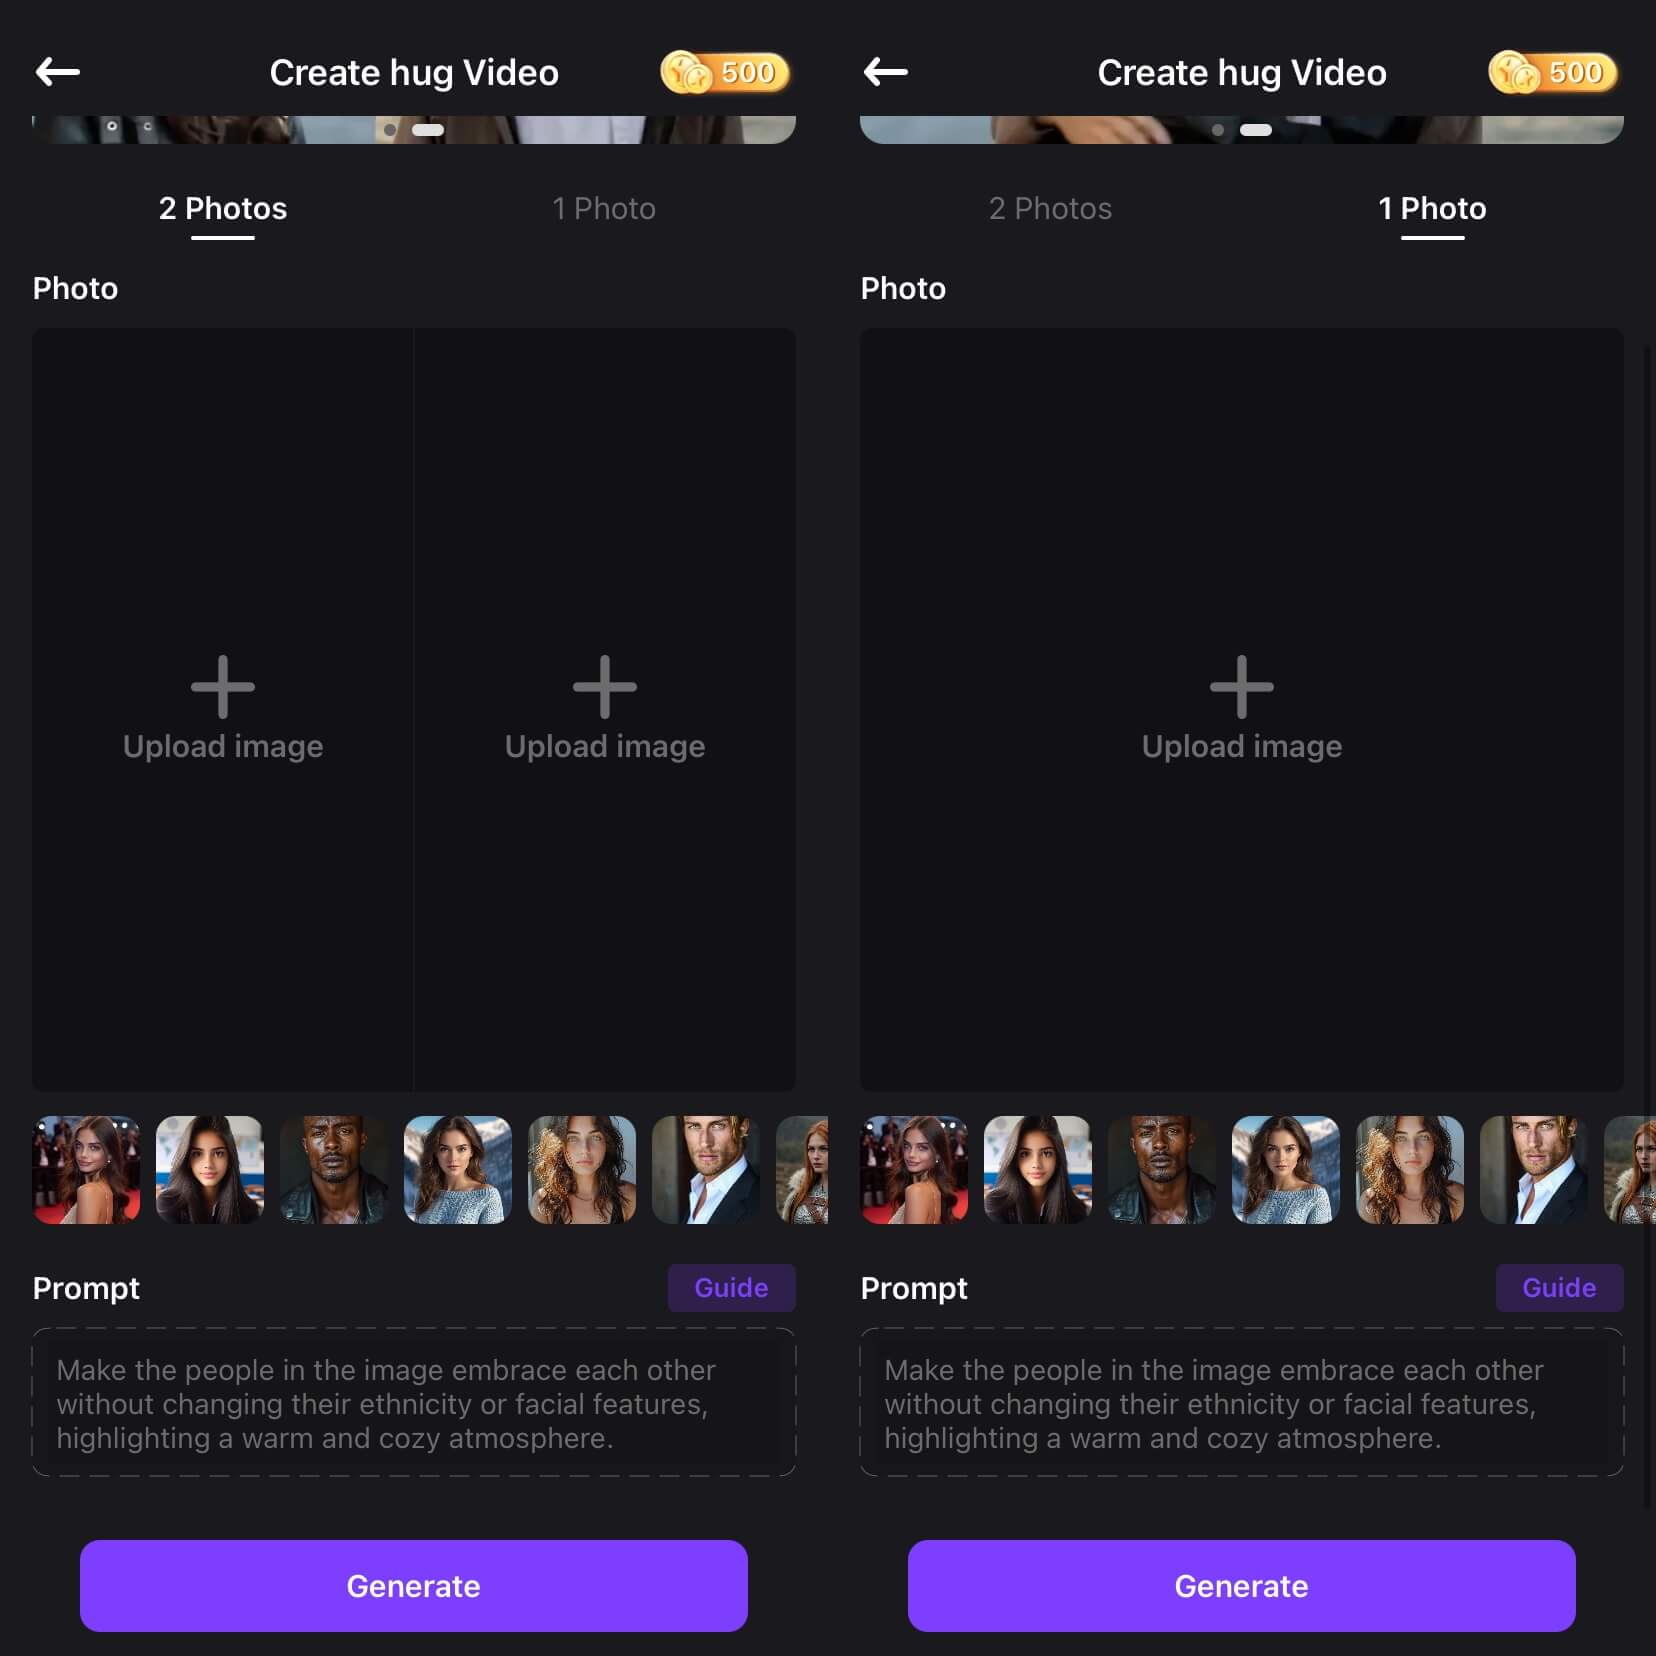
Step 2: Upload Photos
Upload one or two photos of individuals. You can either use the default prompts or create your own for a personalized video. Then, click Generate to proceed.
- The AI Kissing feature provides two models: DV 1.5 for standard kisses and DV 2.0 for French kisses.
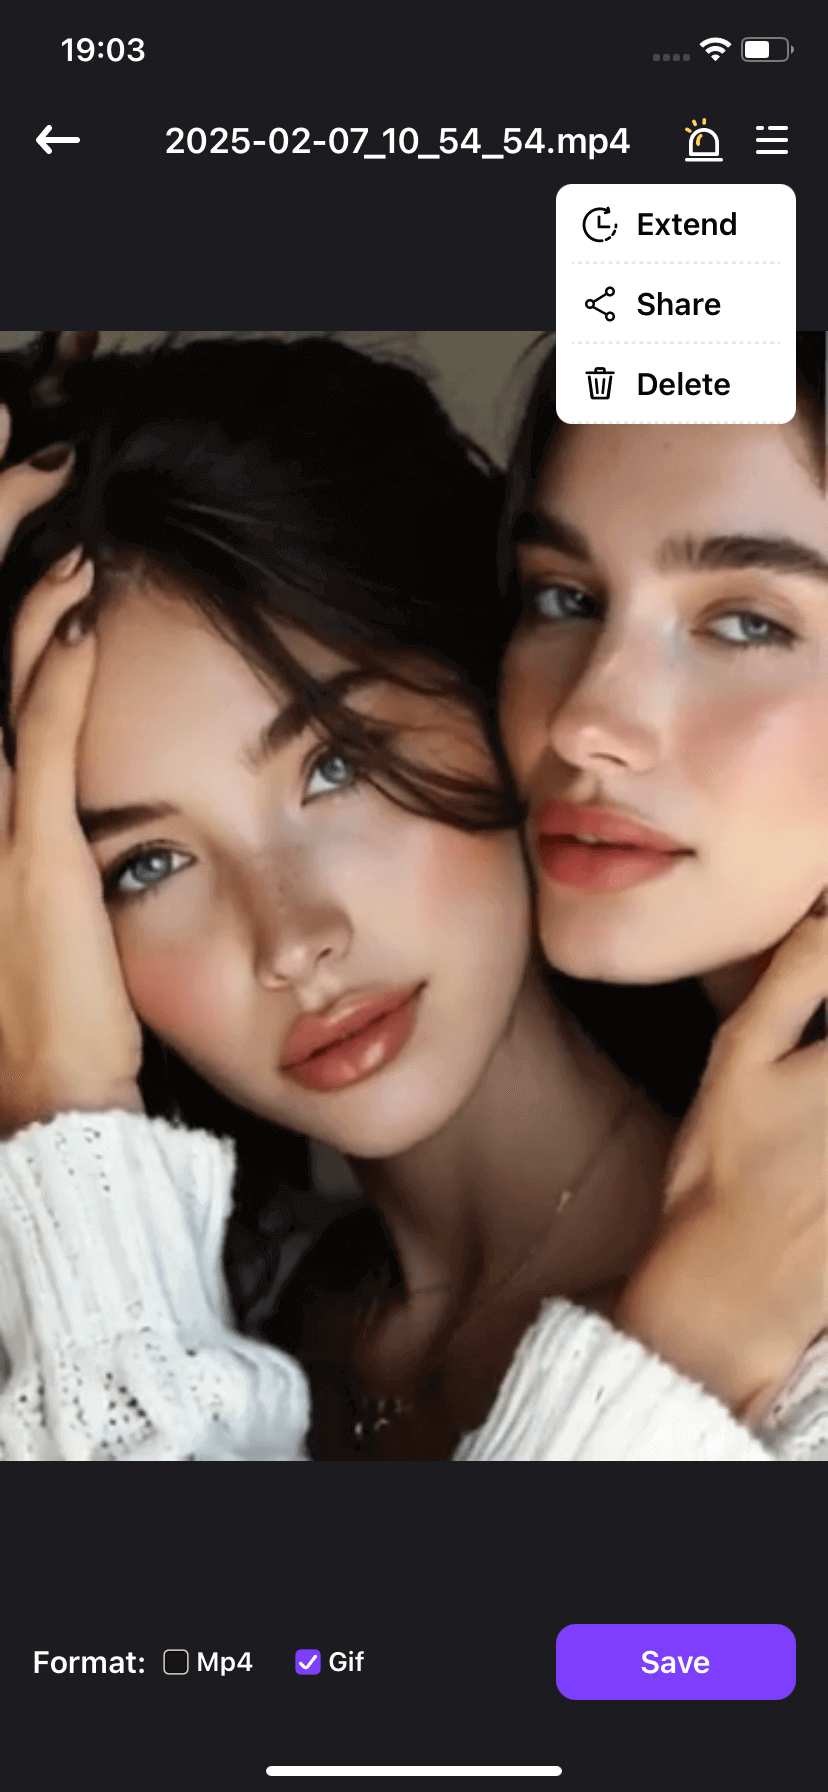
Step 3: AI Video Creation
Your video will be saved to your library once it's generated. You can enhance, extend, download, or share it with friends.
Part 4: AI Virtual Try-On
You can upload a picture, select your favorite style, and let the AI swap the outfit in the image, so you can virtually try on different looks.
Step 1: Select AI Virtual Try-On and OOTD
On the DreamVid homepage, go to the AI Virtual Try-On feature. Click Upload Image and select your preferred OOTD.
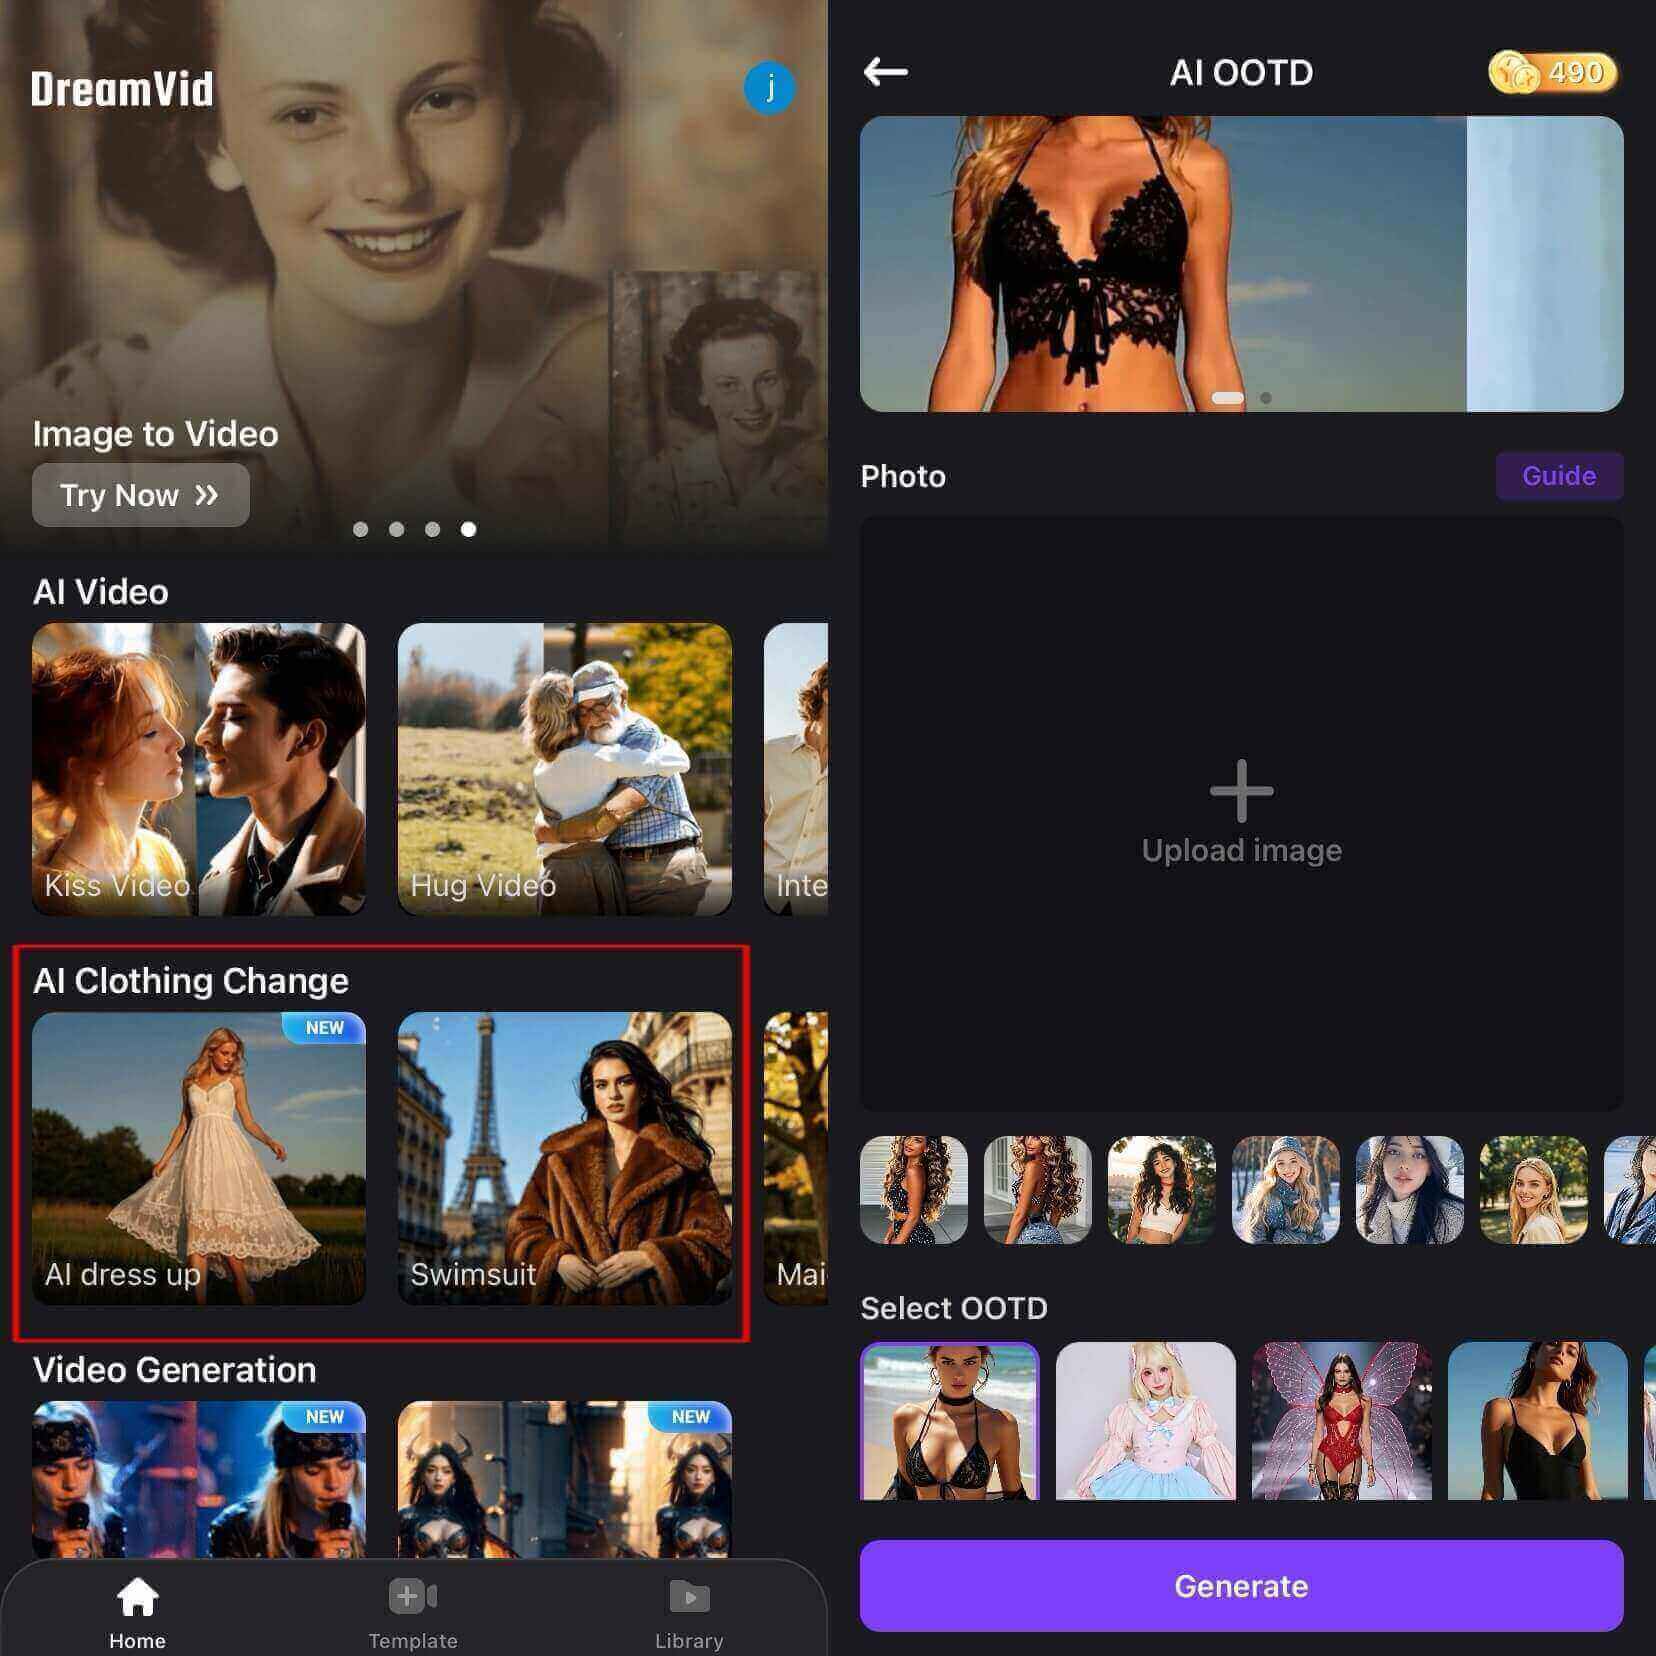
Step 2: Generate Your AI Outfit Video
Click on the Generate button and wait for the DreamVid AI outfit generator to create your virtual outfit video. Once ready, you can download or share it.
Part 5: AI Face Swap
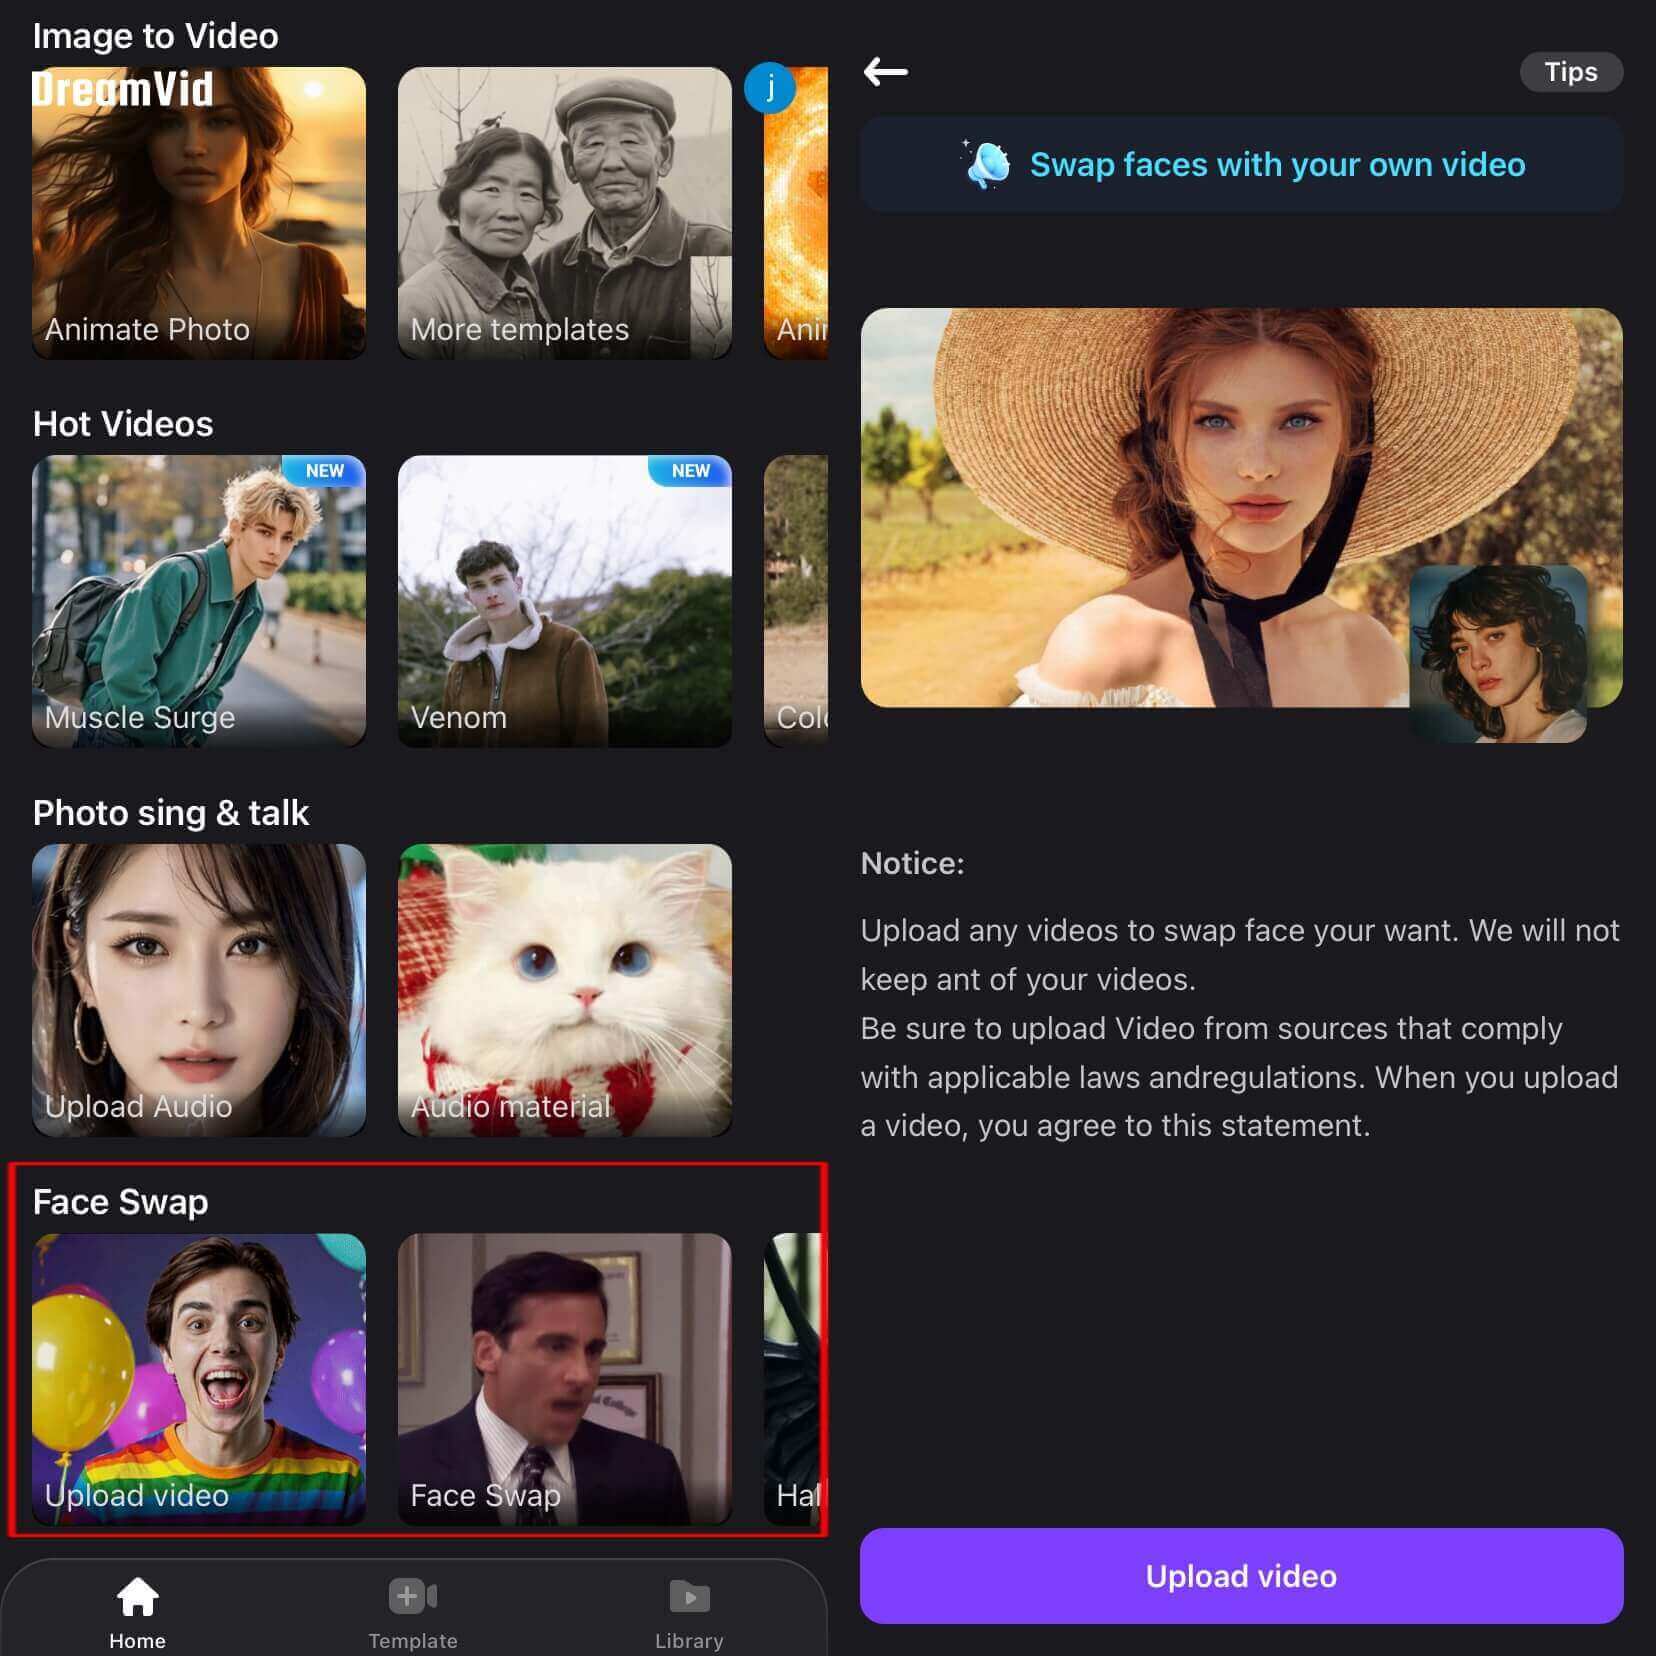
Upload a video and an image, and allow AI to swap faces in the video with anyone you choose, making face swapping with AI effortless.
Step 1: Upload a Video
Go to the Face Swap option on the DreamVid homepage, click Upload Video and wait for the processing to complete.
Step 2: Upload the Photo of the Face You Want to Replace
For the best face swap results, make sure the uploaded photo clearly shows their face. After that, click Generate.
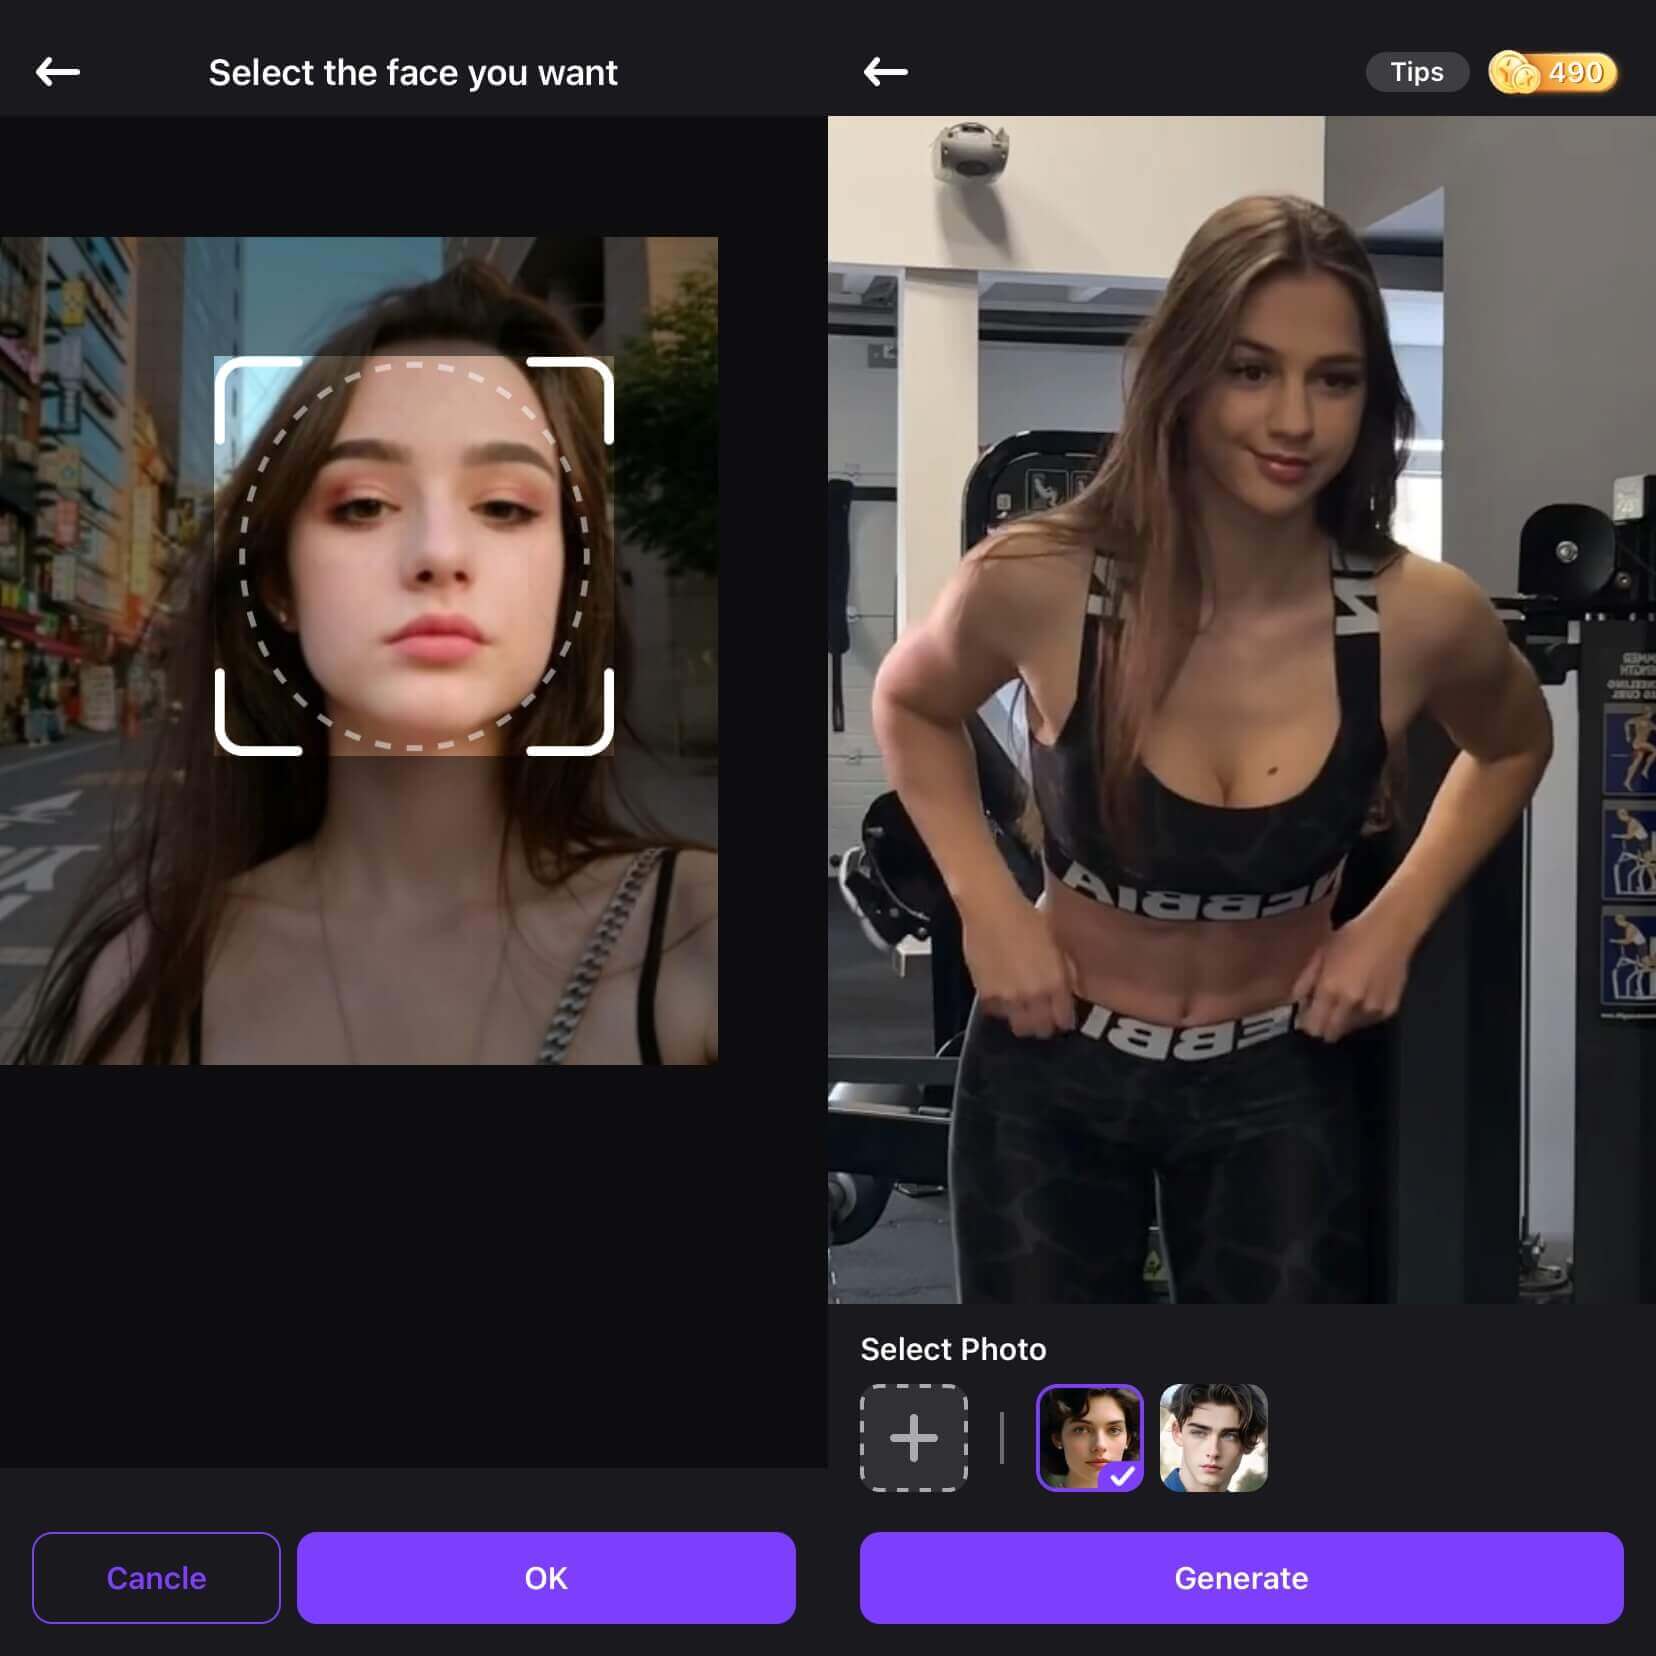
Step 3: AI Face Swap Video Creation
Once the face swap is complete, go to your video library to extend its duration, share, or download it.
Part 6: AI Singing/Talking Photos
Want to bring your photos to life with singing or talking? No problem! Simply upload your photos and audio files to DreamVid, and let AI lip-syncing turn them into animated videos.
Step 1: Upload Photos and Audio Files
Go to the app's homepage and select the Singing & Talking Photo feature. Then, click Upload Image to add photod and audio files. You can record new audio, extract sound from an MP4 file, or use an existing audio file.
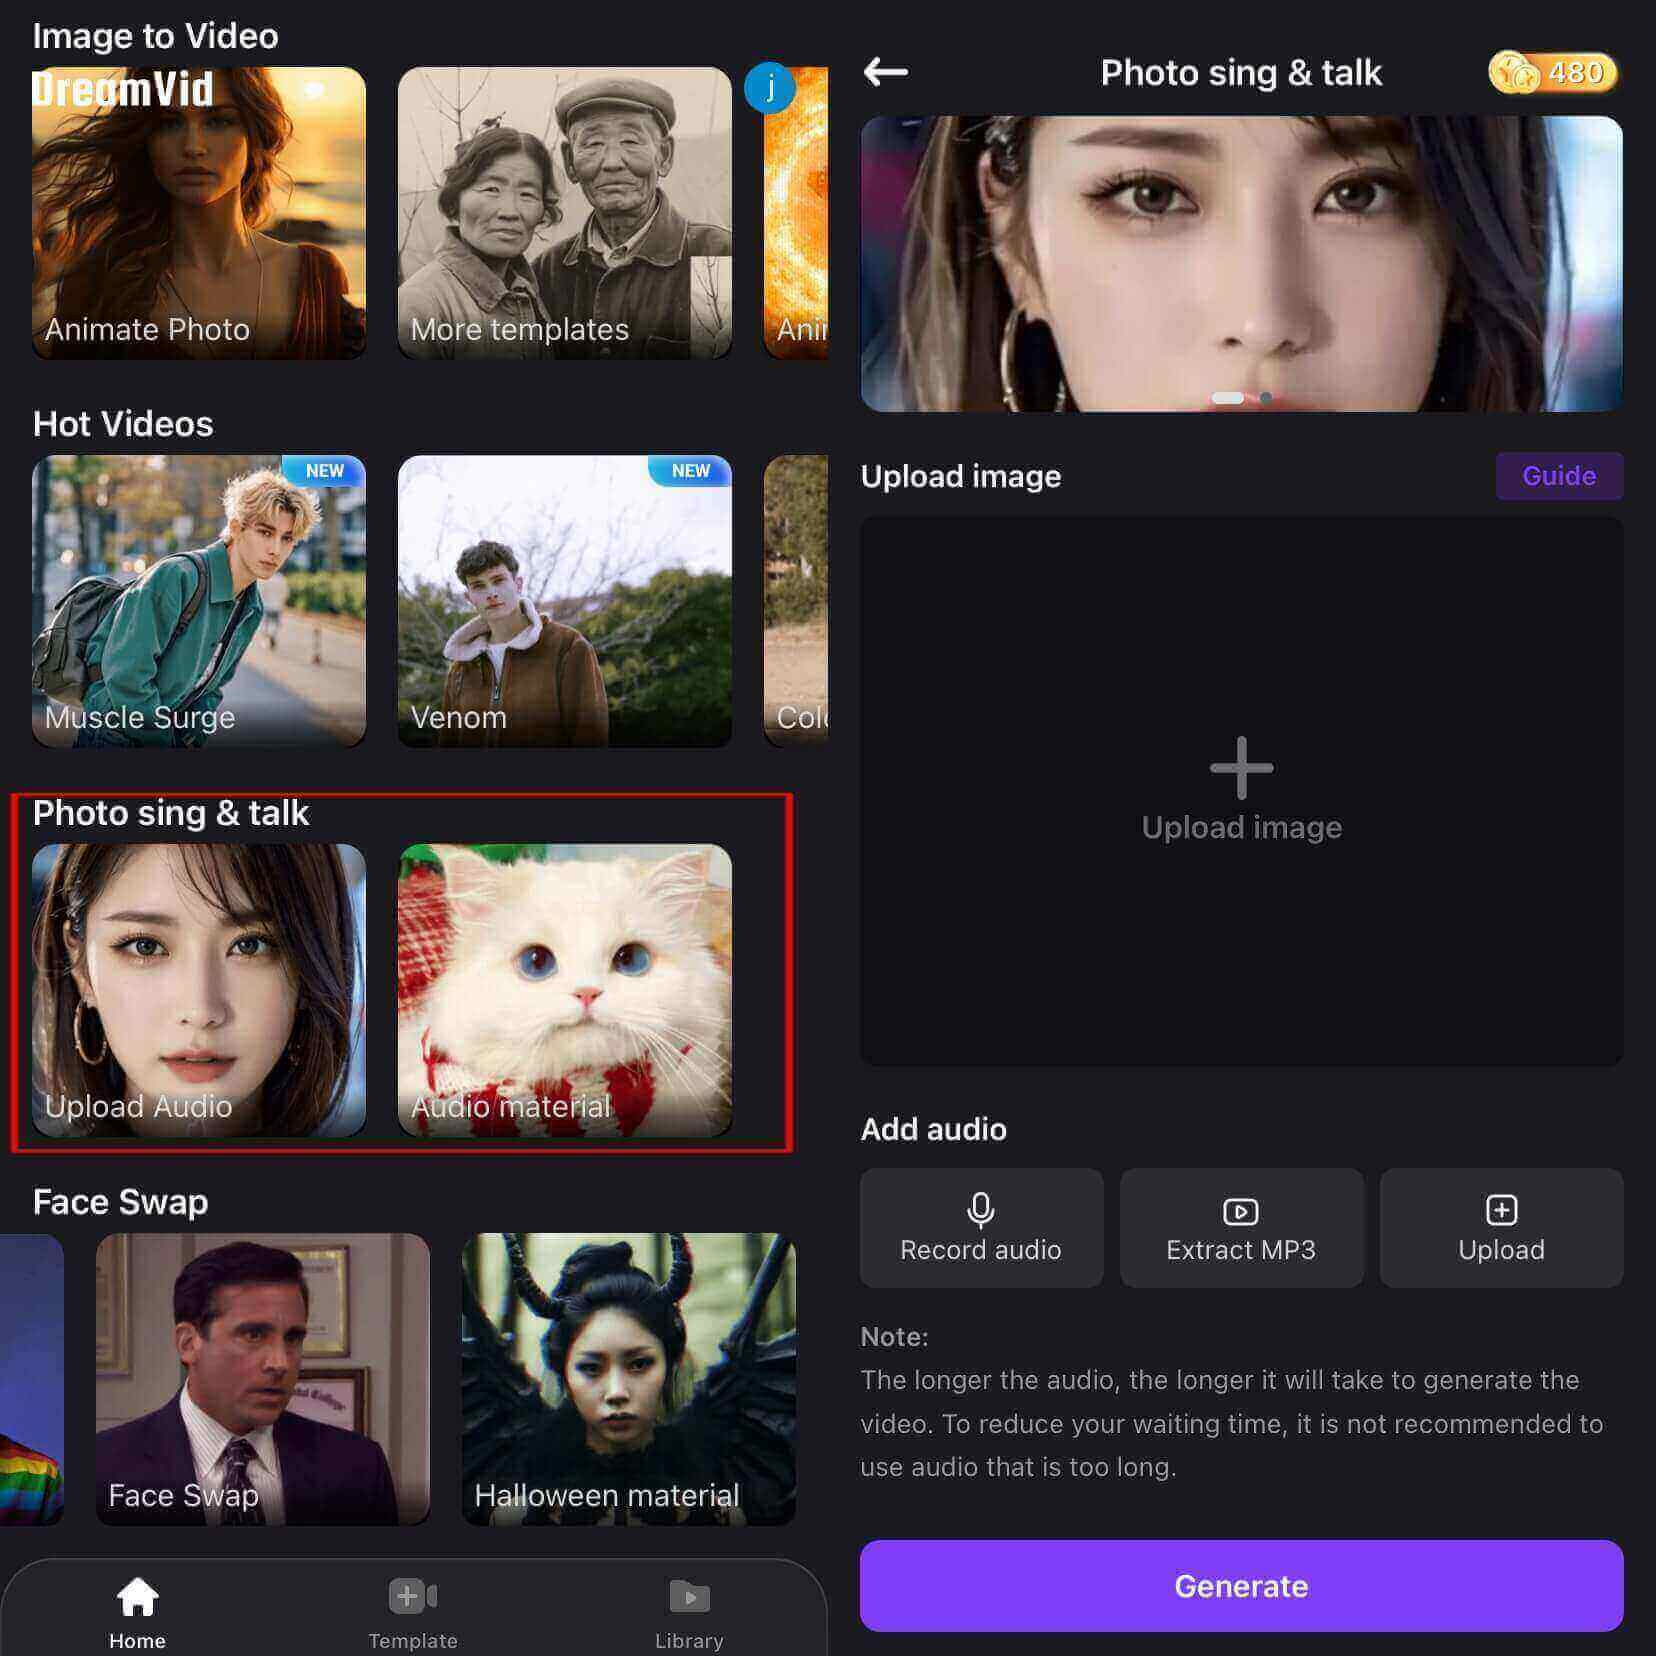
The Singing & Talking Photo section also provides pre-recorded audio clips, letting you choose your favorite and pair them with your photos.

Step 2: Generate Your Video
Click the Generate button. The processing time depends on the size and duration of the audio file. You can track the progress in the video Library. Once the video is ready, you can download, extend, or share it easily.


